快速开始

最快只需 5 分钟,即可构建第一个对话式智能体。

本指南将介绍如何创建首个对话式智能体。这将为构建适合业务场景的对话工作流打下基础。

使用 ElevenLabs agents skill,通过 AI 编程助手构建和管理语音智能体:

npx skills add elevenlabs/skills --skill agents

你还可以将托管 MCP 服务器连接到 Claude 或其他 MCP 客户端,通过自然语言创建和管理智能体。

开始使用

可通过 ElevenAgents 控制台、ElevenLabs API、Agents CLI或托管 MCP 服务器管理 ElevenLabs Agents。
ElevenLabs Agents

本页右下角的助手是一个 ElevenLabs 智能体示例,可回答有关 ElevenLabs 的问题、导航页面并带你前往外部资源。

创建首个智能体

本快速入门指南将通过 API 或网页控制台创建智能体。接下来,你可以将智能体嵌入网站,或通过 ElevenLabs 控制台进行测试。

本指南将创建一个对话式支持助手,能够回答有关产品、文档或服务的问题。可将该助手嵌入网站或应用,为客户提供实时支持。
ElevenLabs Agents

本页右下角的助手可回答有关 ElevenLabs 的问题、导航页面并带你前往外部资源。
1

登录 ElevenLabs

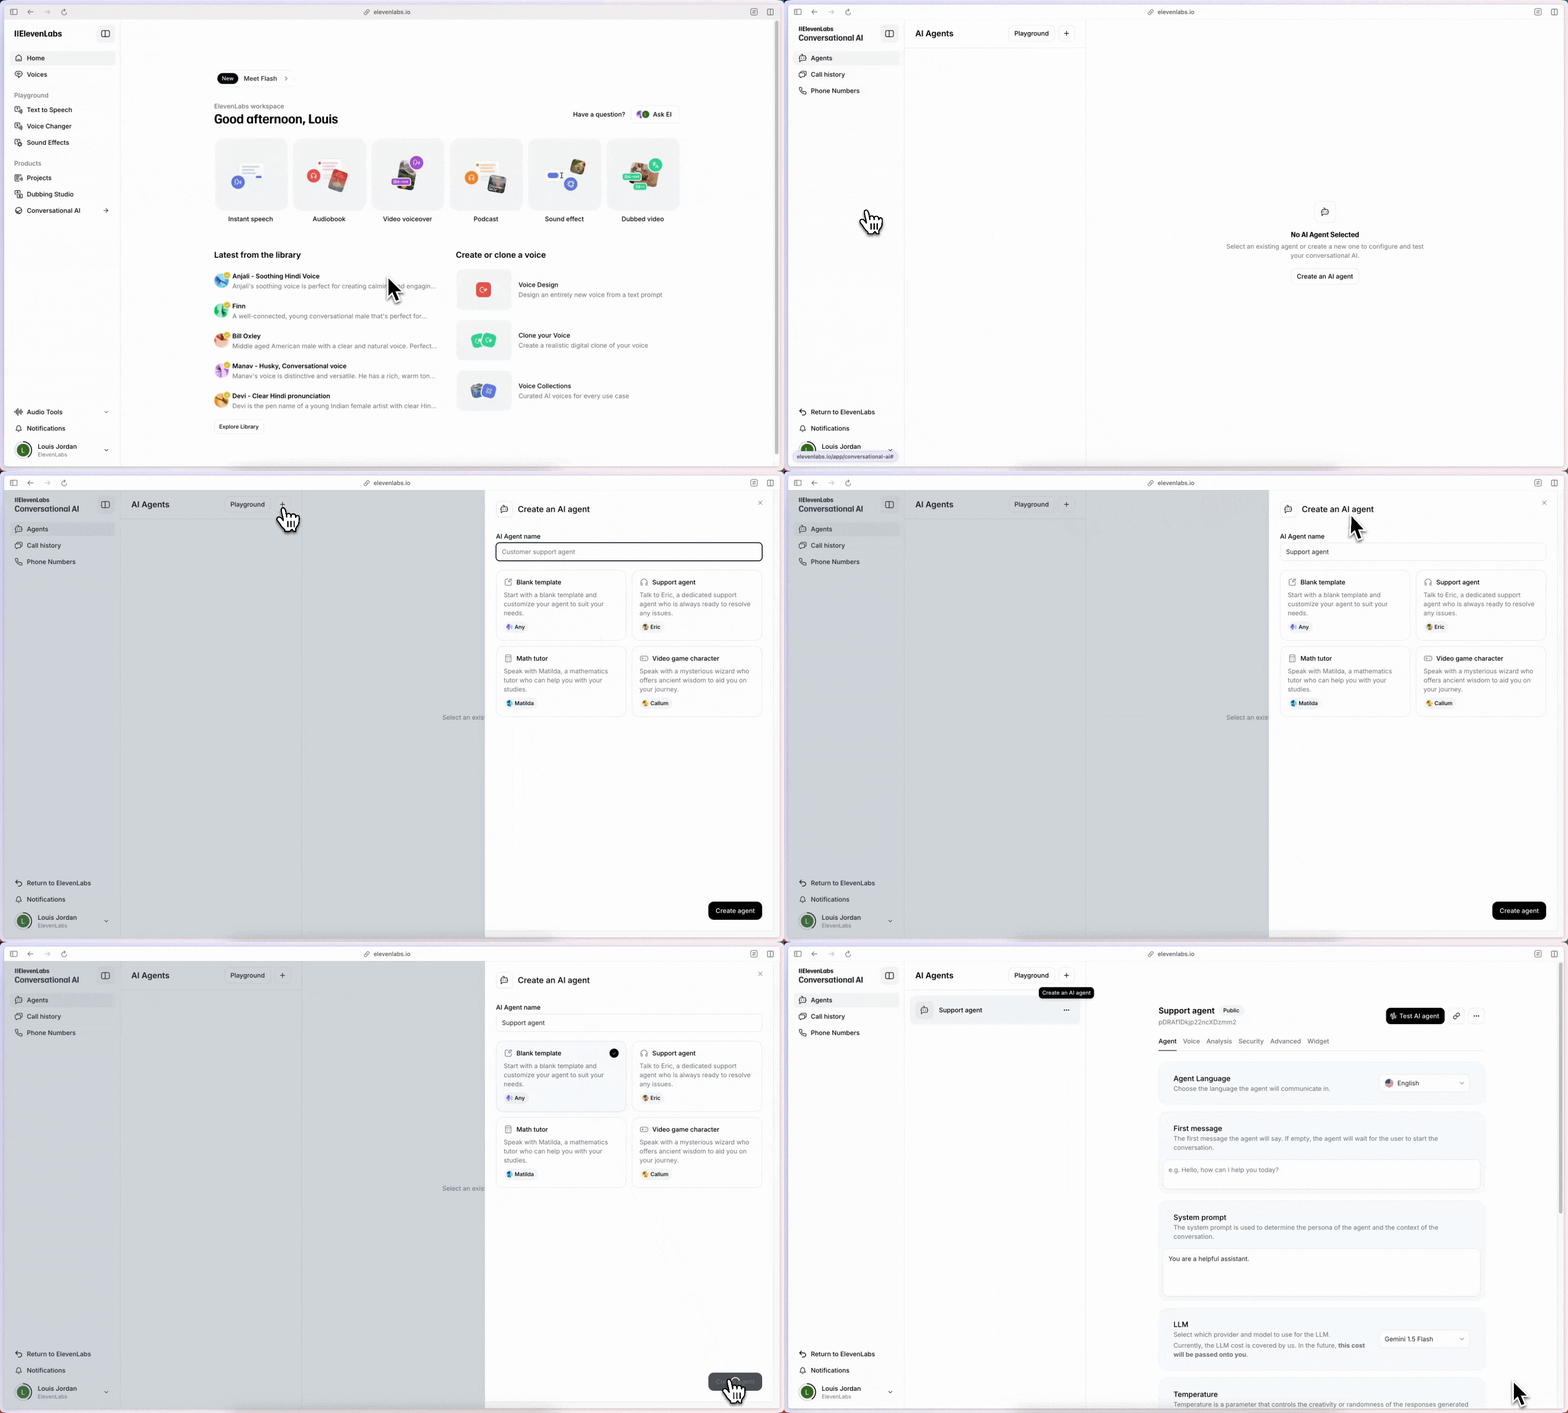
前往 elevenlabs.io,登录或创建账户。

2

创建新助手

在 ElevenLabs 控制台中,输入名称并选择 Blank template 选项,创建新助手。

控制台

创建新助手
3

配置助手行为

前往 Agent 标签页,配置助手行为。设置以下内容:

1

首条消息

这是用户开始对话时,助手首先会朗读的消息。

首条消息
Hi, this is Alexis from <company name> support. How can I help you today?
2

系统提示词

此提示词用于指导助手的行为、任务和个性。

请根据公司信息自定义以下示例:

系统提示词
You are a friendly and efficient virtual assistant for [Your Company Name]. Your role is to assist customers by answering questions about the company's products, services, and documentation. You should use the provided knowledge base to offer accurate and helpful responses.
Tasks:
- Answer Questions: Provide clear and concise answers based on the available information.
- Clarify Unclear Requests: Politely ask for more details if the customer's question is not clear.
Guidelines:
- Maintain a friendly and professional tone throughout the conversation.
- Be patient and attentive to the customer's needs.
- If unsure about any information, politely ask the customer to repeat or clarify.
- Avoid discussing topics unrelated to the company's products or services.
- Aim to provide concise answers. Limit responses to a couple of sentences and let the user guide you on where to provide more detail.
4

添加知识库

前往 Knowledge Base 部分,为助手提供有关业务的背景信息。

可在此上传相关文档和外部资源链接:

  • 添加文档、常见问题和其他资源,帮助助手回复客户咨询。
  • 保持知识库更新,确保助手提供准确且最新的信息。

接下来为助手配置音色。

1

选择音色

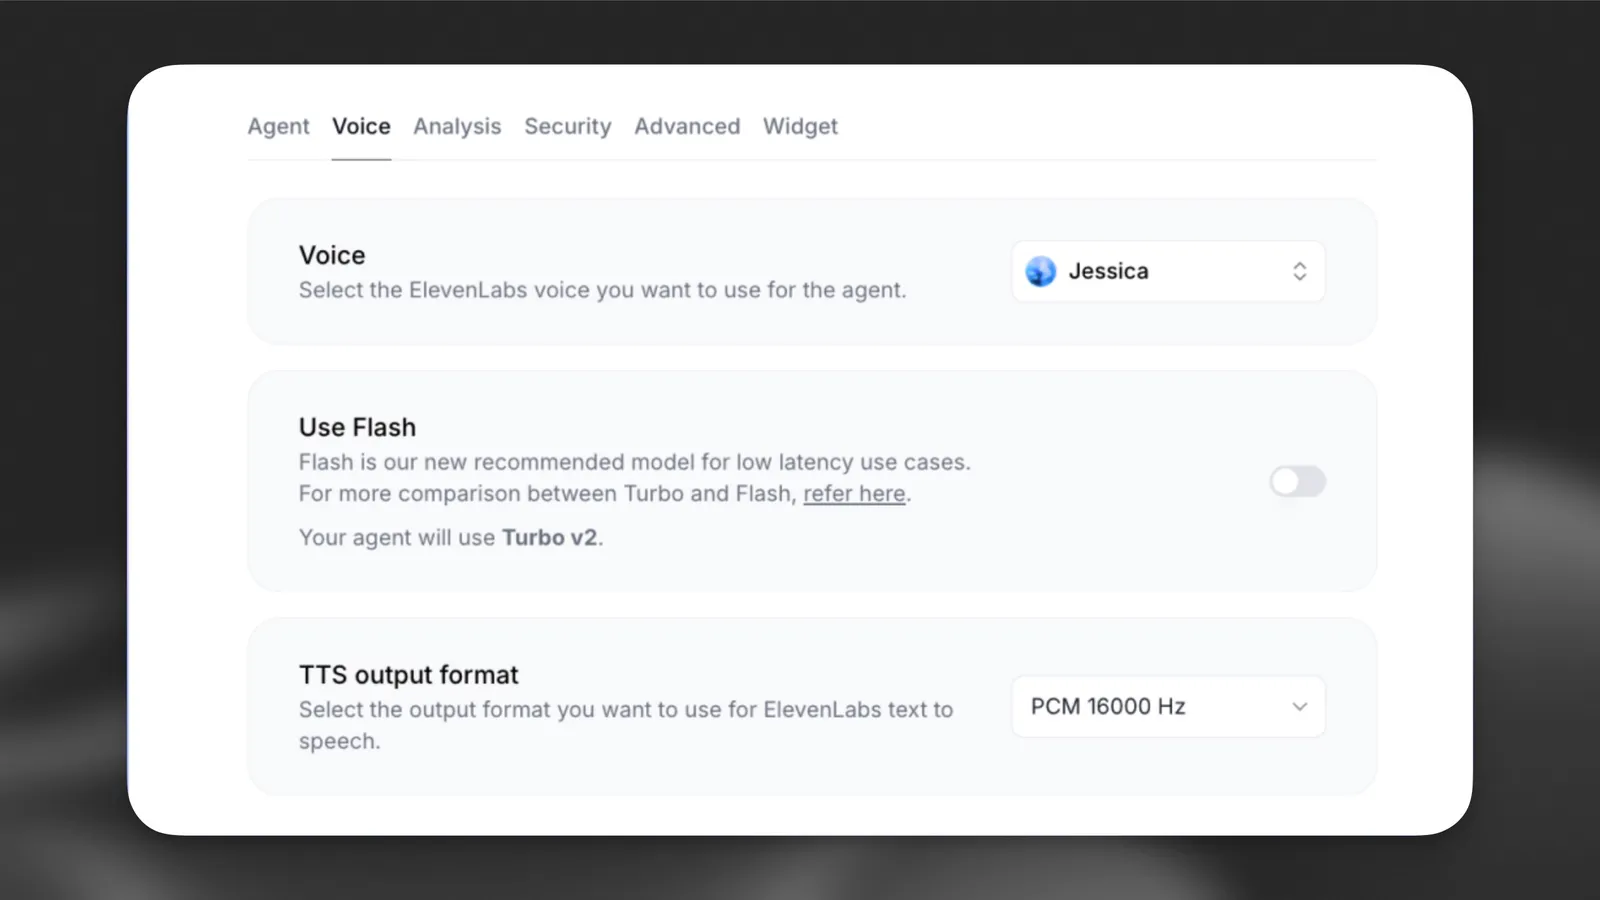
在 Voice 标签页中,从声音库选择最适合助手的音色:

音色设置

使用更高质量的音色、模型和 LLM 可能会延长响应时间。请根据助手的预期使用场景,平衡质量与延迟,以获得最佳客户体验。
2

测试助手

点击 Test AI agent 按钮,开始与助手对话。

配置评估标准和数据收集,以分析对话并提升助手表现。

1

配置评估标准

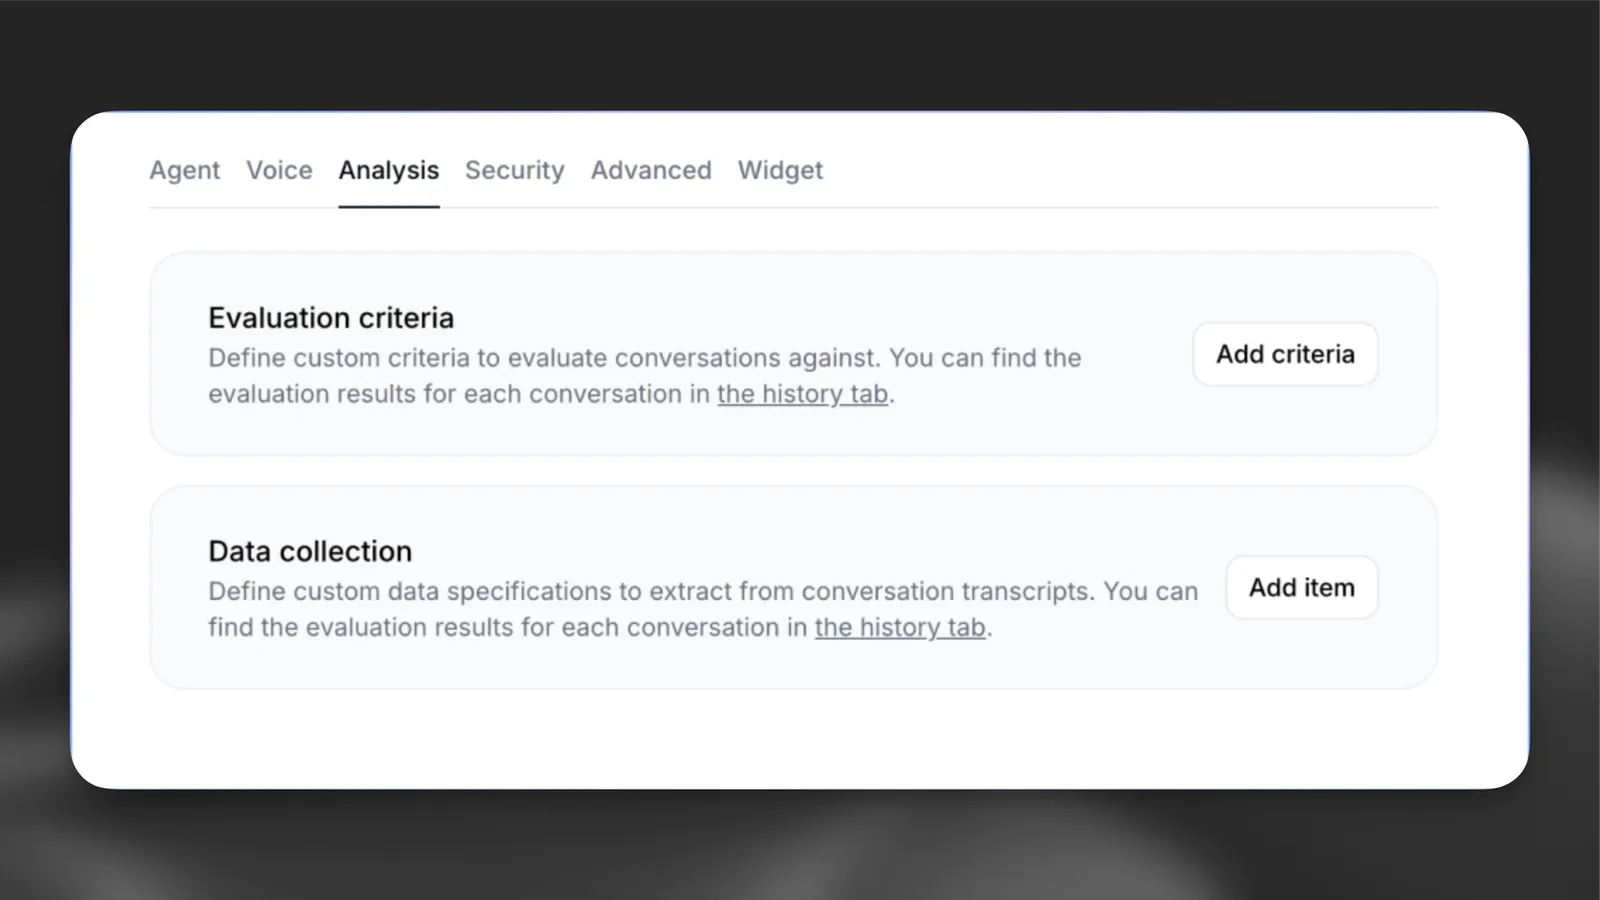
在助手设置中前往 Analysis 标签页,定义用于评估对话的自定义标准。
分析设置

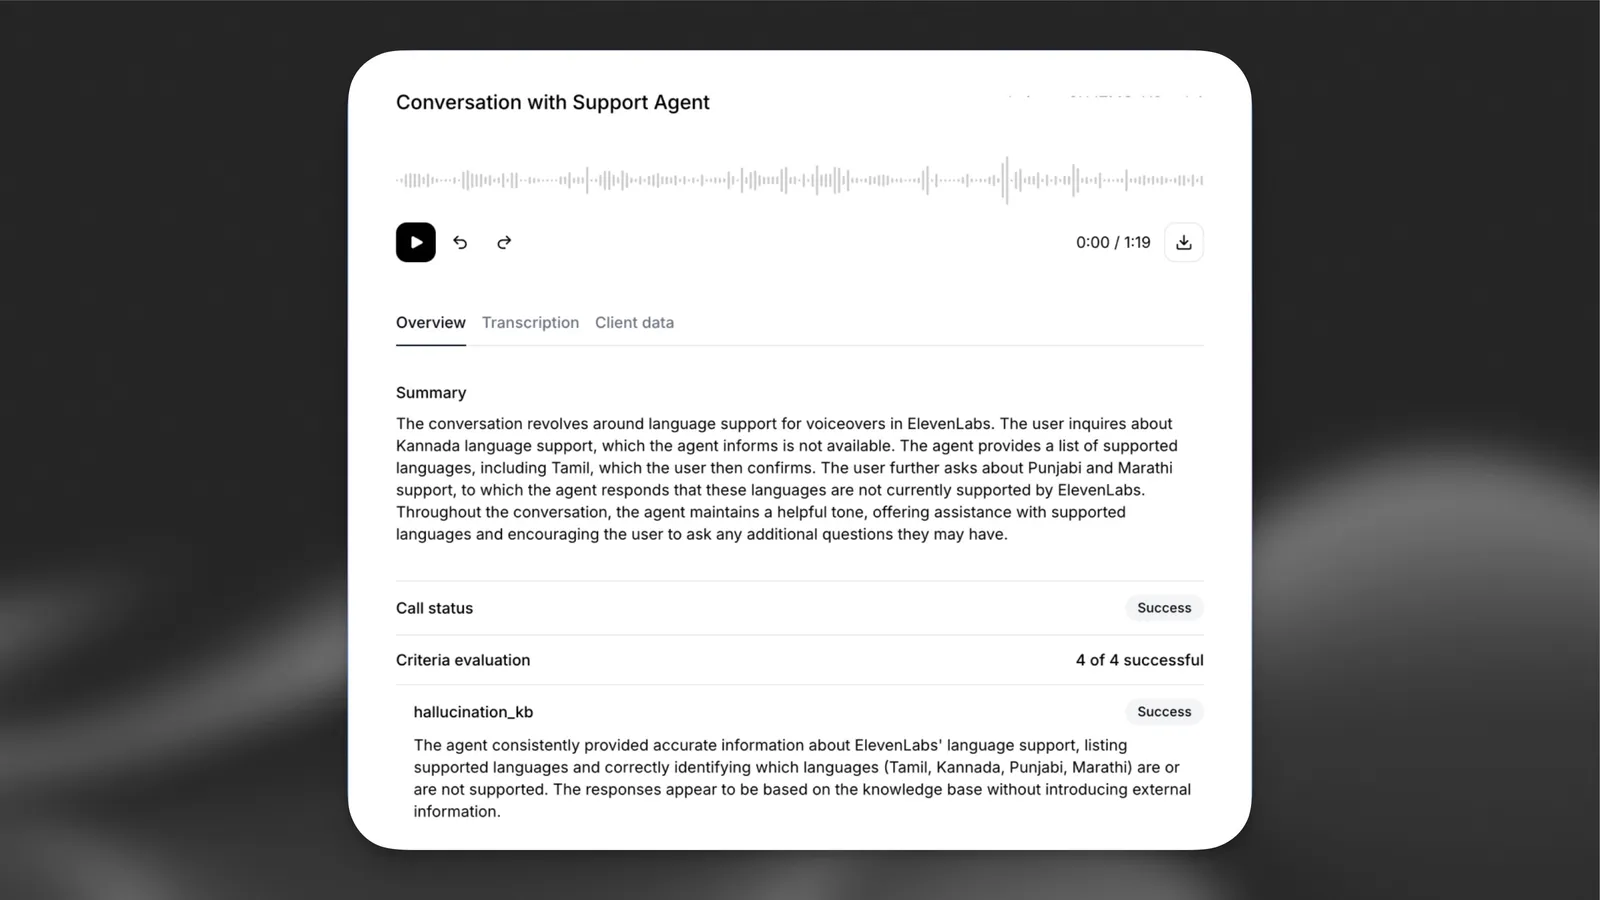
每份对话记录都会传递给 LLM,以验证是否达成特定目标。结果将为 success、failure 或 unknown,并附有说明结果选择依据的理由。

添加一个名为 solved_user_inquiry 的评估标准:

提示词
The assistant was able to answer all of the queries or redirect them to a relevant support channel.
Success Criteria:
- All user queries were answered satisfactorily.
- The user was redirected to a relevant support channel if needed.
2

配置数据收集

在 Data collection 部分,配置要从每段对话中提取的详细信息。

点击 Add item 并进行以下配置:

  1. 数据类型: 选择“string”
  2. 标识符: 为此数据点输入唯一标识符:user_question
  3. 说明: 向 LLM 提供详细指引,说明如何从记录中提取特定数据:
提示词
Extract the user's questions & inquiries from the conversation.
以客户身份测试助手。提出问题、评估回复,并调整提示词,直到你满意其表现。
3

查看对话历史

在 Call history 标签页中查看每段对话的评估结果和收集的数据。

对话历史

定期查看对话历史,识别常见问题和模式。

新创建的智能体可通过多种方式测试,最快的方式是使用 ElevenLabs 控制台。

网页控制台底层使用 React SDK 来处理实时对话。

如果想在自己的网站中快速测试智能体,可以使用 Agent 小组件。只需将以下 HTML 代码段粘贴到网站中,并将 agent-id 替换为智能体 ID。

<elevenlabs-convai agent-id="agent-id"></elevenlabs-convai>
<script src="https://unpkg.com/@elevenlabs/convai-widget-embed" async type="text/javascript"></script>

后续步骤

完成本快速入门指南后,可通过集成以下功能提升智能体效果: