Graph कॉलिंग बॉट

Microsoft Teams में अपने ElevenLabs एजेंट को किसी सहकर्मी की तरह नाम से कॉल करें या चैट करें।

ओवरव्यू

यह तरीका एजेंट को कॉल किए जा सकने वाले Teams आइडेंटिटी में बदल देता है। यूज़र इसे नाम से खोजकर 1:1 कॉल करता है और एजेंट रियल टाइम में जवाब देता है — इसके लिए फोन नंबर, PSTN या Communications Credits की ज़रूरत नहीं होती। नाम से कॉल किए जा सकने वाला यह एकमात्र तरीका है और इसे चलाने में सबसे ज़्यादा सेटअप लगता है।

इसमें Microsoft Graph रियल-टाइम मीडिया बॉट (Cloud Communications calling platform) का इस्तेमाल होता है। मीडिया SDK (Microsoft.Skype.Bots.Media) केवल Windows Server पर .NET के लिए है — Teams कॉल में raw audio के लिए Linux या non-.NET का कोई विकल्प नहीं है।

Teams में नाम से कॉल करने का यह एकमात्र तरीका है। आसान सेटअप के लिए widget tab चुनें, या जब आपको खास तौर पर फोन नंबर चाहिए, तो ACS चुनें।

यह कैसे काम करता है
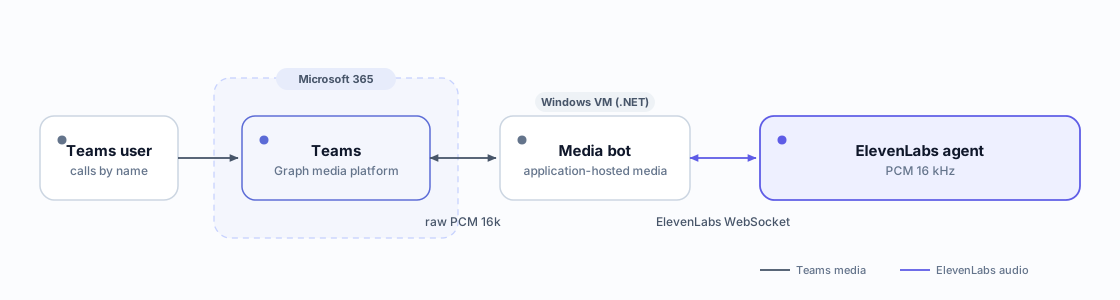
एक Teams यूज़र बॉट को नाम से कॉल करता है; Teams कॉल को Windows VM पर मौजूद मीडिया बॉट तक रूट करता है, जो WebSocket के ज़रिए raw PCM 16k ऑडियो को ElevenLabs एजेंट से जोड़ता है
नाम से कॉल → मीडिया बॉट → ElevenLabs

बॉट application-hosted media के साथ जवाब देता है, हर सेकंड 50 ऑडियो फ़्रेम (20 ms PCM 16 kHz) लेता है, उन्हें WebSocket के ज़रिए ElevenLabs एजेंट तक पहुँचाता है और एजेंट का ऑडियो वापस कॉल में स्ट्रीम करता है।

ज़रूरी चीज़ें

  1. एक Azure Bot रजिस्ट्रेशन + ऐप (Entra ऐप रजिस्ट्रेशन)।
  2. एडमिन सहमति के साथ Graph application permissions: Calls.AccessMedia.All (raw media) और Calls.Initiate.All।
  3. पब्लिक IP और खुले मीडिया पोर्ट वाला एक Windows Server VM (≥ 2 physical cores — जैसे Standard_D4s_v3)।
  4. मीडिया/signaling endpoint के लिए सार्वजनिक FQDN पर CA-signed TLS certificate (मीडिया प्लेटफ़ॉर्म self-signed certs को अस्वीकार करता है)।
  5. दोनों दिशाओं में PCM 16000 Hz पर सेट एक ElevenLabs एजेंट: Voice टैब में TTS output format और Advanced टैब में user input audio format।

D2s_v3 (2 vCPU = 1 physical core) पर MediaPlatform needs a system with at least 2 cores त्रुटि आती है। ≥ 2 physical cores वाला साइज़ इस्तेमाल करें (जैसे D4s_v3)।

अनुमतियां और रोल

स्कोपरोल / अनुमतिक्यों
EntraApplication Administratorऐप रजिस्ट्रेशन + Azure Bot बनाना
EntraGlobal Administrator / Privileged Role AdministratorGraph calling permissions के लिए एडमिन सहमति देना — ऐप अनुमतियों के लिए खुद सहमति नहीं दी जा सकती
Microsoft Graph (application)Calls.AccessMedia.All, Calls.Initiate.All1:1 कॉल का जवाब देना और raw media एक्सेस करना
Azure RBACresource group पर ContributorWindows VM + Azure Bot बनाना
Teams admincustom app upload की अनुमति दें; बॉट का Calling चैनल चालू करेंऐप को sideload करना और कॉल प्राप्त करना

चरण 1 — बॉट + Graph permissions रजिस्टर करें

एक ऐप रजिस्ट्रेशन और उससे जुड़ा Azure Bot बनाएं, फिर calling permissions को grant + consent दें (consent के लिए आपको Global Admin / Privileged Role Admin चाहिए):

APPID=$(az ad app create --display-name "ElevenLabs Teams Agent" \
--sign-in-audience AzureADMyOrg --query appId -o tsv)
az ad sp create --id "$APPID"
# create a client secret and record it
az ad app credential reset --id "$APPID" --display-name bot --query password -o tsv
# Azure Bot bound to the app
az bot create --resource-group $RG --name el-teams-agent-bot \
--app-type SingleTenant --appid "$APPID" --tenant-id $TENANT \
--endpoint "https://YOUR_FQDN/api/messages" --sku S1

दो Graph application roles को grant करें और admin consent दें (Global Admin / Privileged Role Admin चाहिए), फिर पुष्टि करें कि assignments लागू हो गए हैं:

# Graph app roles: Calls.AccessMedia.All, Calls.Initiate.All
az ad app permission add --id "$APPID" --api 00000003-0000-0000-c000-000000000000 \
--api-permissions a7a681dc-756e-4909-b988-f160edc6655f=Role \
284383ee-7f6e-4e40-a2a8-e85dcb029101=Role
az ad app permission admin-consent --id "$APPID"
# Verify — should print both role ids
az rest --method GET \
--url "https://graph.microsoft.com/v1.0/servicePrincipals(appId='$APPID')/appRoleAssignments" \
--query "value[].appRoleId" -o tsv

अगर admin-consent से Consent validation failed मिलता है, तो इसके बजाय app roles को सीधे service principal पर grant करें:

GRAPH_SP=$(az ad sp show --id 00000003-0000-0000-c000-000000000000 --query id -o tsv)
BOT_SP=$(az ad sp show --id "$APPID" --query id -o tsv)
for ROLE in a7a681dc-756e-4909-b988-f160edc6655f 284383ee-7f6e-4e40-a2a8-e85dcb029101; do
az rest --method POST \
--url "https://graph.microsoft.com/v1.0/servicePrincipals/$GRAPH_SP/appRoleAssignedTo" \
--body "{\"principalId\": \"$BOT_SP\", \"resourceId\": \"$GRAPH_SP\", \"appRoleId\": \"$ROLE\"}"
done

पोर्टल में Entra admin center पर App registrations → आपका ऐप → API permissions के तहत जांचें: दोनों permissions के साथ हरे check और Granted दिखना चाहिए।
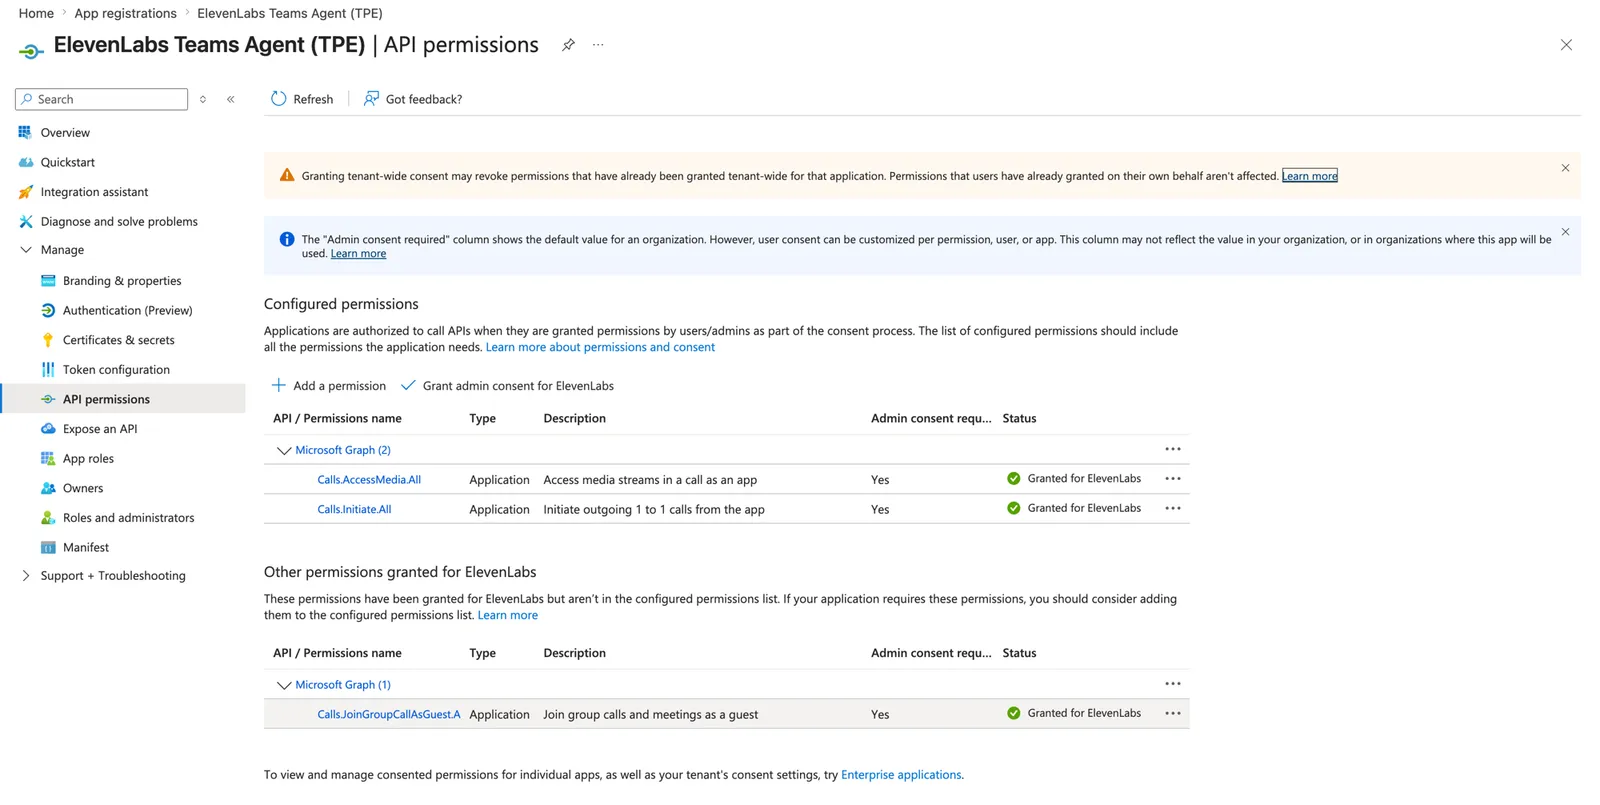
ऐप रजिस्ट्रेशन API permissions ब्लेड में Calls.AccessMedia.All और Calls.Initiate.All
granted दिख रहे हैं

admin consent के बाद ऐप रजिस्ट्रेशन → API permissions

चरण 2 — Windows VM, cert और ports तैयार करें

az vm create -g $RG -n teams-media-bot --image Win2022Datacenter \
--size Standard_D4s_v3 --admin-username azureuser --admin-password '<strong-pw>' \
--public-ip-sku Standard --public-ip-address-dns-name elevenmediabot
az vm open-port -g $RG -n teams-media-bot --port 80,443,8445,9441 --priority 300

VM पर (मीडिया प्लेटफ़ॉर्म के native code को इनकी ज़रूरत होती है — Windows Server में ये डिफ़ॉल्ट रूप से नहीं होते):

# VC++ runtime + Media Foundation feature (required by NativeMedia.dll)
choco install -y vcredist140
Install-WindowsFeature Server-Media-Foundation
# CA cert for the VM's FQDN via win-acme (HTTP-01), then import to LocalMachine\My
& wacs.exe --target manual --host <vm-fqdn>.cloudapp.azure.com `
--validation selfhosting --store pfxfile --pfxfilepath C:\bot\certs --accepttos

वही ports Windows firewall में खोलें और cert का thumbprint नोट करें — बॉट Kestrel (443 + notifications port) और मीडिया प्लेटफ़ॉर्म (8445) को इससे bind करता है।

VM का अपना *.cloudapp.azure.com FQDN Let’s Encrypt cert के लिए काम करता है — अलग डोमेन की ज़रूरत नहीं है।

चरण 3 — बॉट बनाएं और चलाएं

Microsoft के microsoft-graph-comms-samples PublicSamples/EchoBot से शुरू करें — यह net6.0 को target करता है और .NET SDK के साथ बनता है (Visual Studio Build Tools की ज़रूरत नहीं):

git clone --depth 1 https://github.com/microsoftgraph/microsoft-graph-comms-samples.git C:\bot\samples
cd C:\bot\samples\Samples\PublicSamples\EchoBot\src
dotnet build EchoBot.sln -c Release

appsettings.json के AppSettings सेक्शन में अपना AadAppId, AadAppSecret, ServiceDnsName/MediaDnsName (VM FQDN), CertificateThumbprint और ports (calling 443, notifications 9441, media 8445) कॉन्फ़िगर करें। नीचे दिए ElevenLabs bridge के लिए दो सेटिंग जोड़ें: ElevenLabsAgentId और ElevenLabsOrigin (wss://api.elevenlabs.io या आपका residency host)। इसे Windows scheduled task / service के रूप में चलाएं, ताकि रीबूट के बाद भी यह चलता रहे।

Task Scheduler की डिफ़ॉल्ट execution time limit (72 hours) लंबे समय तक चलने वाले tasks को बिना बताए बंद कर देती है — boot पर शुरू हुआ बॉट तीन दिन बाद बंद हो जाता है और कॉल में “we couldn’t connect you” त्रुटि आती है। limit बंद करें और restart-on-failure जोड़ें:

$s = New-ScheduledTaskSettingsSet -ExecutionTimeLimit (New-TimeSpan -Seconds 0) `
-RestartCount 999 -RestartInterval (New-TimeSpan -Minutes 1) -StartWhenAvailable
Set-ScheduledTask -TaskName EchoBot -Settings $s

standard port 443 पर की गई कॉल में stock EchoBot क्रैश हो जाता है: HttpHelpers.SetAbsoluteUri req.Host.Port.Value कॉल करता है, जो Host header में स्पष्ट port न होने पर null होता है। इसे req.Host.Port ?? (req.IsHttps ? 443 : 80) से patch करें।

echo को ElevenLabs से बदलें

EchoBot का audio seam साफ़ है: SpeechService.AppendAudioBuffer(in) और OnSendMediaBufferEventArgs(out) event। इसके Azure-Speech body को ElevenLabs agent WebSocket bridge से बदलें, जो वही surface रखता है:

SpeechService.cs — ElevenLabs bridge (core)
public class SpeechService
{
private readonly AppSettings _settings;
private readonly ILogger _logger;
private ClientWebSocket _ws;
private bool _started;
private bool _connecting;
public event EventHandler<MediaStreamEventArgs> SendMediaBuffer; // agent audio -> call
public event EventHandler FlushMedia; // barge-in: drop queued audio
public SpeechService(AppSettings settings, ILogger logger) { _settings = settings; _logger = logger; }
// Caller audio -> ElevenLabs
public async Task AppendAudioBuffer(AudioMediaBuffer buffer)
{
if (!_started)
{
if (_connecting) return; // a connect attempt is already in flight
_connecting = true;
try { await Connect(); _started = true; }
catch (Exception ex) { _logger.Error(ex, "ElevenLabs connect failed; retry on next frame"); return; }
finally { _connecting = false; }
}
if (_ws?.State != WebSocketState.Open || buffer.Length <= 0) return;
var pcm = new byte[buffer.Length];
Marshal.Copy(buffer.Data, pcm, 0, (int)buffer.Length);
var msg = JsonSerializer.Serialize(new { user_audio_chunk = Convert.ToBase64String(pcm) });
await _ws.SendAsync(Encoding.UTF8.GetBytes(msg), WebSocketMessageType.Text, true, default);
}
private async Task Connect()
{
_ws = new ClientWebSocket();
// ElevenLabsOrigin: wss://api.elevenlabs.io, or a residency host (.eu./.in./.sg.)
var url = $"{_settings.ElevenLabsOrigin}/v1/convai/conversation?agent_id={_settings.ElevenLabsAgentId}";
await _ws.ConnectAsync(new Uri(url), default);
await _ws.SendAsync(Encoding.UTF8.GetBytes(
JsonSerializer.Serialize(new { type = "conversation_initiation_client_data" })),
WebSocketMessageType.Text, true, default);
_ = Task.Run(ReceiveLoop);
}
private async Task ReceiveLoop()
{
var buf = new byte[32768]; var sb = new StringBuilder();
while (_ws.State == WebSocketState.Open)
{
sb.Clear(); WebSocketReceiveResult r;
do { r = await _ws.ReceiveAsync(buf, default); sb.Append(Encoding.UTF8.GetString(buf, 0, r.Count)); }
while (!r.EndOfMessage);
using var doc = JsonDocument.Parse(sb.ToString());
var type = doc.RootElement.GetProperty("type").GetString();
if (type == "audio") // ElevenLabs audio -> call
Emit(Convert.FromBase64String(doc.RootElement
.GetProperty("audio_event").GetProperty("audio_base_64").GetString()));
else if (type == "ping")
await _ws.SendAsync(Encoding.UTF8.GetBytes(JsonSerializer.Serialize(new {
type = "pong", event_id = doc.RootElement.GetProperty("ping_event").GetProperty("event_id").GetInt32() })),
WebSocketMessageType.Text, true, default);
else if (type == "interruption") // barge-in: drop any agent audio still queued
FlushMedia?.Invoke(this, EventArgs.Empty);
}
}
// slice PCM into 20 ms / 640-byte frames the media platform expects
private void Emit(byte[] pcm)
{
var all = new List<AudioMediaBuffer>(); long tick = DateTime.Now.Ticks;
for (int off = 0; off < pcm.Length; off += 640)
{
var frame = new byte[640];
Array.Copy(pcm, off, frame, 0, Math.Min(640, pcm.Length - off));
all.AddRange(Utilities.CreateAudioMediaBuffers(frame, tick, _logger));
tick += 20 * 10000;
}
if (all.Count > 0) SendMediaBuffer?.Invoke(this, new MediaStreamEventArgs { AudioMediaBuffers = all });
}
}

दोनों तरफ PCM 16 kHz mono है, इसलिए यह base64 passthrough है — एजेंट को pcm_16000 पर सेट करें। ElevenLabs interruption (barge-in) पर bridge FlushMedia raise करता है; इसे अपने media stream से जोड़ें ताकि queued AudioMediaBuffers हट जाएं, नहीं तो एजेंट कॉलर के ऊपर बोलता रहेगा। पूरा message reference WebSocket docs में है। कॉल के अंत में hangup और warm transfer की जानकारी नीचे के सेक्शन में दी गई है।

Connect() में URL public एजेंट तक पहुंचता है। private एजेंट के लिए server-side एक short-lived signed URL मांगें — अपनी API key के साथ GET /v1/convai/conversation/get-signed-url?agent_id=... — और इसके बजाय लौटे URL से connect करें। data residency में ElevenLabsOrigin को अपने residency host (wss://api.eu.residency.elevenlabs.io, .in., या .sg.) पर सेट करें — signed-URL requests के लिए उससे मिलता हुआ https:// host इस्तेमाल होता है।

चरण 4 — इसे Teams में कॉल करने योग्य बनाएं

  1. Azure Bot के Teams channel पर Calling चालू करें और calling webhook को https://YOUR_FQDN/api/calling पर सेट करें:

    az bot msteams create -g $RG -n el-teams-agent-bot \
    --enable-calling --calling-web-hook "https://YOUR_FQDN/api/calling"

    पोर्टल में यह आपके Azure Bot resource → Channels → Microsoft Teams → Calling टैब में है:
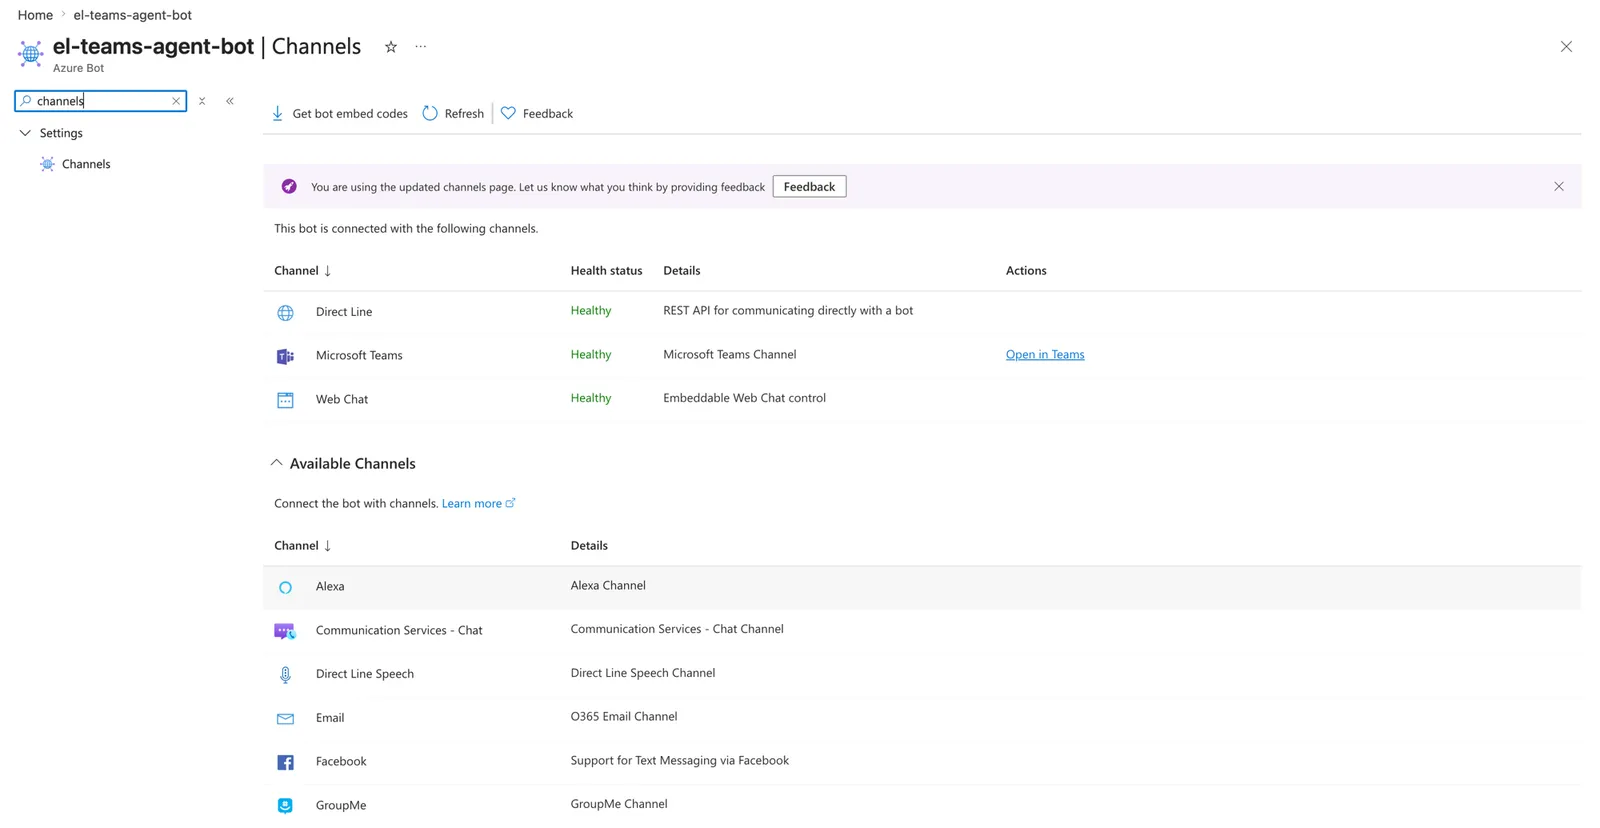
    Azure Bot Channels ब्लेड में Microsoft Teams चैनल healthy के रूप में
दिख रहा है

    Azure Bot → Channels — कनेक्टेड Microsoft Teams चैनल
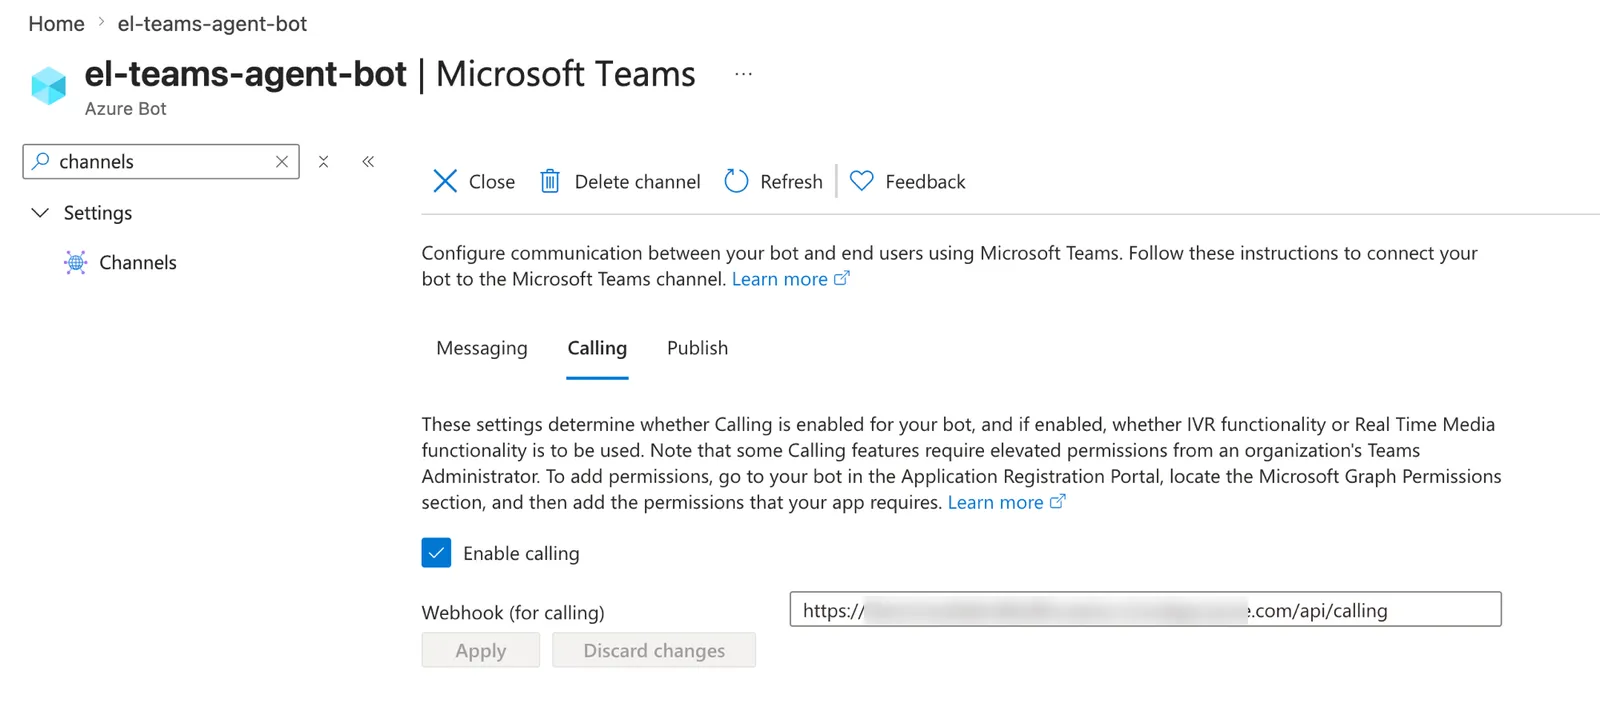
    Teams चैनल Calling टैब में Enable calling चुना हुआ है और calling webhook
सेट है

    Microsoft Teams चैनल → Calling — बॉट के webhook के साथ calling चालू
  2. bots[0].supportsCalling: true और बॉट के app ID के साथ एक Teams app manifest बनाएं, फिर इसे sideload करें (Apps → Manage your apps → Upload a custom app), या UI के बिना इसे पूरी organization में प्रकाशित करें: New-TeamsApp -DistributionMethod organization -Path ./bot-app.zip (MicrosoftTeams PowerShell module)।

Teams में ऐप को नाम से खोजें और कॉल करें — बॉट जवाब देगा और ElevenLabs एजेंट बोलेगा।
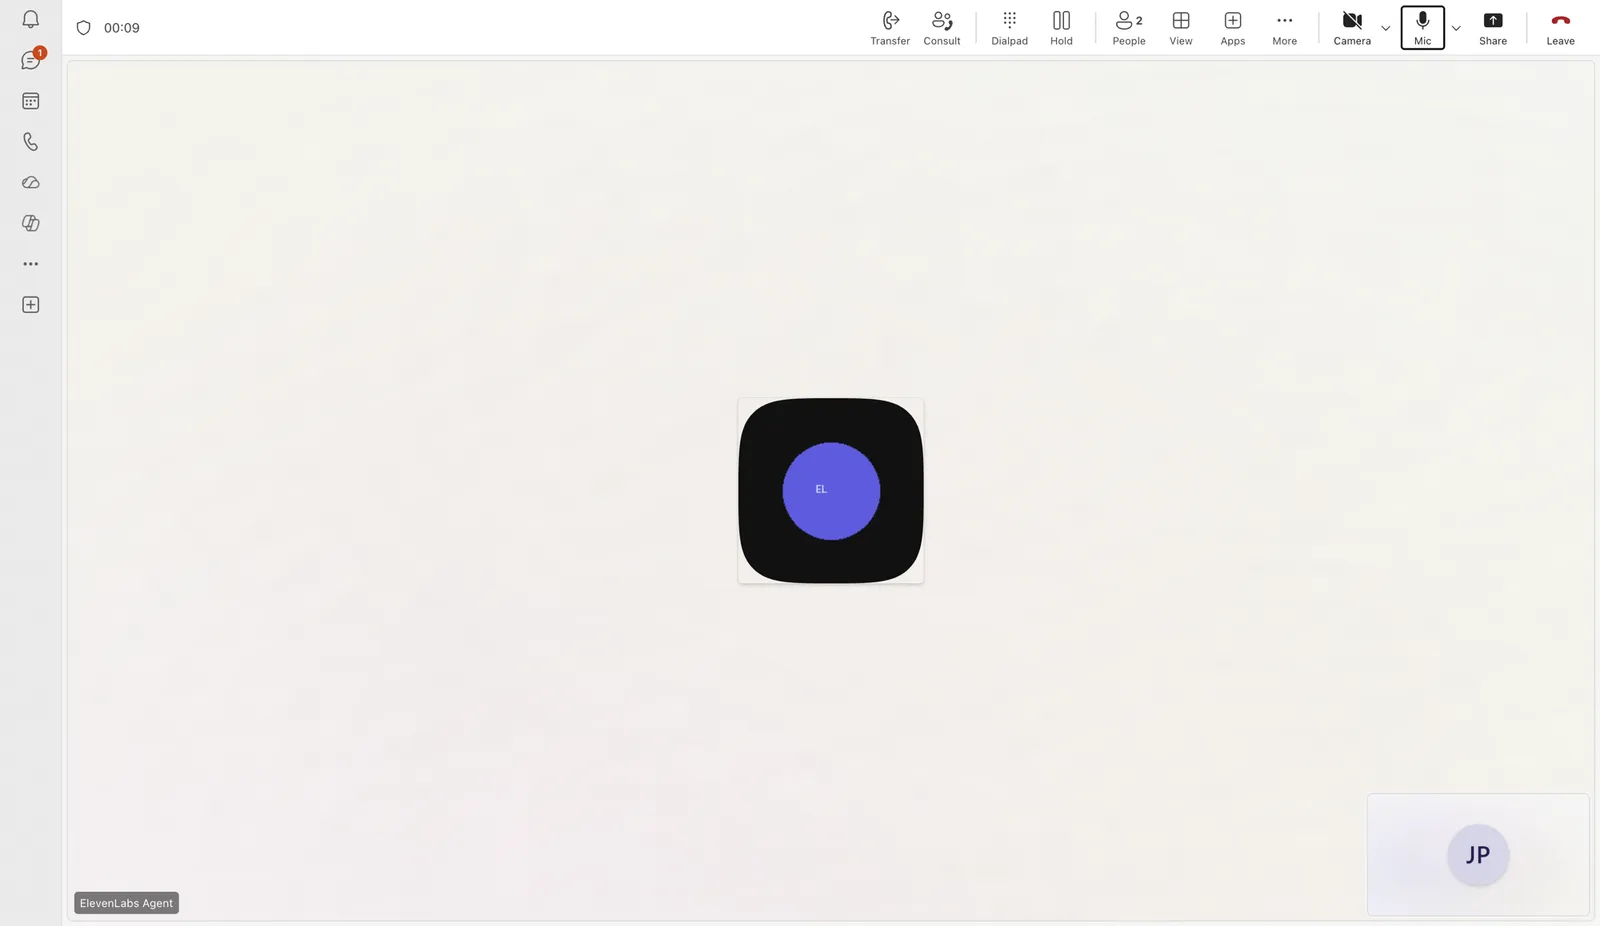
ElevenLabs एजेंट बॉट के साथ सक्रिय Teams
कॉल

एजेंट के साथ लाइव 1:1 कॉल — कॉल toolbar में Transfer और Consult देखें

1:1 call-by-name के लिए फोन नंबर या resource account की ज़रूरत नहीं है — ये केवल PSTN dial-in के लिए होते हैं। Calls.AccessMedia.All ही raw-audio bridge को सक्षम करता है।

टेक्स्ट चैट (वही बॉट)

वही Azure Bot Teams में टेक्स्ट का जवाब भी दे सकता है — इसलिए यूज़र एजेंट को कॉल कर सकते हैं या उससे चैट कर सकते हैं। कॉलिंग और मैसेजिंग बॉट पर अलग-अलग चैनल हैं: कॉलिंग webhook वॉइस संभालता है और Bot Framework मैसेजिंग एंडपॉइंट (/api/messages) चैट संभालता है।
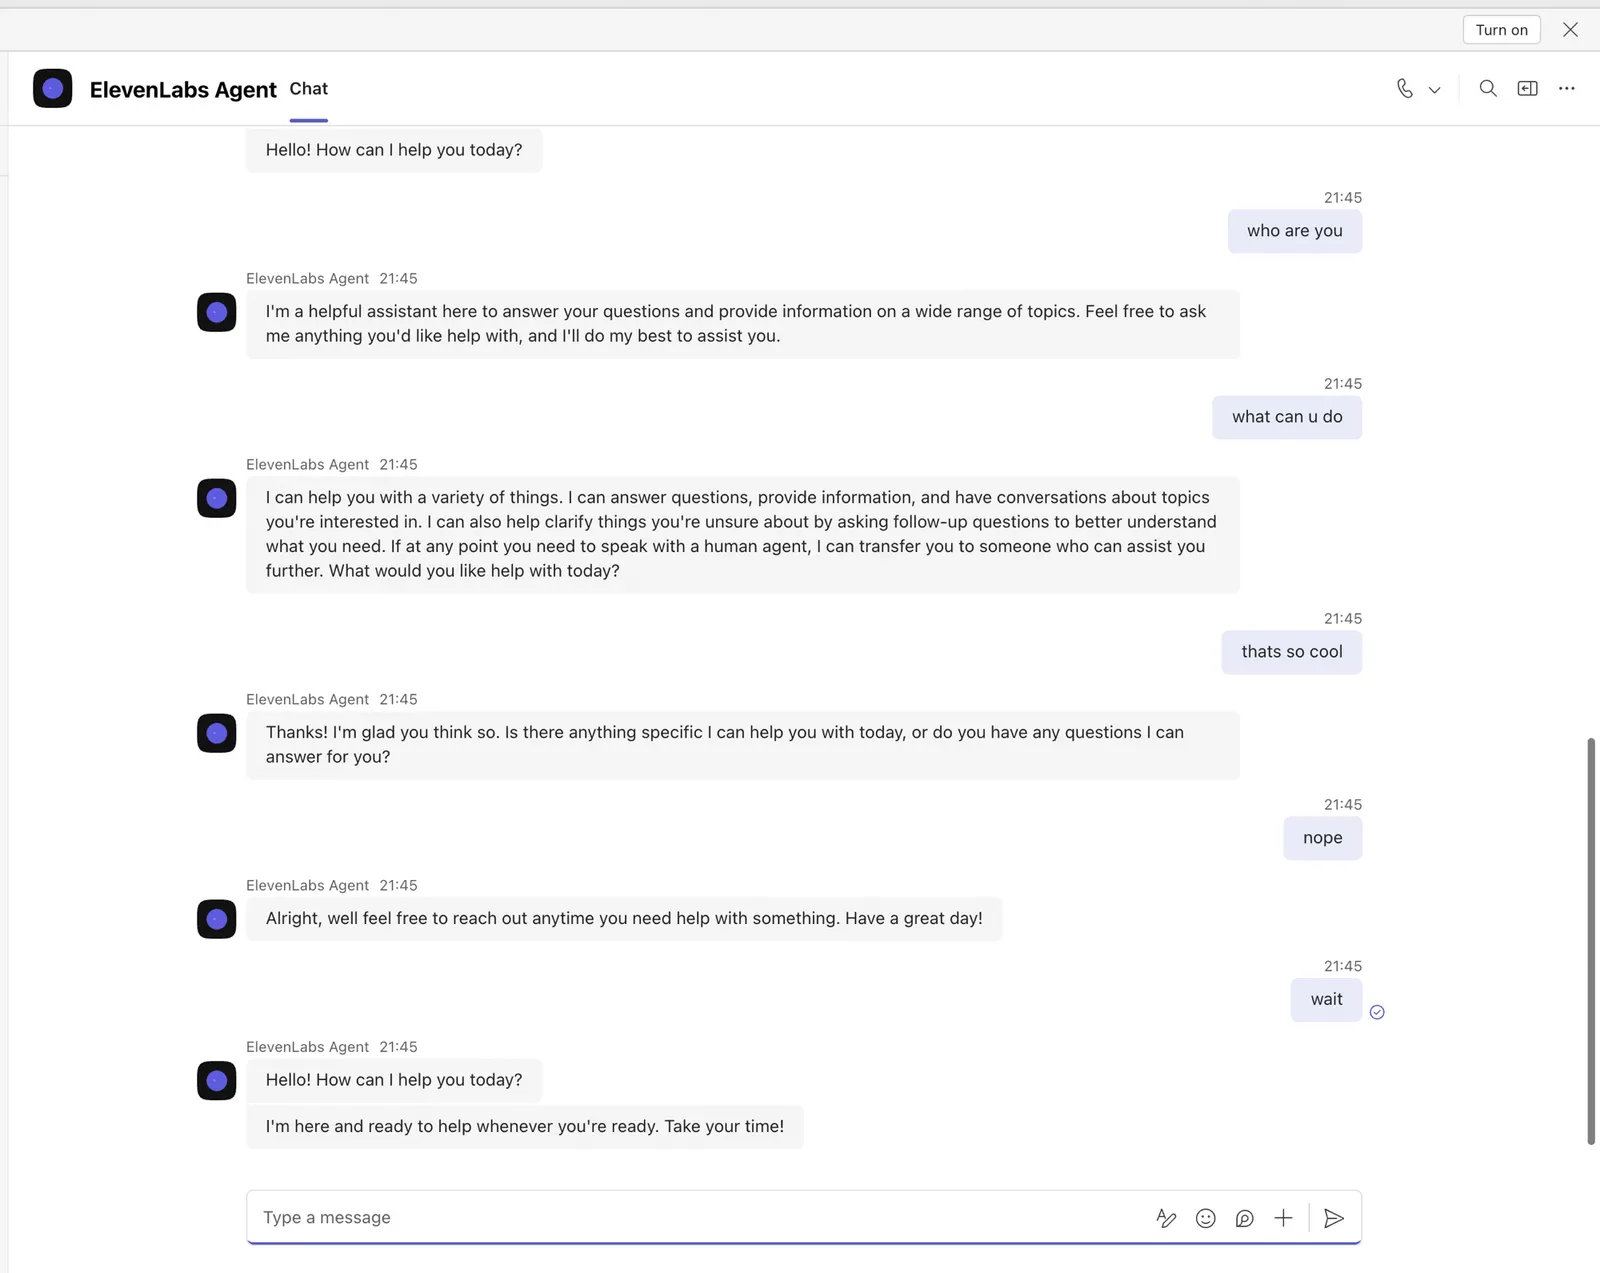
Teams चैट में ElevenLabs एजेंट बॉट टेक्स्ट
मैसेज का जवाब दे रहा है

Teams में उसी बॉट के साथ चैटिंग

बॉट के मैसेजिंग एंडपॉइंट को उस होस्ट पर पॉइंट करें जो इसे सर्व करता है (मीडिया बॉट या कोई अन्य सेवा — ज़रूरी नहीं कि वह Windows VM ही हो):

az bot update -g $RG -n el-teams-agent-bot --endpoint "https://YOUR_FQDN/api/messages"

Bot Framework SDK के साथ एंडपॉइंट लागू करें और हर मैसेज को वॉइस के लिए इस्तेमाल होने वाले उसी conversation WebSocket पर टेक्स्ट मोड में एजेंट तक भेजें — user_message इवेंट भेजें और agent_response इवेंट पढ़ें। पहले एजेंट की overrides सेटिंग्स में पहला मैसेज फ़ील्ड सक्षम करें — नीचे दिया गया कोड इसे खाली से ओवरराइड करता है, ताकि जवाब एजेंट के अभिवादन के बजाय यूज़र के मैसेज का उत्तर हो:

ChatBot.cs — Teams टेक्स्ट चैट -> ElevenLabs (टेक्स्ट मोड)
public class ChatBot : ActivityHandler
{
private readonly AppSettings _settings;
public ChatBot(AppSettings settings) => _settings = settings;
protected override async Task OnMessageActivityAsync(
ITurnContext<IMessageActivity> turn, CancellationToken ct)
{
var reply = await AskAgent(turn.Activity.Text, ct);
await turn.SendActivityAsync(MessageFactory.Text(reply), ct);
}
private async Task<string> AskAgent(string text, CancellationToken ct)
{
using var ws = new ClientWebSocket();
var url = $"{_settings.ElevenLabsOrigin}/v1/convai/conversation?agent_id={_settings.ElevenLabsAgentId}";
await ws.ConnectAsync(new Uri(url), ct);
// Suppress the agent's greeting: with no override, the first agent_response is the
// configured first message, not the answer to this user_message.
await Send(ws, new
{
type = "conversation_initiation_client_data",
conversation_config_override = new { agent = new { first_message = "" } },
}, ct);
await Send(ws, new { type = "user_message", text }, ct);
var buf = new byte[16384]; var sb = new StringBuilder();
while (ws.State == WebSocketState.Open)
{
sb.Clear(); WebSocketReceiveResult r;
do { r = await ws.ReceiveAsync(buf, ct); sb.Append(Encoding.UTF8.GetString(buf, 0, r.Count)); }
while (!r.EndOfMessage);
using var doc = JsonDocument.Parse(sb.ToString());
switch (doc.RootElement.GetProperty("type").GetString())
{
case "agent_response":
return doc.RootElement.GetProperty("agent_response_event")
.GetProperty("agent_response").GetString();
case "ping":
await Send(ws, new { type = "pong", event_id = doc.RootElement
.GetProperty("ping_event").GetProperty("event_id").GetInt32() }, ct);
break;
}
}
return "Sorry, I couldn't reach the agent.";
}
private static Task Send(ClientWebSocket ws, object msg, CancellationToken ct) =>
ws.SendAsync(Encoding.UTF8.GetBytes(JsonSerializer.Serialize(msg)),
WebSocketMessageType.Text, true, ct);
}

इसे सामान्य तरीके से रजिस्टर करें (एक CloudAdapter, AddTransient<IBot, ChatBot>() के ज़रिए बॉट और एक /api/messages controller), और manifest की bot एंट्री में चैट स्कोप जोड़ें:

"bots": [
{ "botId": "YOUR_APP_ID", "supportsCalling": true, "scopes": ["personal", "team", "groupChat"] }
]

यह स्निपेट हर मैसेज के लिए नया conversation खोलता है, इसलिए हर टर्न स्वतंत्र होता है। चैट मेमोरी के लिए, हर Teams conversation.id के लिए एक WebSocket खुला रखें (टर्न्स के बीच उसका दोबारा इस्तेमाल करें) और निष्क्रिय सेशन बंद करें — तब एजेंट उस चैट के पहले के मैसेज याद रखता है। first_message ओवरराइड एजेंट की overrides सेटिंग्स में सक्षम होना चाहिए — अगर अस्वीकृत ओवरराइड भेजा जाता है, तो सर्वर conversation बंद कर देता है। अगर आप इसे सक्षम नहीं कर सकते, तो ओवरराइड हटाएं और हर सेशन का पहला agent_response (अभिवादन) छोड़ दें और अगला वाला वापस करें।

अगर चैट के जवाब कभी नहीं आते, तो एजेंट की Advanced सेटिंग्स में agent_response client event सक्षम करें — टेक्स्ट जवाब इसी इवेंट के ज़रिए भेजे जाते हैं।

कॉल समाप्ति

जब ElevenLabs बातचीत समाप्त करता है (इसका End Call टूल WebSocket बंद करता है), तो Teams वाला कनेक्शन काट दें:

await this.Call.DeleteAsync(); // after a short delay so the goodbye audio finishes

किसी व्यक्ति को वॉर्म ट्रांसफर

एजेंट एक कस्टम transfer_to_human client tool ट्रिगर करता है; बॉट लाइव कॉल में एक Teams यूज़र को आमंत्रित करता है (consultative add), फिर पीछे हट जाता है:

var target = new IdentitySet { User = new Identity { Id = humanObjectId } };
await this.Call.Participants.InviteAsync(target, replacesCallId: null);
// suppress the end-call hangup while transferring, and mute the bot

Consultative transfer (replacesCallId) के लिए दोनों पक्षों का एक ही tenant में Teams यूज़र होना ज़रूरी है; PSTN ट्रांसफर टारगेट के लिए application instance चाहिए। पहले व्यक्ति को जानकारी देने के लिए, एजेंट से reason पैरामीटर पास करें और ब्रिज करने से पहले उसे व्यक्ति को चलाकर सुनाएं।

समस्या निवारण

VM में सिर्फ़ एक physical core है। कम से कम 2 physical cores (जैसे D4s_v3) में resize करें और रीस्टार्ट करें।

VC++ Redistributable (vcredist140) और Server-Media-Foundation Windows फीचर इंस्टॉल करें, फिर बॉट रीस्टार्ट करें।

443 पर EchoBot port-null bug — HttpHelpers.SetAbsoluteUri को पैच करें (Step 3 देखें)। यह भी पुष्टि करें कि cert CA-signed है और 443 पर पहुंच योग्य है।

पुष्टि करें कि Teams चैनल पर सही /api/calling webhook के साथ Calling सक्षम है, Graph Calls.AccessMedia.All अनुमति के लिए consent दिया गया है, और NSG व Windows firewall दोनों पर ports 443/8445/9441 खुले हैं। अगर कॉलिंग पहले काम करती थी और बंद हो गई, तो जांचें कि बॉट प्रक्रिया अभी भी VM पर चल रही है — Task Scheduler की डिफ़ॉल्ट 72-hour execution limit, बूट के कुछ दिनों बाद इसे बंद कर देती है (Step 3 में चेतावनी देखें)।

उपयोगी लिंक