Multi-voice support

Enable your AI agent to switch between different voices for multi-character conversations and enhanced storytelling.

Overview

Multi-voice support allows your conversational AI agent to dynamically switch between different ElevenLabs voices during a single conversation. This powerful feature enables:

  • Multi-character storytelling: Different voices for different characters in narratives
  • Language tutoring: Native speaker voices for different languages
  • Emotional agents: Voice changes based on emotional context
  • Role-playing scenarios: Distinct voices for different personas
Multi-voice configuration interface

How it works

When multi-voice support is enabled, your agent can use XML-style markup to switch between configured voices during text generation. The agent automatically returns to the default voice when no specific voice is specified.
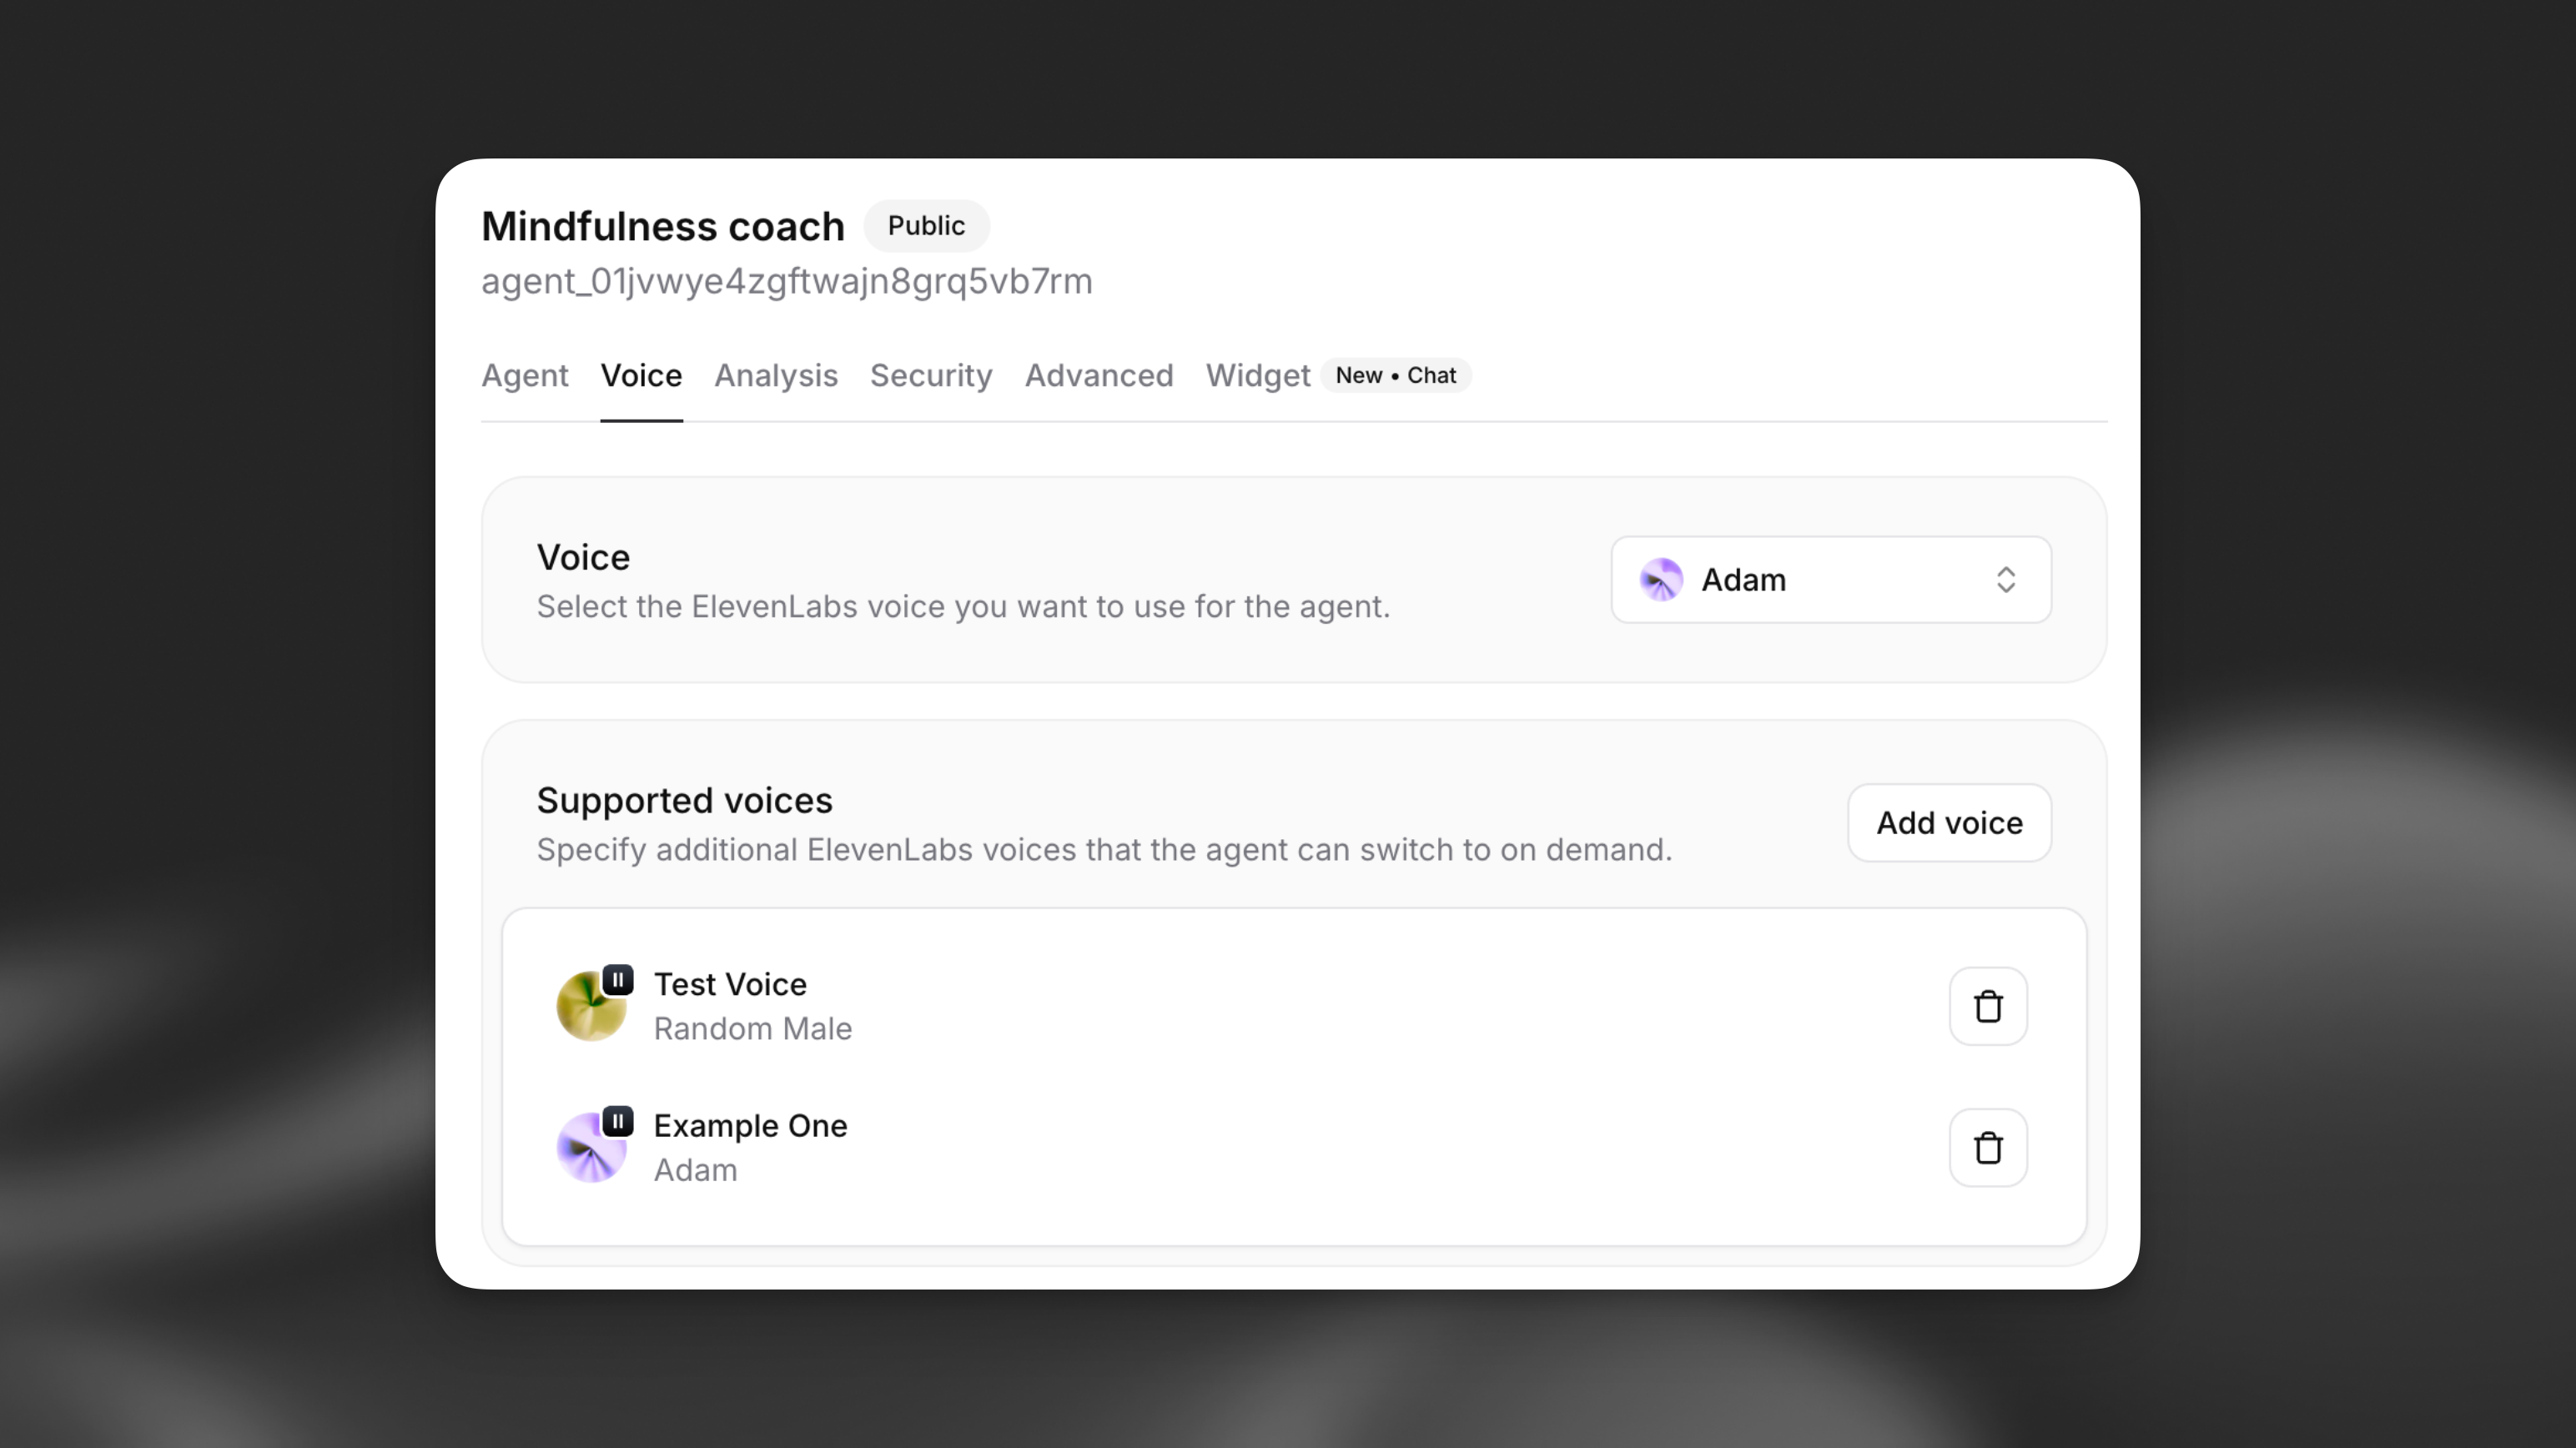
1The teacher said, <spanish>¡Hola estudiantes!</spanish>
2Then the student replied, <student>Hello! How are you today?</student>

Configuration

Adding supported voices

Navigate to your agent settings and locate the Multi-voice support section under the Voice tab.

1

Add a new voice

Click Add voice to configure a new supported voice for your agent.

Multi-voice configuration interface
2

Configure voice properties

Set up the voice with the following details:

  • Voice label: Unique identifier (e.g., “Joe”, “Spanish”, “Happy”)
  • Voice: Select from your available ElevenLabs voices
  • Model Family: Choose Turbo, Flash, or Multilingual (optional)
  • Language: Override the default language for this voice (optional)
  • Description: When the agent should use this voice
3

Save configuration

Click Add voice to save the configuration. The voice will be available for your agent to use immediately.

Voice properties

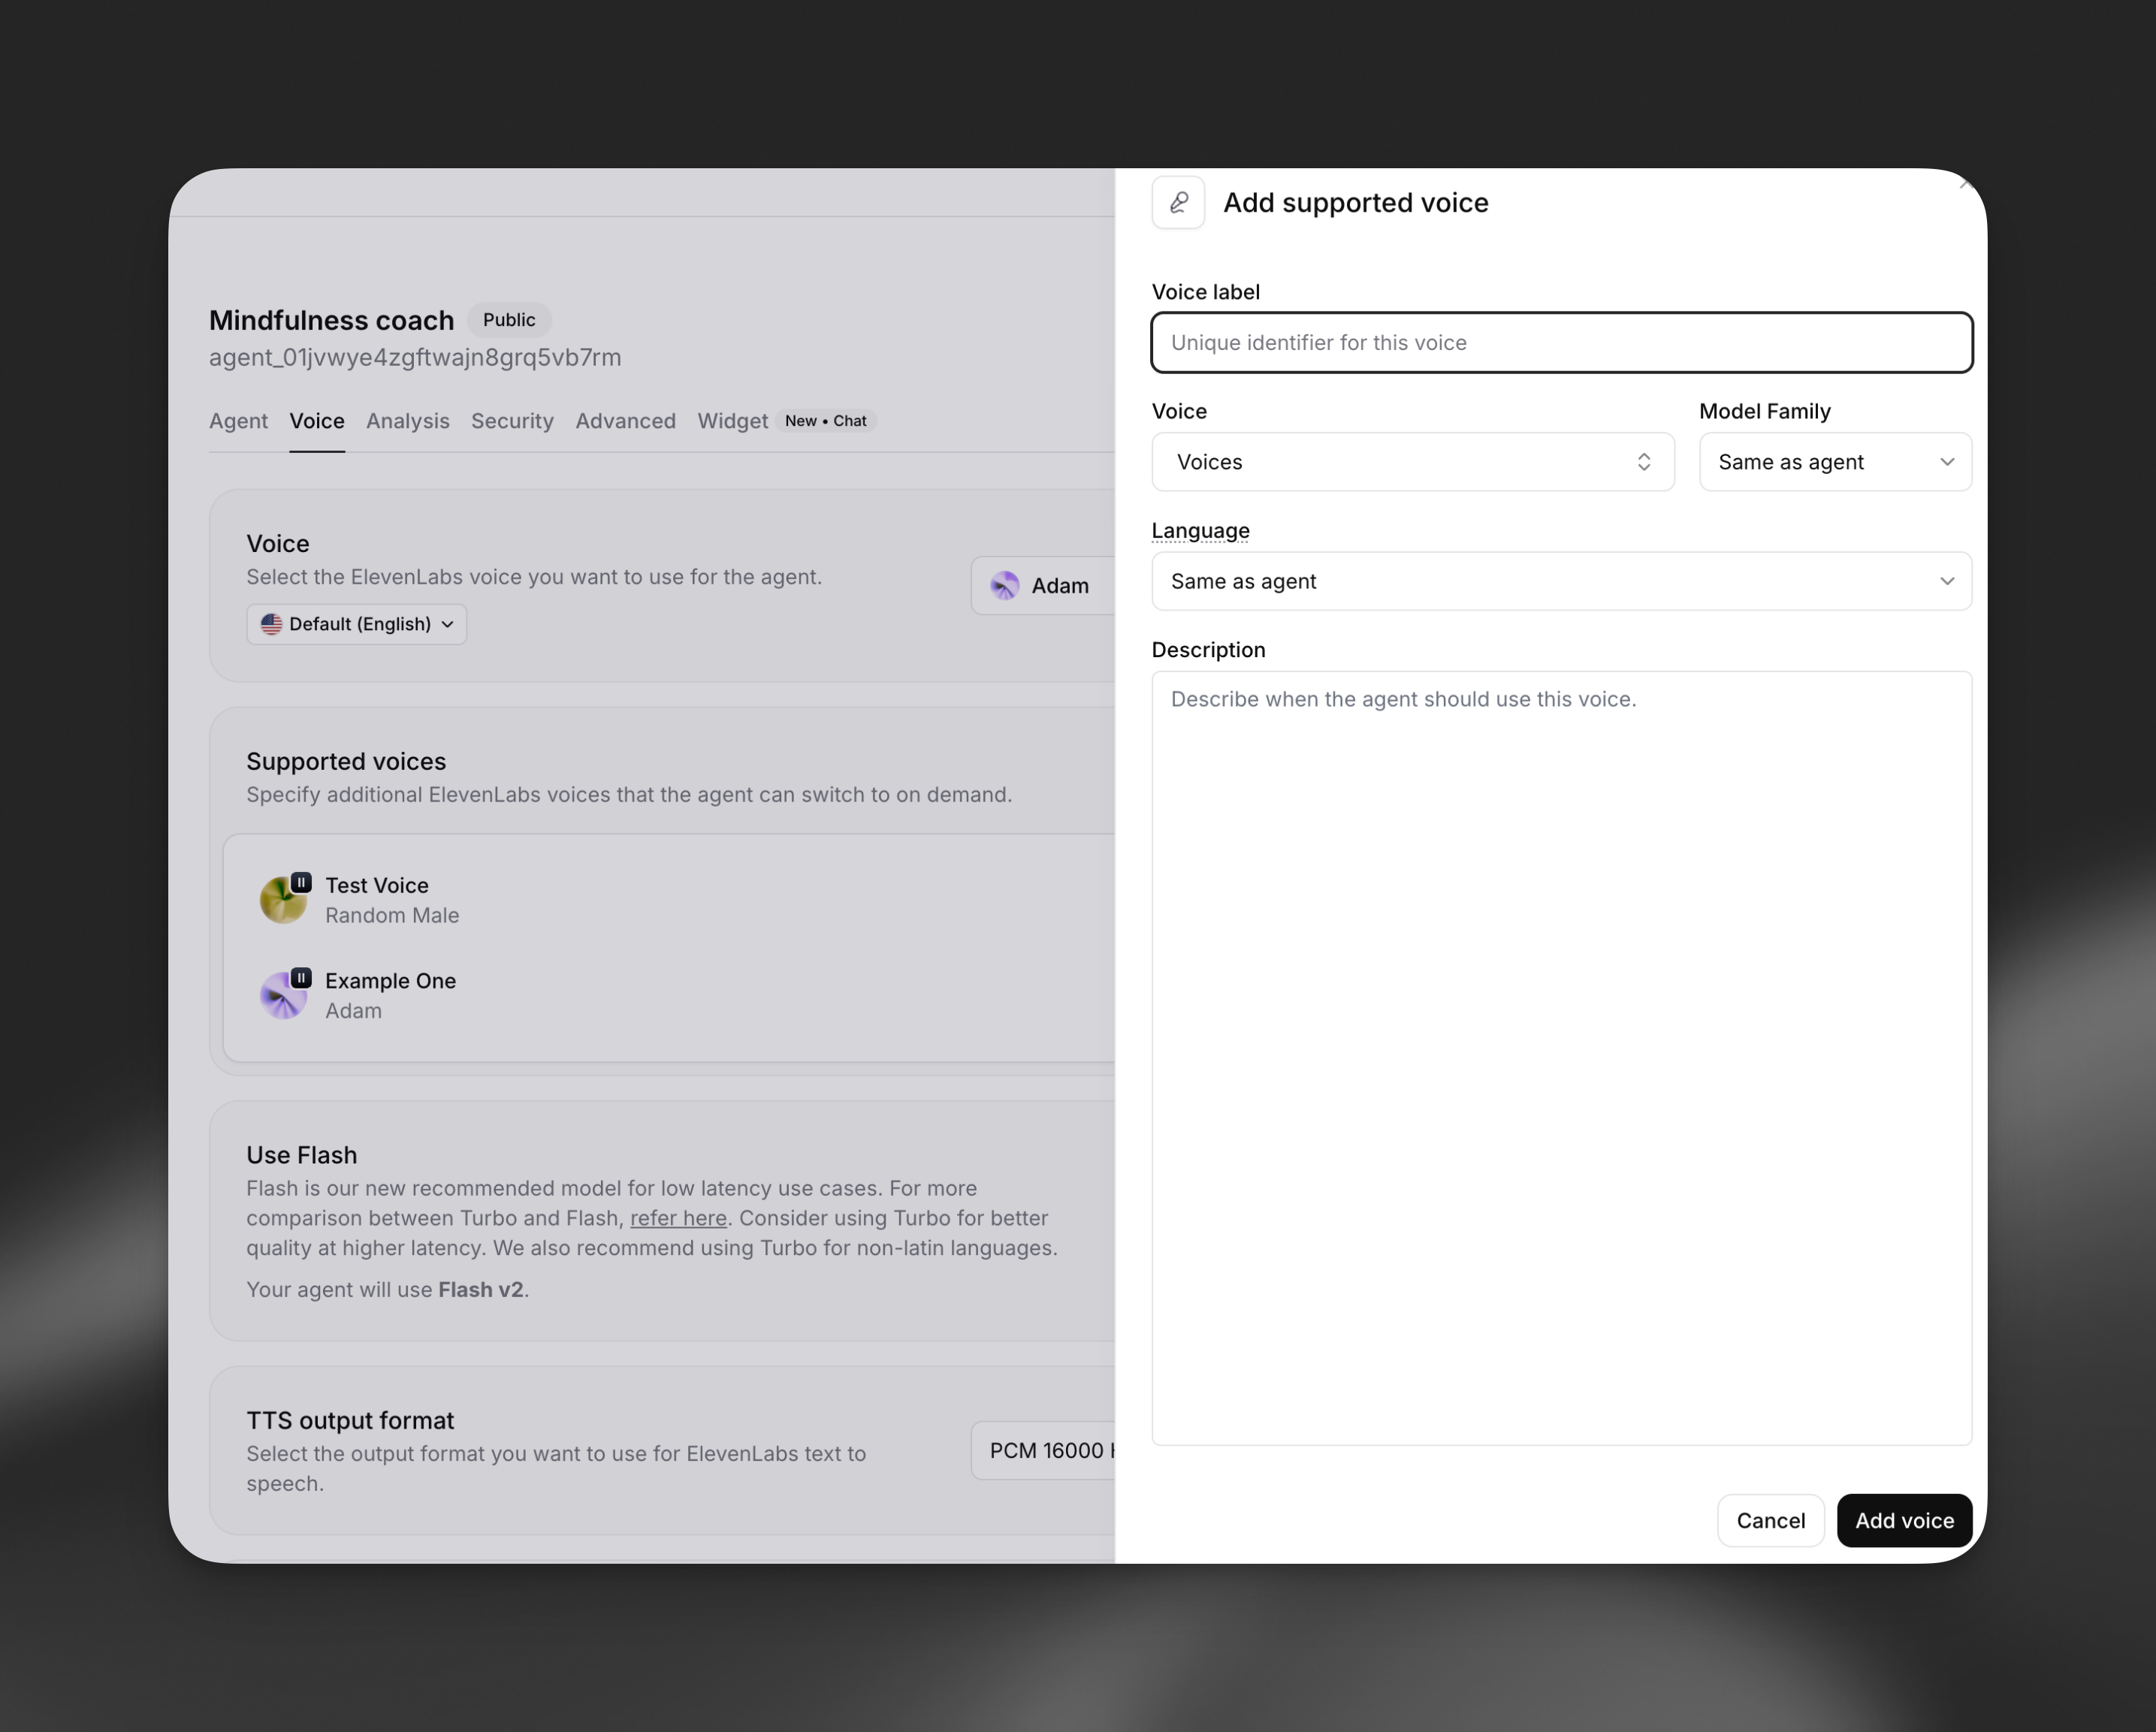
A unique identifier that the LLM uses to reference this voice. Choose descriptive labels like: - Character names: “Alice”, “Bob”, “Narrator” - Languages: “Spanish”, “French”, “German” - Emotions: “Happy”, “Sad”, “Excited” - Roles: “Teacher”, “Student”, “Guide”

Override the agent’s default model family for this specific voice: - Flash: Fastest eneration, optimized for real-time use - Turbo: Balanced speed and quality - Multilingual: Highest quality, best for non-English languages - Same as agent: Use agent’s default setting

Specify a different language for this voice, useful for: - Multilingual conversations - Language tutoring applications - Region-specific pronunciations

Provide context for when the agent should use this voice. Examples:

  • “For any Spanish words or phrases”
  • “When the message content is joyful or excited”
  • “Whenever the character Joe is speaking”

Implementation

XML markup syntax

Your agent uses XML-style tags to switch between voices:

1<VOICE_LABEL>text to be spoken</VOICE_LABEL>

Key points:

  • Replace VOICE_LABEL with the exact label you configured
  • Text outside tags uses the default voice
  • Tags are case-sensitive
  • Nested tags are not supported

System prompt integration

When you configure supported voices, the system automatically adds instructions to your agent’s prompt:

When a message should be spoken by a particular person, use markup: "<CHARACTER>message</CHARACTER>" where CHARACTER is the character label.
Available voices are as follows:
- default: any text outside of the CHARACTER tags
- Joe: Whenever Joe is speaking
- Spanish: For any Spanish words or phrases
- Narrator: For narrative descriptions

Example usage

Teacher: Let's practice greetings. In Spanish, we say <Spanish>¡Hola! ¿Cómo estás?</Spanish>
Student: How do I respond?
Teacher: You can say <Spanish>¡Hola! Estoy bien, gracias.</Spanish> which means Hello! I'm fine, thank you.

Best practices

  • Choose voices that clearly differentiate between characters or contexts
  • Test voice combinations to ensure they work well together
  • Consider the emotional tone and personality for each voice
  • Ensure voices match the language and accent when switching languages
  • Use descriptive, intuitive labels that the LLM can understand
  • Keep labels short and memorable
  • Avoid special characters or spaces in labels
  • Limit the number of supported voices to what you actually need
  • Use the same model family when possible to reduce switching overhead
  • Test with your expected conversation patterns
  • Monitor response times with multiple voice switches
  • Provide clear descriptions for when each voice should be used
  • Test edge cases where voice switching might be unclear
  • Consider fallback behavior when voice labels are ambiguous
  • Ensure voice switches enhance rather than distract from the conversation

Limitations

  • Maximum of 10 supported voices per agent (including default)
  • Voice switching adds minimal latency during generation
  • XML tags must be properly formatted and closed
  • Voice labels are case-sensitive in markup
  • Nested voice tags are not supported

FAQ

If the agent uses a voice label that hasn’t been configured, the text will be spoken using the default voice. The XML tags will be ignored.

Yes, you can switch voices within a single response. Each tagged section will use the specified voice, while untagged text uses the default voice.

Voice switching adds minimal overhead. The first use of each voice in a conversation may have slightly higher latency as the voice is initialized.

Yes, you can configure multiple labels that use the same ElevenLabs voice but with different model families, languages, or contexts.

Provide clear examples in your system prompt and test thoroughly. You can include specific scenarios where voice switching should occur and examples of the XML markup format.