Widget customization
Widgets enable instant integration of ElevenAgents into any website. You can either customize your widget through the UI or through our type-safe ElevenAgents SDKs for complete control over styling and behavior. The SDK overrides take priority over UI customization. Our widget is multimodal and able to process both text and audio.
Modality configuration
The widget supports flexible input modes to match your use case. Configure these options in the dashboard Widget tab under the Interface section.
Multimodality is fully supported in our client SDKs, see more here.
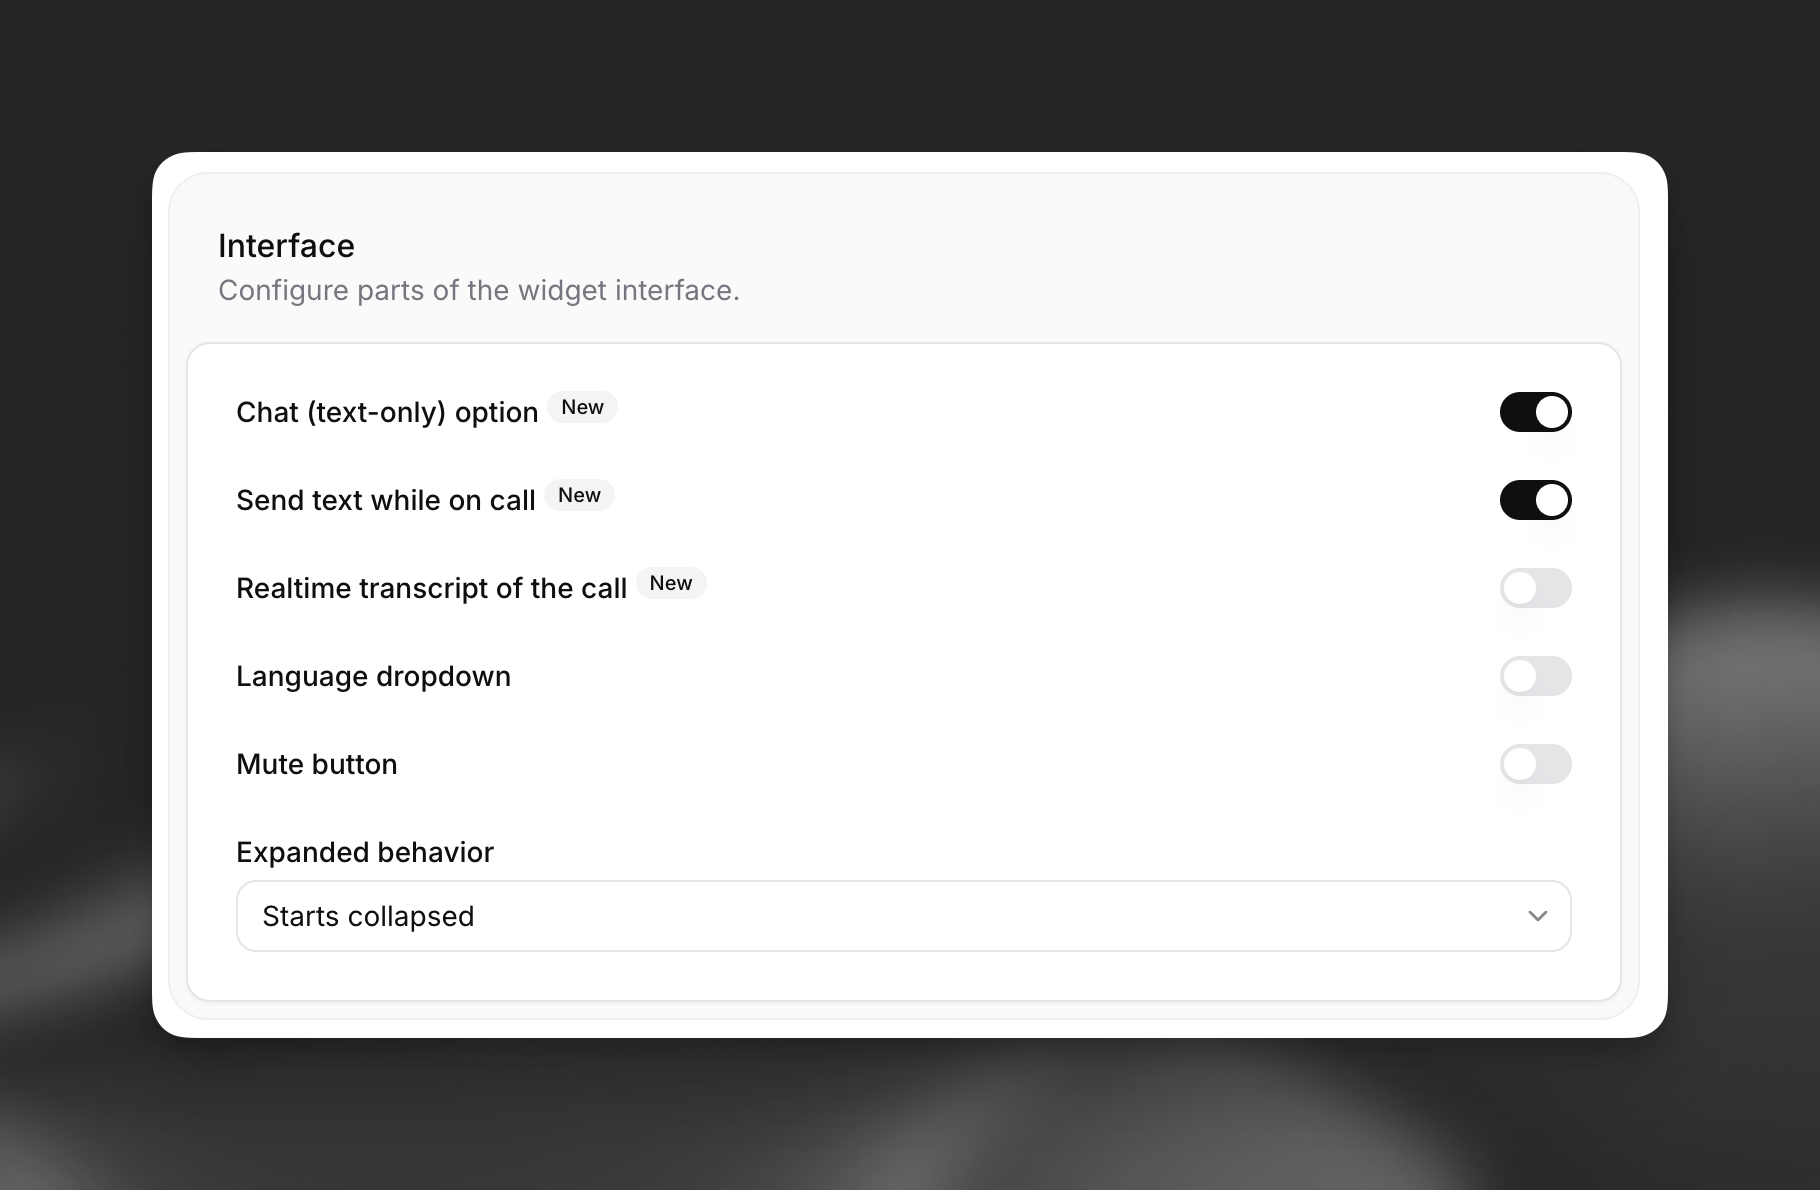
Available modes:
- Voice only (default): Users interact through speech only.
- Voice + text: Users can switch between voice and text input during conversations.
- Chat Mode: Conversations start in chat (text-only) mode without voice capabilities when initiated with a text message.
For more information on using chat (text-only) mode via our SDKs, see our chat mode guide.
The widget defaults to voice-only mode. Enable the text input toggle to allow multimodal interactions, or enable text-only mode support for purely text-based conversations when initiated via text.
Embedding the widget
Widgets currently require public agents with authentication disabled. Ensure this is disabled in the Advanced tab of your agent settings.
Add this code snippet to your website’s <body> section. Place it in your main index.html file for site-wide availability:
For enhanced security, define allowed domains in your agent’s Allowlist (located in the Security tab). This restricts access to specified hosts only.
Widget attributes
This basic embed code will display the widget with the default configuration defined in the agent’s dashboard. The widget supports various HTML attributes for further customization:
Core configuration
Visual customization
Text customization
Markdown rendering
The widget renders markdown in agent responses. Links display as plain text by default to prevent phishing.
Runtime configuration
Two more html attributes can be used to customize the agent’s behavior at runtime. These two features can be used together, separately, or not at all
Dynamic variables
Dynamic variables allow you to inject runtime values into your agent’s messages, system prompts, and tools.
All dynamic variables that the agent requires must be passed in the widget.
See more in our dynamic variables guide.
Overrides
Overrides enable complete customization of your agent’s behavior at runtime:
Overrides can be enabled for specific fields, and are entirely optional.
See more in our overrides guide.
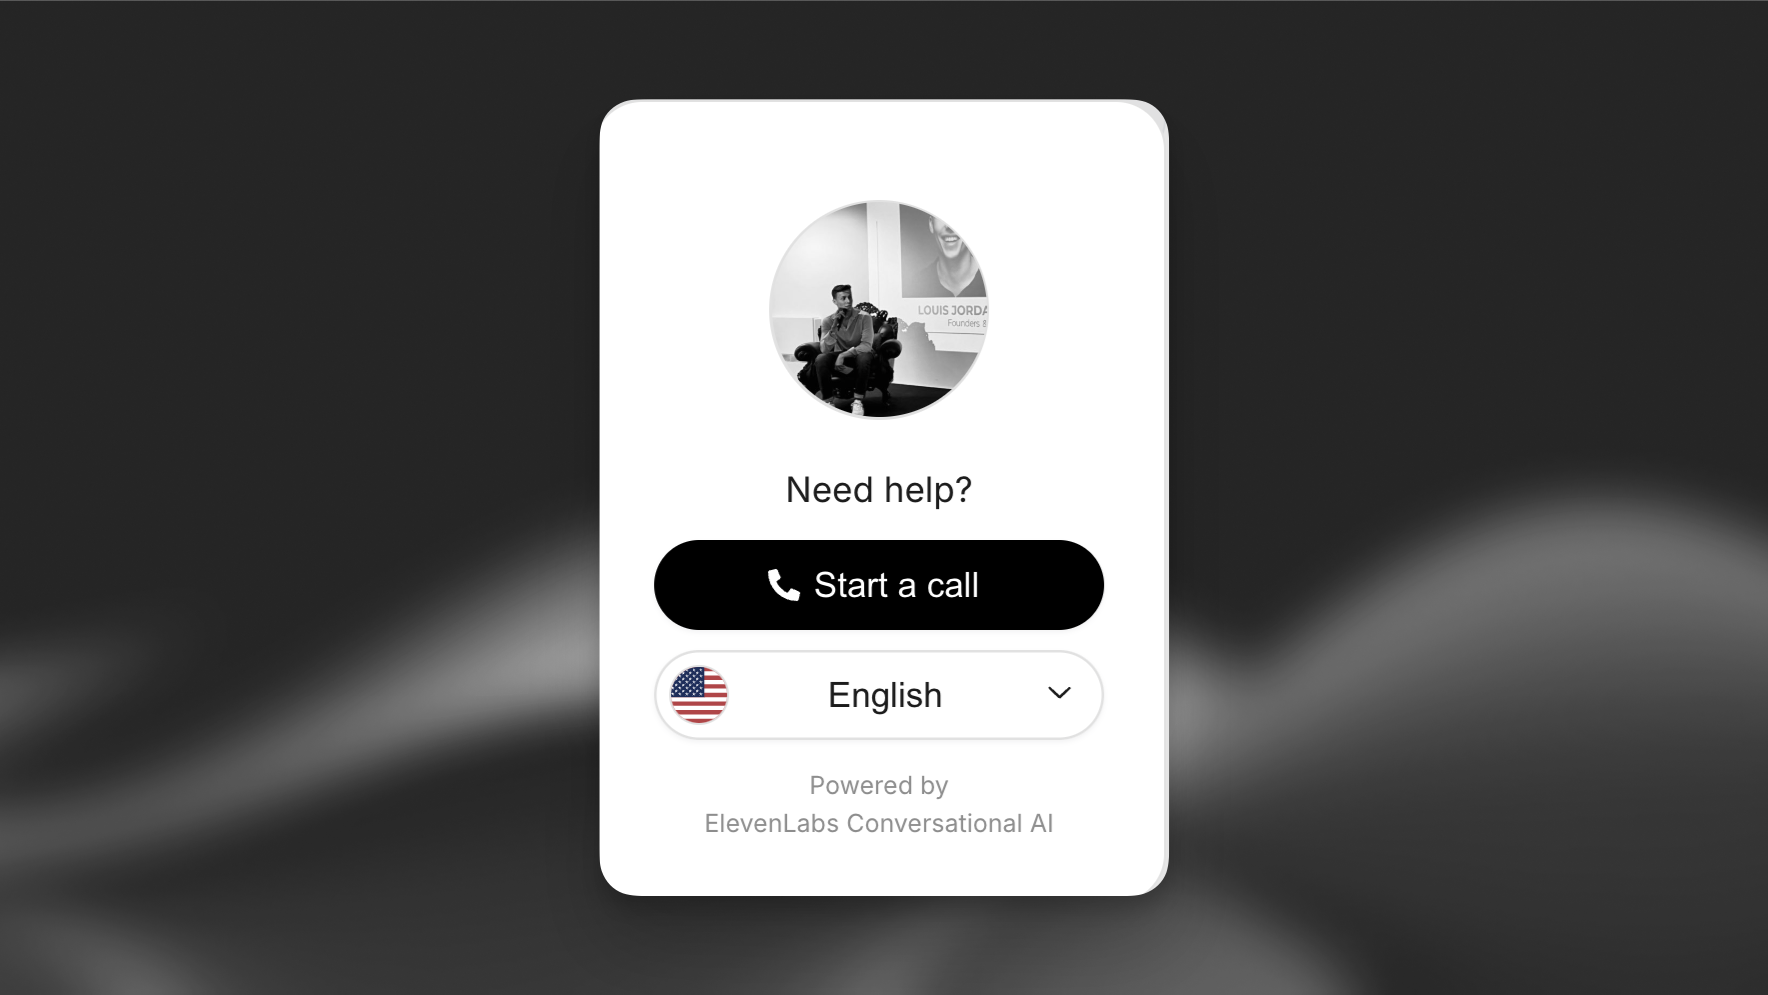
Visual customization
Customize the widget’s appearance, text content, language selection, and more.
Update via the dashboard
Update via the CLI
Update via the API
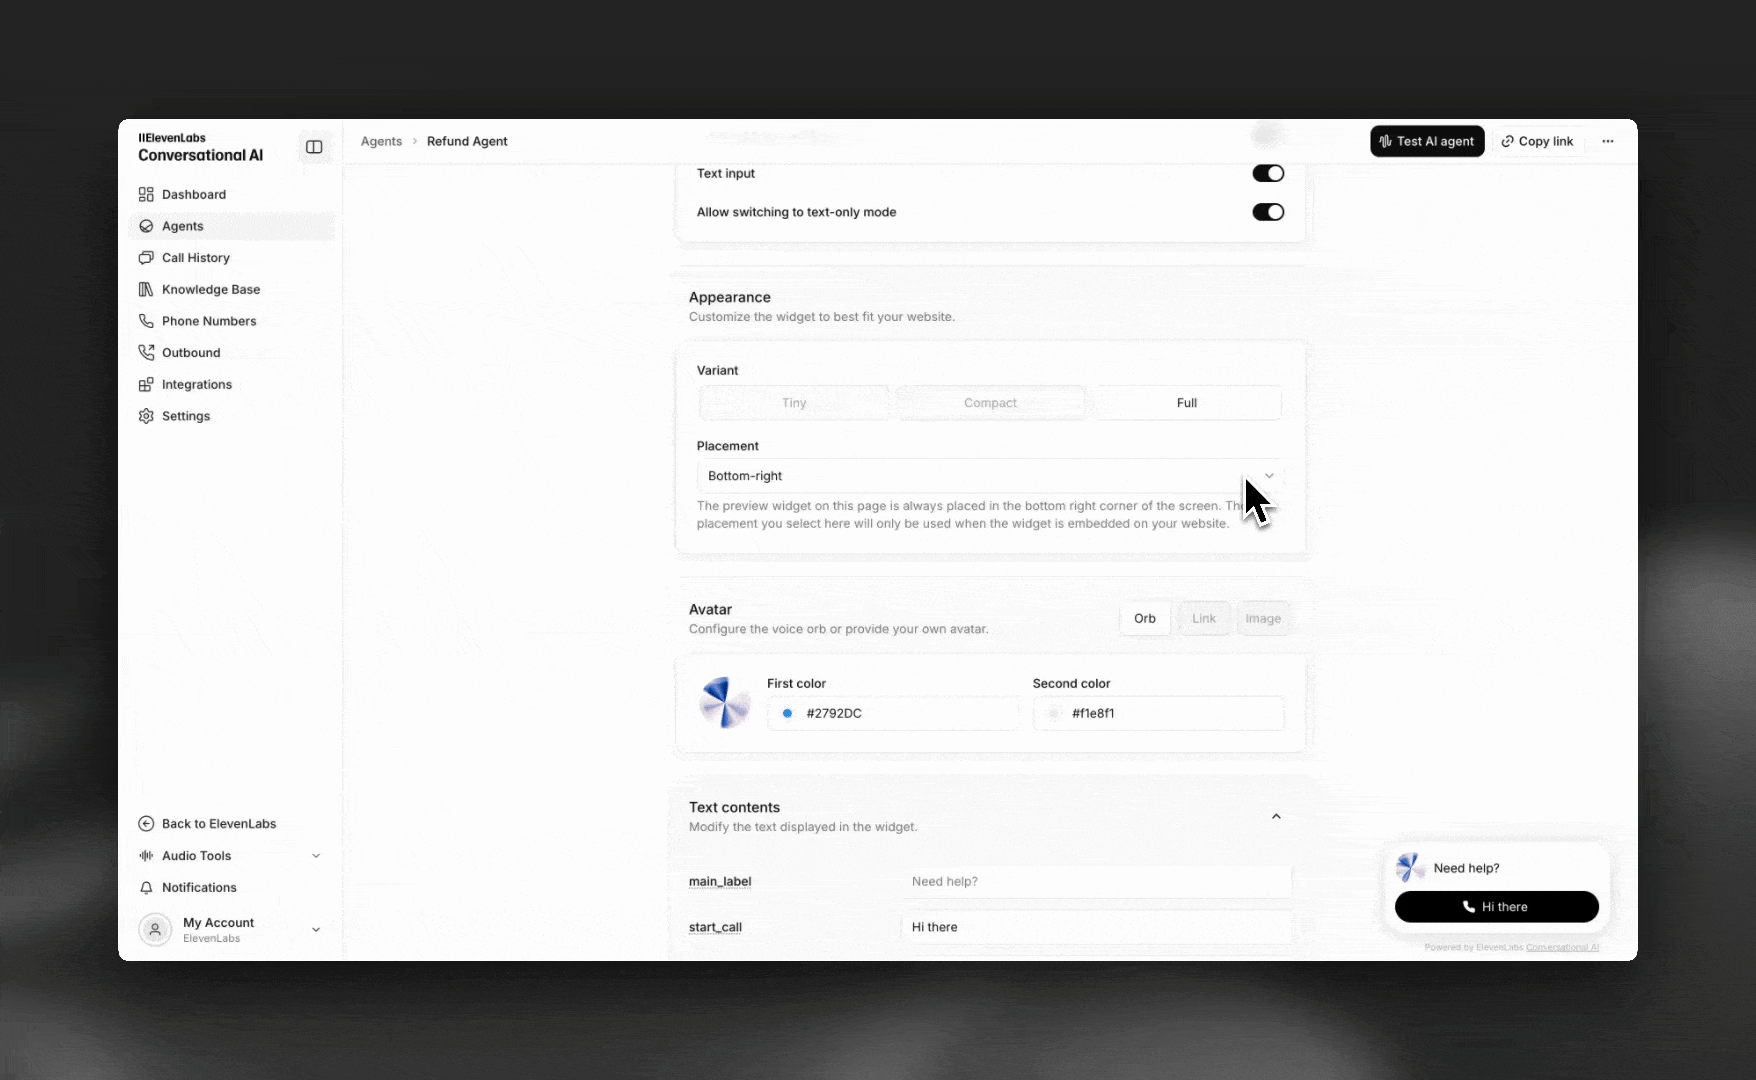
Open your agent in the dashboard and navigate to the Widget tab to customize appearance, avatar, text, terms, language support, and more.
Appearance
Feedback
Avatar
Display text
Terms
Language
Muting
Shareable page
Customize the widget colors and shapes to match your brand identity.
Advanced implementation
For more advanced customization, you should use the type-safe ElevenAgents SDKs with a Next.js, React, or Python application.
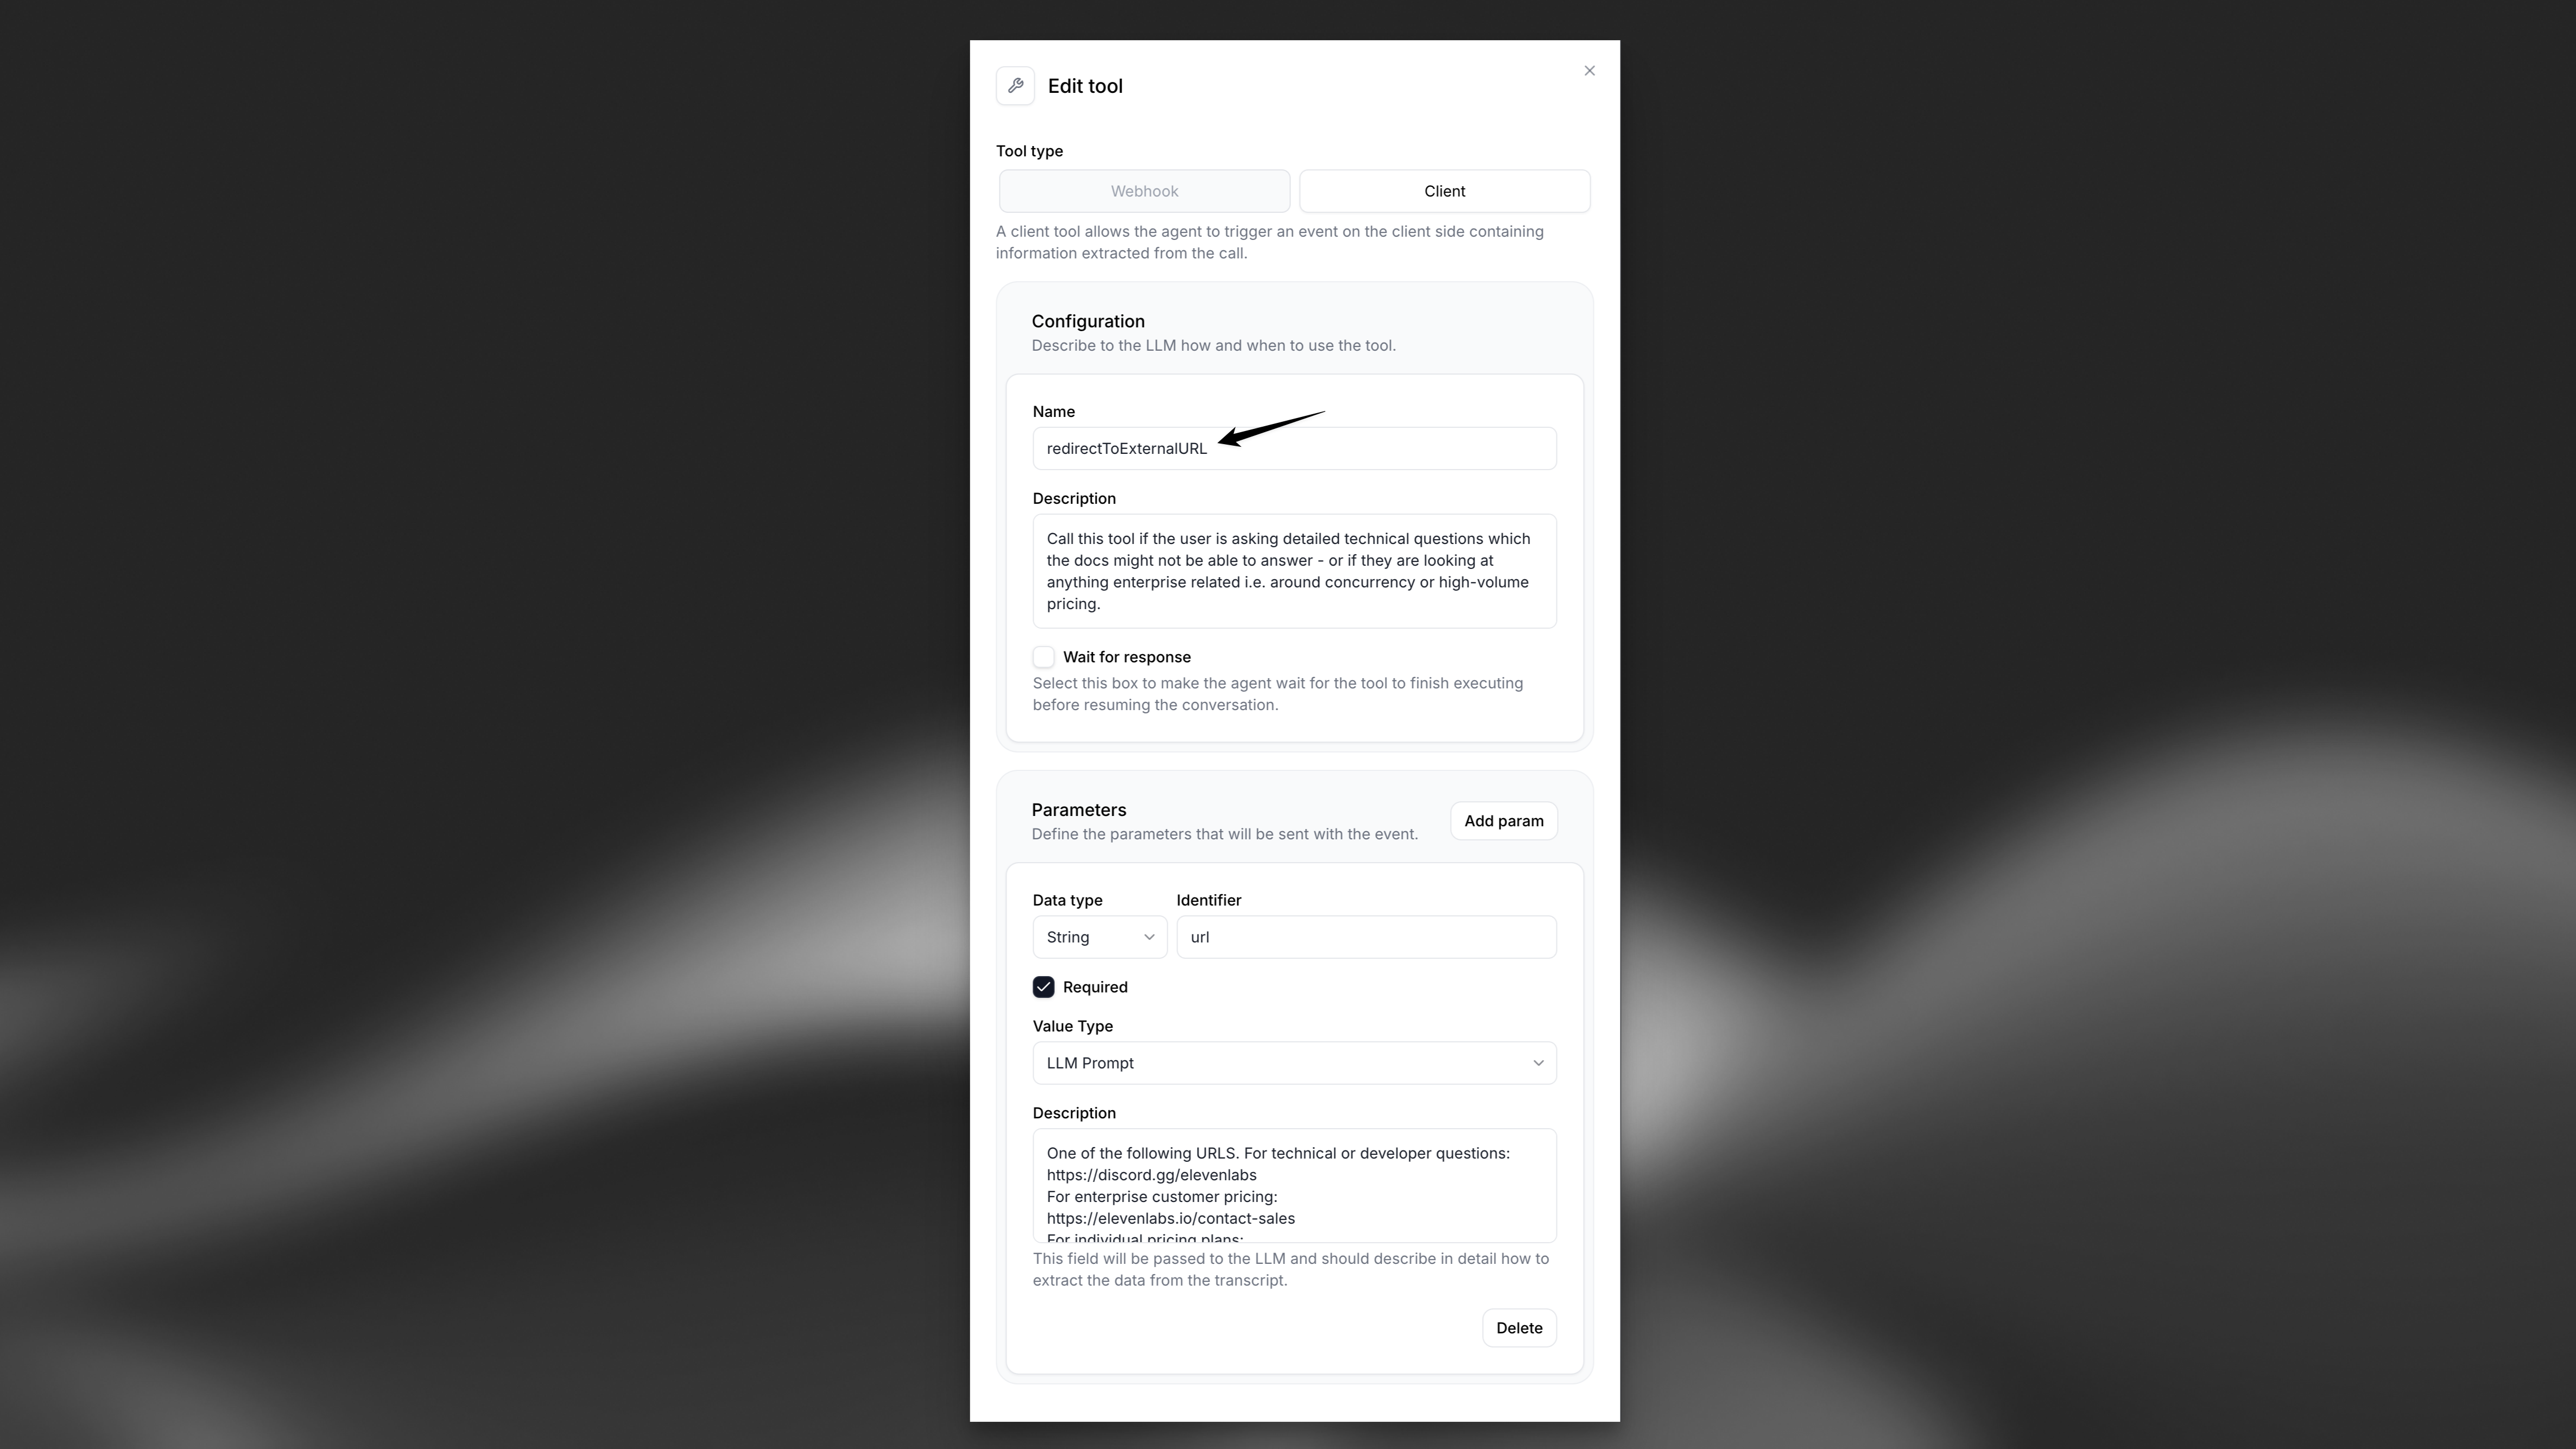
Client Tools
Client tools allow you to extend the functionality of the widget by adding event listeners. This enables the widget to perform actions such as:
- Redirecting the user to a specific page
- Sending an email to your support team
- Redirecting the user to an external URL
To see examples of these tools in action, start a call with the agent in the bottom right corner of this page. The source code is available on GitHub for reference.
Creating a Client Tool
To create your first client tool, follow the client tools guide.
Example: Creating the redirectToExternalURL Tool
Example: Creating the redirectToExternalURL Tool
Example Implementation
Below is an example of how to handle the redirectToExternalURL tool triggered by the widget in your JavaScript code:
Explore our type-safe SDKs for React, Next.js, and Python implementations.