Bot do Telegram para transcrição

Crie um bot do Telegram que transcreve mensagens de áudio e vídeo em mais de 90 idiomas usando TypeScript com Deno nas Supabase Edge Functions.

Guia prático · Pressupõe que você concluiu o guia de início rápido do Speech to Text e tem um token de bot do Telegram e uma conta no Supabase.

Introdução

Neste tutorial, você aprenderá a criar um bot do Telegram que transcreve mensagens de áudio e vídeo em mais de 90 idiomas usando TypeScript e o modelo ElevenLabs Scribe pela API de Speech to Text.

Requisitos

Configuração

Registre um bot do Telegram

Use o BotFather para criar um novo bot do Telegram. Execute o comando /newbot e siga as instruções para criar um novo bot. Ao final, você receberá o token secreto do seu bot. Anote-o com segurança para a próxima etapa.
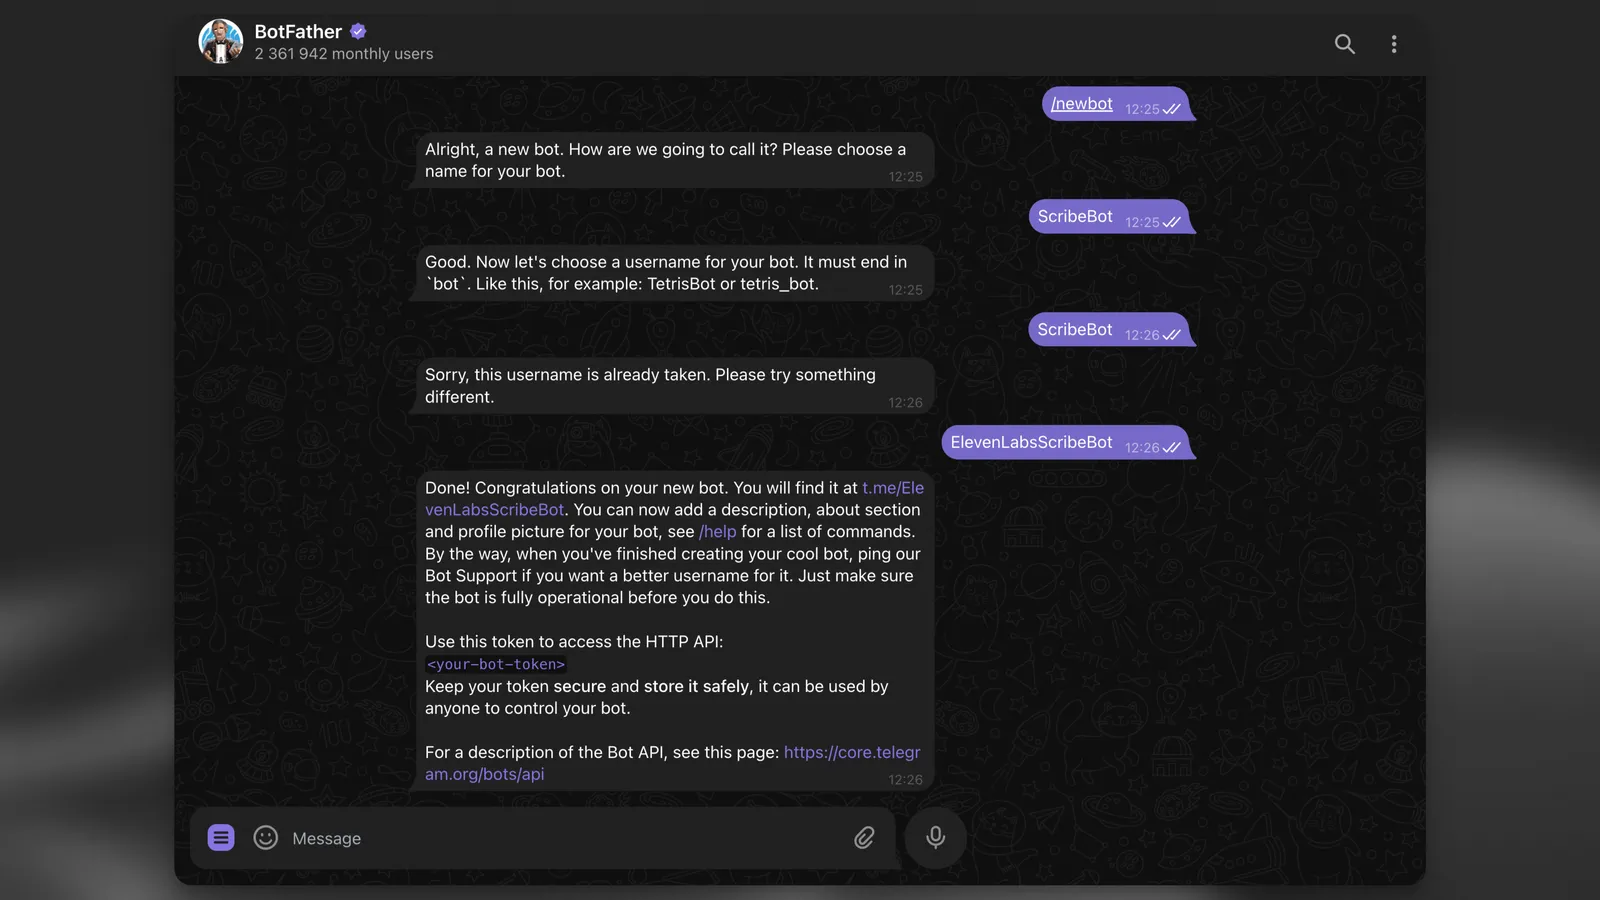
BotFather

Crie um projeto Supabase localmente

Depois de instalar a CLI do Supabase, execute o comando a seguir para criar um novo projeto Supabase localmente:

supabase init

Crie uma tabela de banco de dados para registrar os resultados das transcrições

Em seguida, crie uma nova tabela de banco de dados para registrar os resultados das transcrições:

supabase migrations new init

Isso criará um novo arquivo de migração no diretório supabase/migrations. Abra o arquivo e adicione o seguinte SQL:

supabase/migrations/init.sql
CREATE TABLE IF NOT EXISTS transcription_logs (
id BIGSERIAL PRIMARY KEY,
file_type VARCHAR NOT NULL,
duration INTEGER NOT NULL,
chat_id BIGINT NOT NULL,
message_id BIGINT NOT NULL,
username VARCHAR,
transcript TEXT,
language_code VARCHAR,
created_at TIMESTAMP WITH TIME ZONE DEFAULT CURRENT_TIMESTAMP,
error TEXT
);
ALTER TABLE transcription_logs ENABLE ROW LEVEL SECURITY;

Crie uma Supabase Edge Function para processar solicitações de webhook do Telegram

Em seguida, crie uma nova Edge Function para processar solicitações de webhook do Telegram:

supabase functions new scribe-bot

Se você usa o VS Code ou o Cursor, selecione y quando a CLI perguntar “Generate VS Code settings for Deno? [y/N]”!

Configure as variáveis de ambiente

No diretório supabase/functions, crie um novo arquivo .env e adicione as seguintes variáveis:

supabase/functions/.env
# Find / create an API key at https://elevenlabs.io/app/settings/api-keys
ELEVENLABS_API_KEY=your_api_key
# The bot token you received from the BotFather.
TELEGRAM_BOT_TOKEN=your_bot_token
# A random secret chosen by you to secure the function.
FUNCTION_SECRET=random_secret

Dependências

O projeto usa algumas dependências:

Como a Supabase Edge Function usa o runtime Deno, você não precisa instalar as dependências. Em vez disso, pode importá-las com o prefixo npm:.

Programe o bot do Telegram

No arquivo scribe-bot/index.ts que você acabou de criar, adicione o código a seguir:

supabase/functions/scribe-bot/index.ts
import { Bot, webhookCallback } from "https://deno.land/x/grammy@v1.34.0/mod.ts";
import "jsr:@supabase/functions-js/edge-runtime.d.ts";
import { createClient } from "jsr:@supabase/supabase-js@2";
import { ElevenLabsClient } from "npm:elevenlabs@1.50.5";
console.log(`Function "elevenlabs-scribe-bot" up and running!`);
const elevenlabs = new ElevenLabsClient({
apiKey: Deno.env.get("ELEVENLABS_API_KEY") || "",
});
const supabase = createClient(
Deno.env.get("SUPABASE_URL") || "",
Deno.env.get("SUPABASE_SERVICE_ROLE_KEY") || ""
);
async function scribe({
fileURL,
fileType,
duration,
chatId,
messageId,
username,
}: {
fileURL: string;
fileType: string;
duration: number;
chatId: number;
messageId: number;
username: string;
}) {
let transcript: string | null = null;
let languageCode: string | null = null;
let errorMsg: string | null = null;
try {
const sourceFileArrayBuffer = await fetch(fileURL).then((res) => res.arrayBuffer());
const sourceBlob = new Blob([sourceFileArrayBuffer], {
type: fileType,
});
const scribeResult = await elevenlabs.speechToText.convert({
file: sourceBlob,
model_id: "scribe_v2",
tag_audio_events: false,
});
transcript = scribeResult.text;
languageCode = scribeResult.language_code;
// Reply to the user with the transcript
await bot.api.sendMessage(chatId, transcript, {
reply_parameters: { message_id: messageId },
});
} catch (error) {
errorMsg = error.message;
console.log(errorMsg);
await bot.api.sendMessage(chatId, "Sorry, there was an error. Please try again.", {
reply_parameters: { message_id: messageId },
});
}
// Write log to Supabase.
const logLine = {
file_type: fileType,
duration,
chat_id: chatId,
message_id: messageId,
username,
language_code: languageCode,
error: errorMsg,
};
console.log({ logLine });
await supabase.from("transcription_logs").insert({ ...logLine, transcript });
}
const telegramBotToken = Deno.env.get("TELEGRAM_BOT_TOKEN");
const bot = new Bot(telegramBotToken || "");
const startMessage = `Welcome to the ElevenLabs Scribe Bot\\! I can transcribe speech in 90\\+ languages with super high accuracy\\!
\nTry it out by sending or forwarding me a voice message, video, or audio file\\!
\n[Learn more about Scribe](https://elevenlabs.io/speech-to-text) or [build your own bot](https://elevenlabs.io/developers/guides/cookbooks/speech-to-text/telegram-bot)\\!
`;
bot.command("start", (ctx) => ctx.reply(startMessage.trim(), { parse_mode: "MarkdownV2" }));
bot.on([":voice", ":audio", ":video"], async (ctx) => {
try {
const file = await ctx.getFile();
const fileURL = `https://api.telegram.org/file/bot${telegramBotToken}/${file.file_path}`;
const fileMeta = ctx.message?.video ?? ctx.message?.voice ?? ctx.message?.audio;
if (!fileMeta) {
return ctx.reply("No video|audio|voice metadata found. Please try again.");
}
// Run the transcription in the background.
EdgeRuntime.waitUntil(
scribe({
fileURL,
fileType: fileMeta.mime_type!,
duration: fileMeta.duration,
chatId: ctx.chat.id,
messageId: ctx.message?.message_id!,
username: ctx.from?.username || "",
})
);
// Reply to the user immediately to let them know we received their file.
return ctx.reply("Received. Scribing...");
} catch (error) {
console.error(error);
return ctx.reply(
"Sorry, there was an error getting the file. Please try again with a smaller file!"
);
}
});
const handleUpdate = webhookCallback(bot, "std/http");
Deno.serve(async (req) => {
try {
const url = new URL(req.url);
if (url.searchParams.get("secret") !== Deno.env.get("FUNCTION_SECRET")) {
return new Response("not allowed", { status: 405 });
}
return await handleUpdate(req);
} catch (err) {
console.error(err);
}
});

Análise detalhada do código

Há alguns pontos importantes sobre o código. Vamos analisá-lo passo a passo.

1

Processamento da solicitação recebida

Para processar a solicitação recebida, use o manipulador Deno.serve. O manipulador verifica se a solicitação contém o segredo correto e então a passa para a função handleUpdate.

const handleUpdate = webhookCallback(bot, 'std/http');
Deno.serve(async (req) => {
try {
const url = new URL(req.url);
if (url.searchParams.get('secret') !== Deno.env.get('FUNCTION_SECRET')) {
return new Response('not allowed', { status: 405 });
}
return await handleUpdate(req);
} catch (err) {
console.error(err);
}
});
2

Processamento de mensagens de voz, áudio e vídeo

O framework grammY oferece uma forma prática de filtrar tipos específicos de mensagem. Neste caso, o bot escuta mensagens de voz, áudio e vídeo.

Usando o contexto da solicitação, o bot extrai os metadados do arquivo e usa EdgeRuntime.waitUntil das tarefas em segundo plano do Supabase para executar a transcrição em segundo plano.

Assim, você pode dar uma resposta imediata ao usuário e processar a transcrição do arquivo em segundo plano.

bot.on([':voice', ':audio', ':video'], async (ctx) => {
try {
const file = await ctx.getFile();
const fileURL = `https://api.telegram.org/file/bot${telegramBotToken}/${file.file_path}`;
const fileMeta = ctx.message?.video ?? ctx.message?.voice ?? ctx.message?.audio;
if (!fileMeta) {
return ctx.reply('No video|audio|voice metadata found. Please try again.');
}
// Run the transcription in the background.
EdgeRuntime.waitUntil(
scribe({
fileURL,
fileType: fileMeta.mime_type!,
duration: fileMeta.duration,
chatId: ctx.chat.id,
messageId: ctx.message?.message_id!,
username: ctx.from?.username || '',
})
);
// Reply to the user immediately to let them know we received their file.
return ctx.reply('Received. Scribing...');
} catch (error) {
console.error(error);
return ctx.reply(
'Sorry, there was an error getting the file. Please try again with a smaller file!'
);
}
});
3

Transcrição com a API da ElevenLabs

Por fim, no worker em segundo plano, o bot usa o SDK JavaScript da ElevenLabs para transcrever o arquivo. Quando a transcrição é concluída, o bot responde ao usuário com a transcrição e grava uma entrada de log no banco de dados do Supabase usando supabase-js.

const elevenlabs = new ElevenLabsClient({
apiKey: Deno.env.get('ELEVENLABS_API_KEY') || '',
});
const supabase = createClient(
Deno.env.get('SUPABASE_URL') || '',
Deno.env.get('SUPABASE_SERVICE_ROLE_KEY') || ''
);
async function scribe({
fileURL,
fileType,
duration,
chatId,
messageId,
username,
}: {
fileURL: string;
fileType: string;
duration: number;
chatId: number;
messageId: number;
username: string;
}) {
let transcript: string | null = null;
let languageCode: string | null = null;
let errorMsg: string | null = null;
try {
const sourceFileArrayBuffer = await fetch(fileURL).then((res) => res.arrayBuffer());
const sourceBlob = new Blob([sourceFileArrayBuffer], {
type: fileType,
});
const scribeResult = await elevenlabs.speechToText.convert({
file: sourceBlob,
model_id: 'scribe_v2',
tag_audio_events: false,
});
transcript = scribeResult.text;
languageCode = scribeResult.language_code;
// Reply to the user with the transcript
await bot.api.sendMessage(chatId, transcript, {
reply_parameters: { message_id: messageId },
});
} catch (error) {
errorMsg = error.message;
console.log(errorMsg);
await bot.api.sendMessage(chatId, 'Sorry, there was an error. Please try again.', {
reply_parameters: { message_id: messageId },
});
}
// Write log to Supabase.
const logLine = {
file_type: fileType,
duration,
chat_id: chatId,
message_id: messageId,
username,
language_code: languageCode,
error: errorMsg,
};
console.log({ logLine });
await supabase.from('transcription_logs').insert({ ...logLine, transcript });
}

Faça o deploy no Supabase

Se ainda não tiver feito isso, crie uma nova conta no Supabase em database.new e vincule o projeto local à sua conta do Supabase:

supabase link

Aplique as migrações do banco de dados

Execute o comando a seguir para aplicar as migrações do banco de dados do diretório supabase/migrations:

supabase db push

Acesse o editor de tabelas no painel do Supabase e você verá uma tabela transcription_logs vazia.
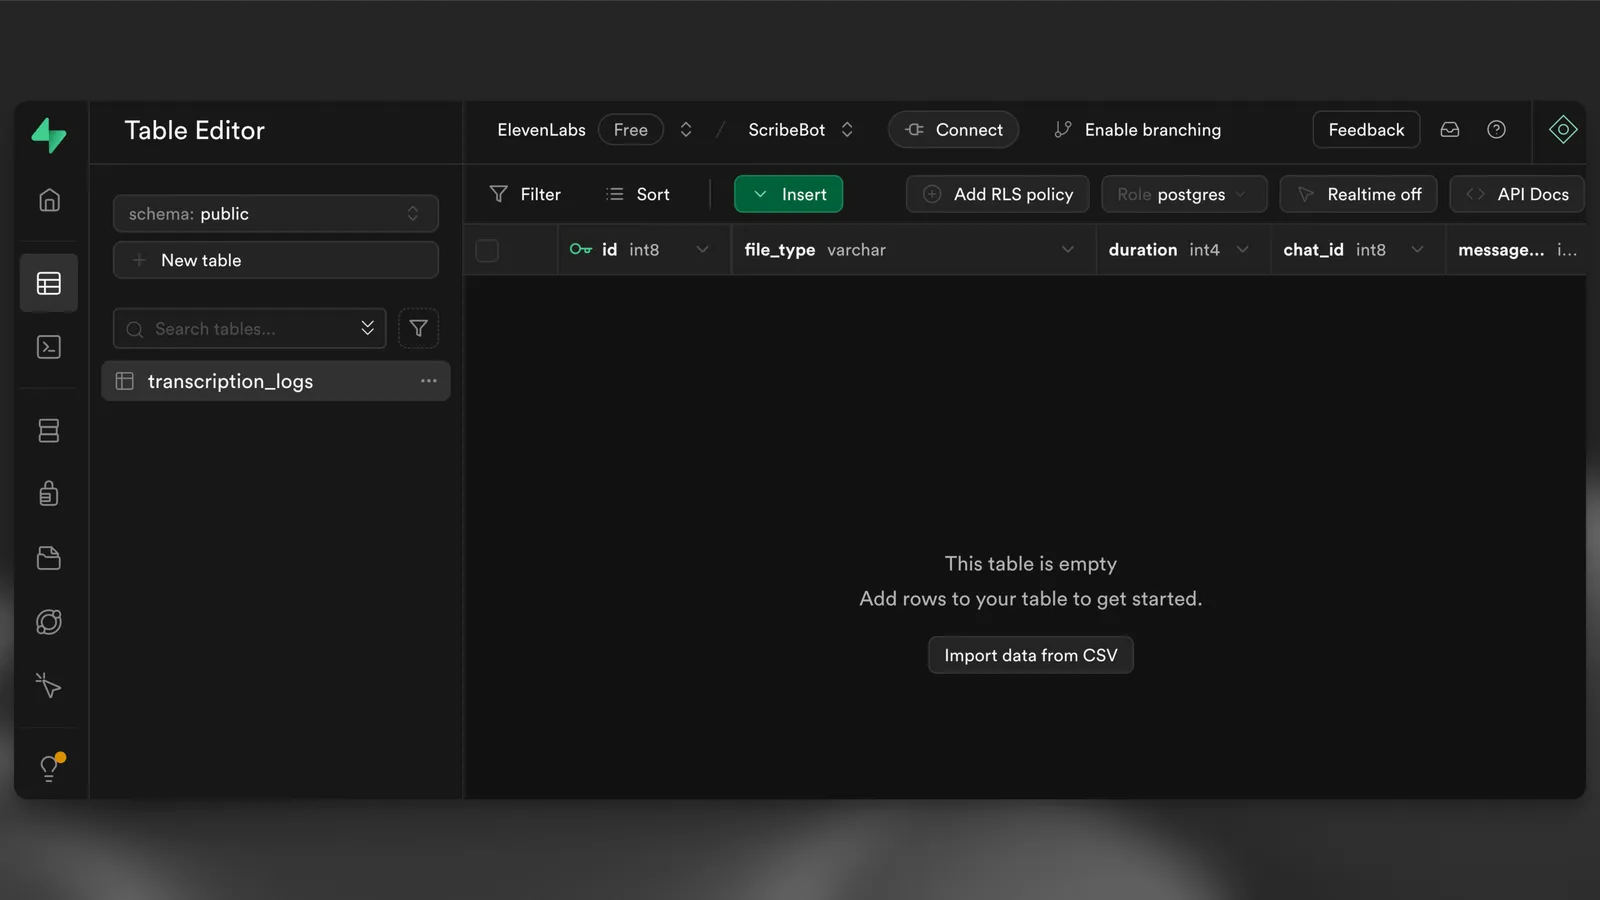
Tabela vazia

Por fim, execute o comando a seguir para fazer o deploy da Edge Function:

supabase functions deploy --no-verify-jwt scribe-bot

Acesse a visualização de Edge Functions no painel do Supabase e você verá a função scribe-bot implantada. Anote a URL da função, pois precisará dela mais tarde. Ela deve ser parecida com https://<project-ref>.functions.supabase.co/scribe-bot.
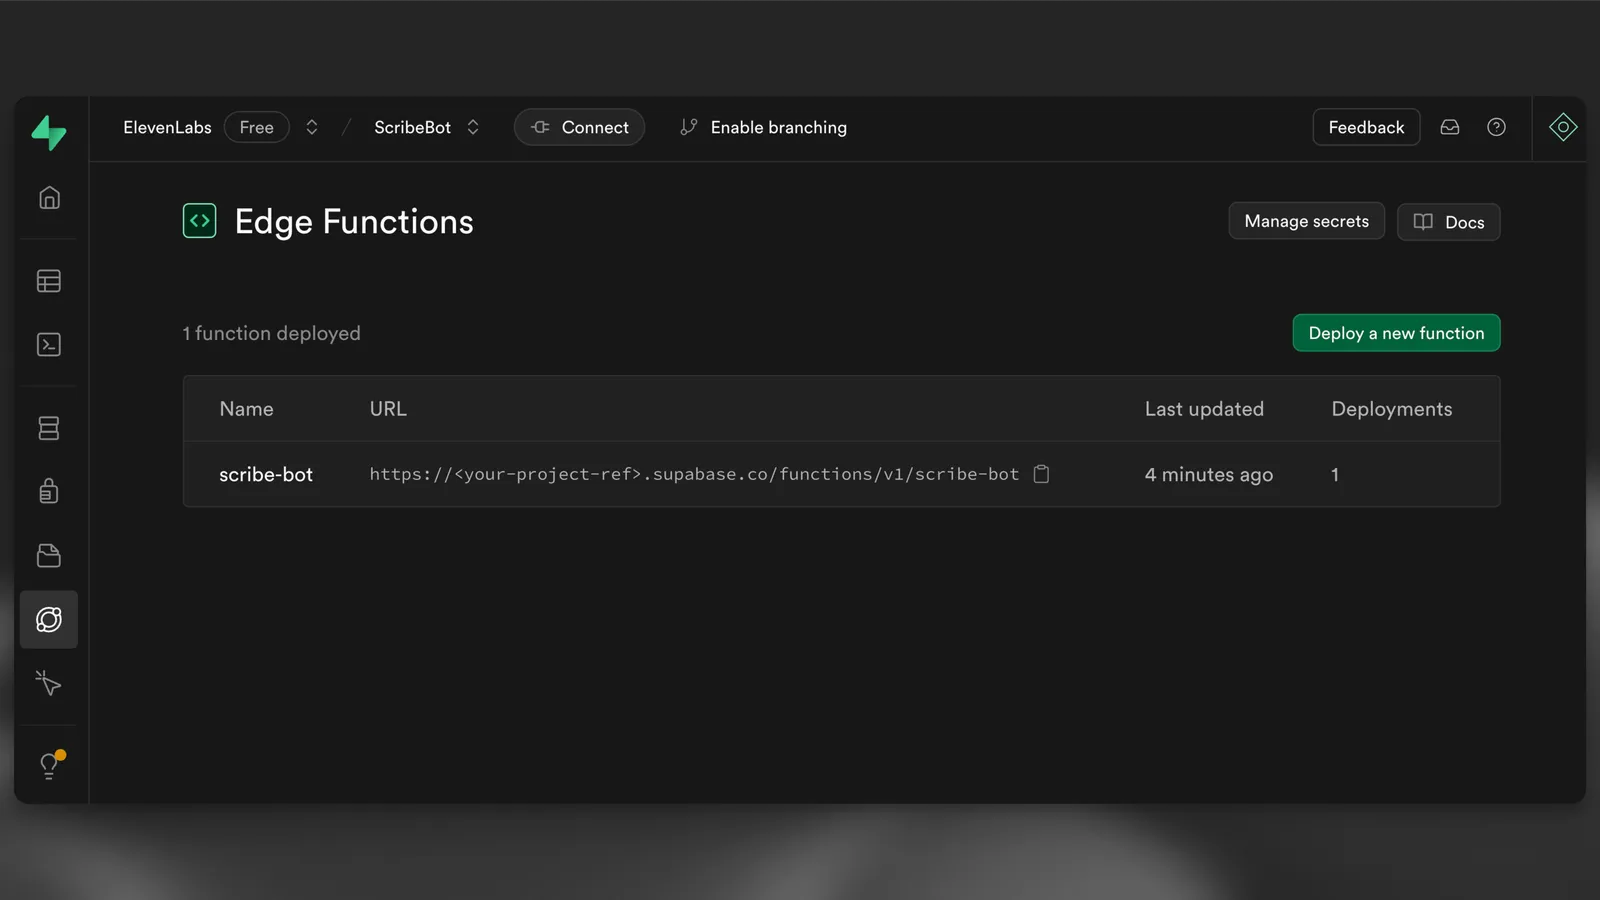
Edge Function implantada

Configure o webhook

Defina a URL do webhook do seu bot como https://<PROJECT_REFERENCE>.functions.supabase.co/telegram-bot (substituindo <...> pelos respectivos valores). Para isso, basta executar uma solicitação GET para a seguinte URL (no seu navegador, por exemplo):

https://api.telegram.org/bot<TELEGRAM_BOT_TOKEN>/setWebhook?url=https://<PROJECT_REFERENCE>.supabase.co/functions/v1/scribe-bot?secret=<FUNCTION_SECRET>

Observe que FUNCTION_SECRET é o segredo que você definiu no arquivo .env.
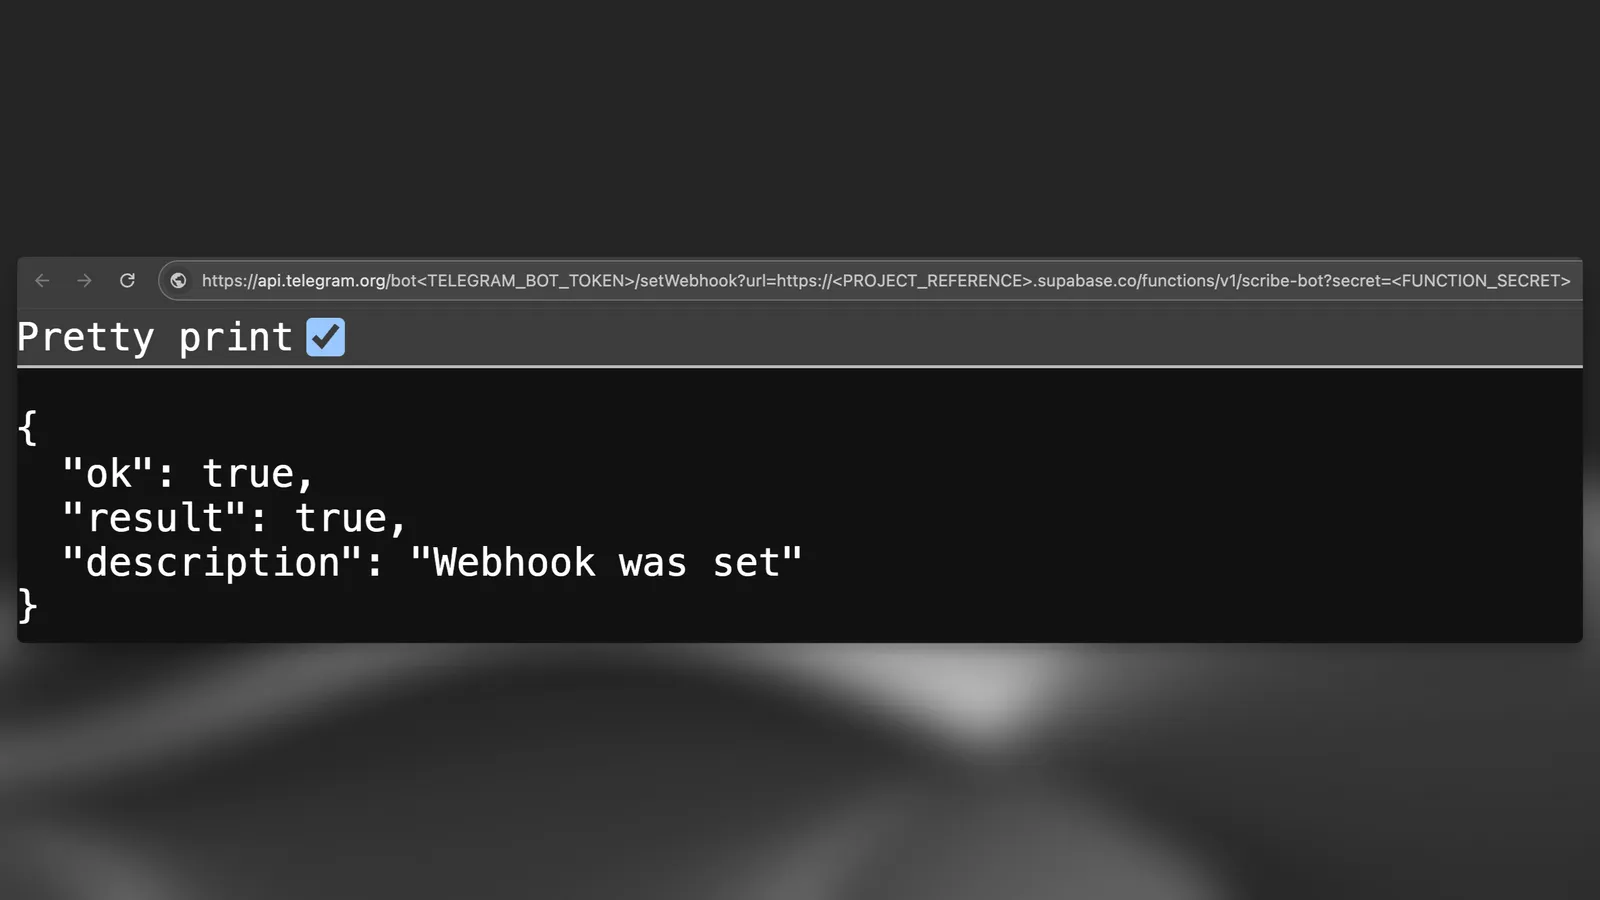
Configurar webhook

Defina os segredos da função

Agora que todos os seus segredos estão configurados localmente, você pode executar o comando a seguir para defini-los no seu projeto Supabase:

supabase secrets set --env-file supabase/functions/.env

Teste o bot

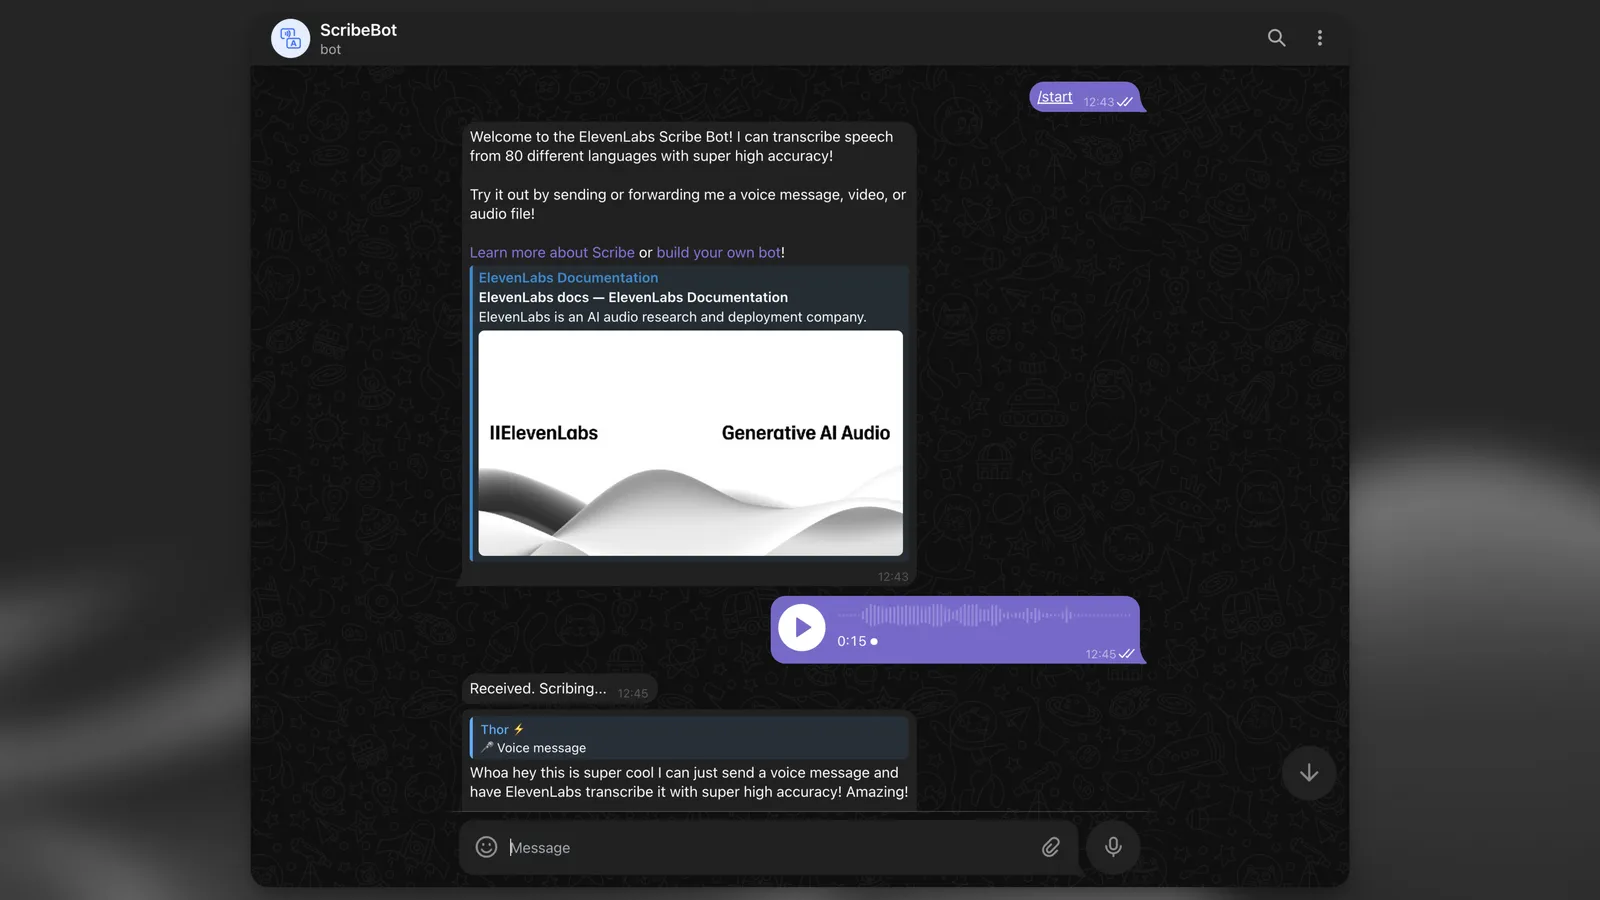
Por fim, você pode testar o bot enviando uma mensagem de voz, um arquivo de áudio ou vídeo.
Testar o bot

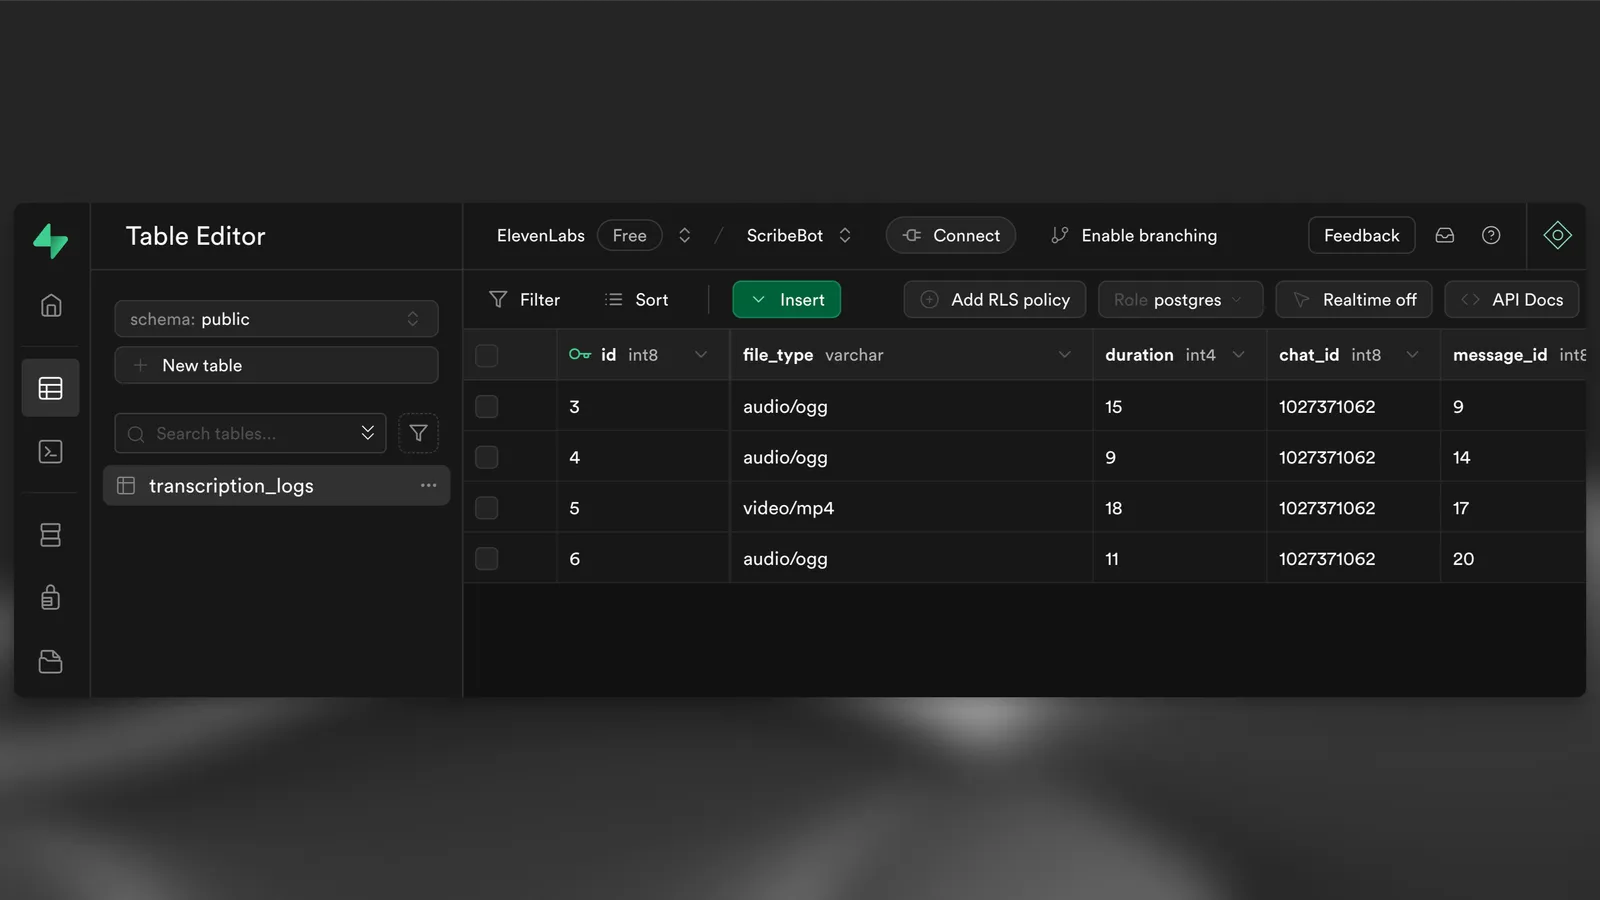
Depois que a transcrição aparecer como resposta, volte ao editor de tabelas no painel do Supabase e você verá uma nova linha na tabela transcription_logs.
Nova linha na tabela

Próximas etapas