

Generate audio in real-time
This guide shows you how to generate audio in real-time via a WebSocket connection.
WebSocket streaming is a method of sending and receiving data over a single, long-lived connection. This method is useful for real-time applications where you need to stream audio data as it becomes available.
If you want to quickly test out the latency (time to first byte) of a WebSocket connection to the ElevenLabs text-to-speech API, you can install elevenlabs-latency via npm and follow the instructions here.
WebSockets are available for Text to Speech and the Agents Platform. This guide covers the Text
to Speech WebSocket (/v1/text-to-speech/{voice_id}/stream-input). That endpoint does not
support the eleven_v3 or eleven_v4 models. For Eleven v3 or Eleven v4 dialogue over a
WebSocket, see Realtime Text to Dialogue
and Text to Speech vs Text to Dialogue
WebSockets.
Requirements
- An ElevenLabs account with an API key (here’s how to find your API key).
- Python or Node.js (or another JavaScript runtime) installed on your machine
Setup
Install required dependencies:
Next, create a .env file in your project directory and add your API key:
Initiate the websocket connection
After choosing a voice from the Voice Library and the text to speech model you wish to use, initiate a WebSocket connection to the text to speech API.
Send the input text
Once the WebSocket connection is open, set up voice settings first. Next, send the text message to the API.
Save the audio to file
Read the incoming message from the WebSocket connection and write the audio chunks to a local file.
Run the script
You can run the script by executing the following command in your terminal. An mp3 audio file will be saved in the output directory.
Advanced configuration
The use of WebSockets comes with some advanced settings that you can use to fine-tune your real-time audio generation.
Buffering
When generating real-time audio, two important concepts should be taken into account: Time To First Byte (TTFB) and Buffering. To produce high quality audio and deduce context, the model requires a certain threshold of input text. The more text that is sent in a WebSocket connection, the better the audio quality. If the threshold is not met, the model will add the text to a buffer and generate audio once the buffer is full.
In terms of latency, TTFB is the time it takes for the first byte of audio to be sent to the client. This is important because it affects the perceived latency of the audio. As such, you might want to control the buffer size to balance between quality and latency.
To manage this, you can use the chunk_length_schedule parameter when either initializing the WebSocket connection or when sending text. This parameter is an array of integers that represent the number of characters that will be sent to the model before generating audio. For example, if you set chunk_length_schedule to [120, 160, 250, 290], the model will generate audio after 120, 160, 250, and 290 characters have been sent, respectively.
Here’s an example of how this works with the default settings for chunk_length_schedule:
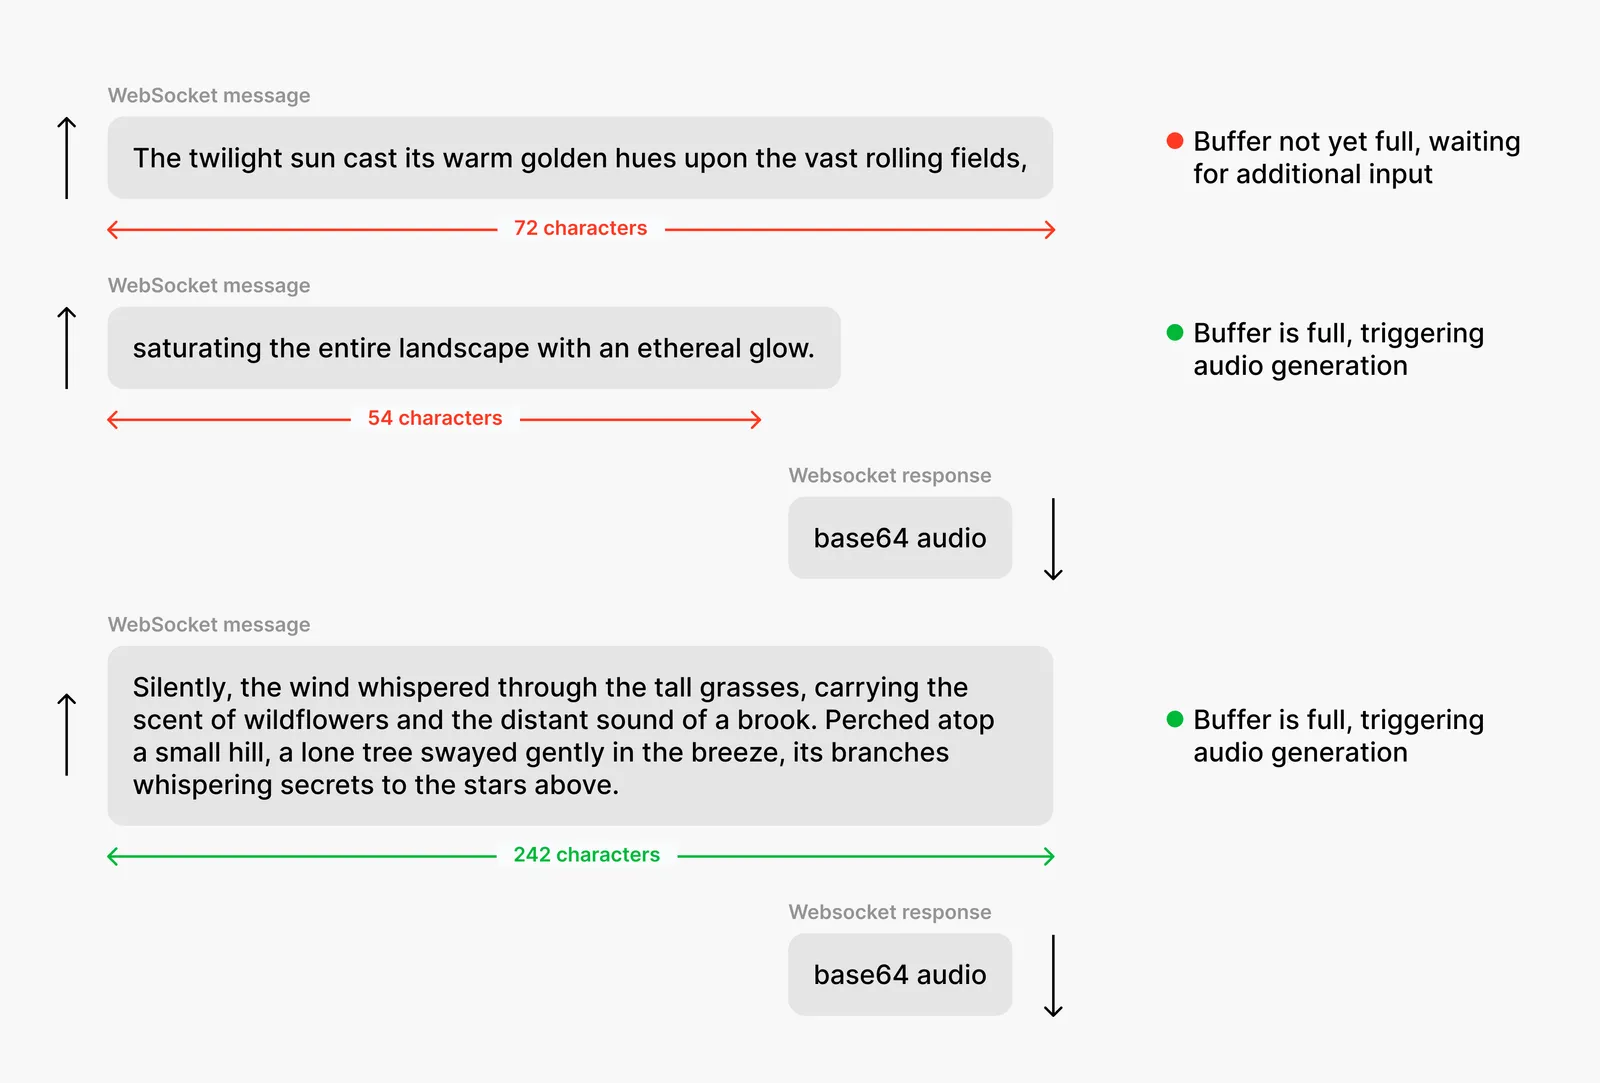
In the above diagram, audio is only generated after the second message is sent to the server. This is because the first message is below the threshold of 120 characters, while the second message brings the total number of characters above the threshold. The third message is above the threshold of 160 characters, so audio is immediately generated and returned to the client.
You can specify a custom value for chunk_length_schedule when initializing the WebSocket connection or when sending text.
In the case that you want force the immediate return of the audio, you can use flush: true to clear out the buffer and force generate any buffered text. This can be useful, for example, when you have reached the end of a document and want to generate audio for the final section.
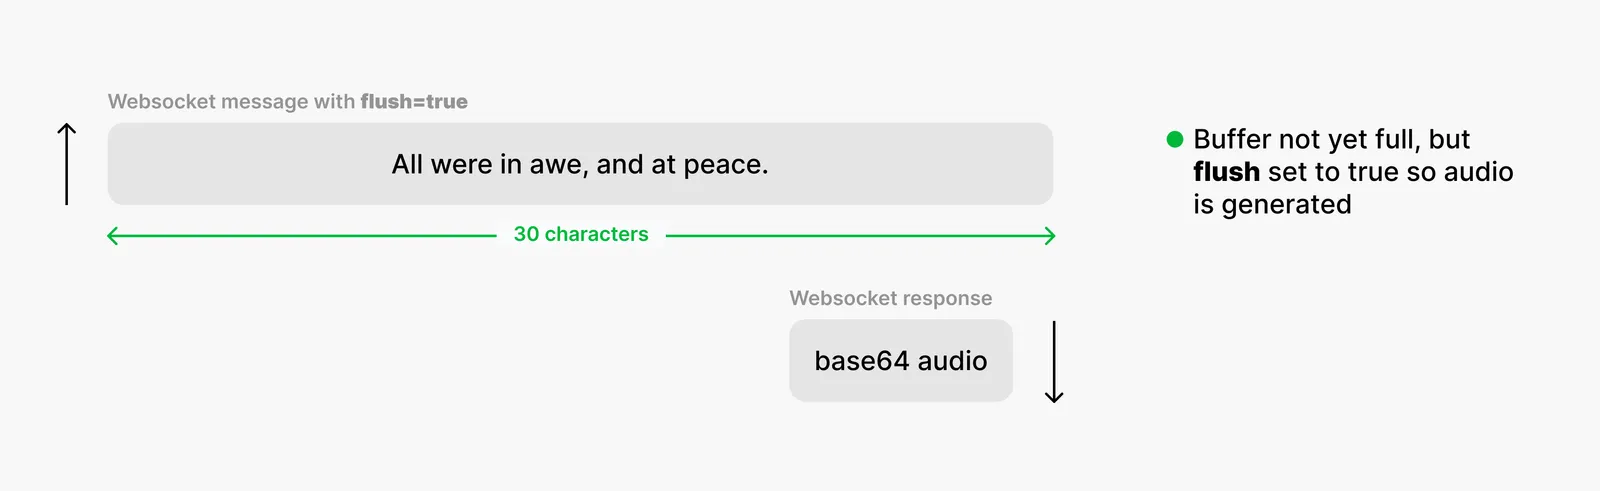
This can be specified on a per-message basis by setting flush: true in the message.
In addition, closing the websocket will automatically force generate any buffered text.
Voice settings
When initializing the WebSocket connections, you can specify the voice settings for the subsequent generations. This allows you to control the speed, stability, and other voice characteristics of the generated audio.
This can be overridden on a per-message basis by specifying a different voice_settings in the message.
Pronunciation dictionaries
You can use pronunciation dictionaries to control the pronunciation of specific words or phrases. This can be useful for ensuring that certain words are pronounced correctly or for adding emphasis to certain words or phrases.
Unlike voice_settings and generation_config, pronunciation dictionaries must be specified in the “Initialize Connection” message. See the API Reference for more information.
When using phoneme-based pronunciation dictionaries with WebSockets, you must add enable_ssml_parsing=true as a query parameter to the WebSocket URI. For example:
Best practice
- We suggest using the default setting for
chunk_length_scheduleingeneration_config. - When developing a real-time conversational agent application, we advise using
flush: truealong with the text at the end of conversation turn to ensure timely audio generation. - If the default setting doesn’t provide optimal latency for your use case, you can modify the
chunk_length_schedule. However, be mindful that reducing latency through this adjustment may come at the expense of quality.
Tips
- The WebSocket connection will automatically close after 20 seconds of inactivity. To keep the connection open, you can send a single space character
" ". Please note that this string must include a space, as sending a fully empty string,"", will close the WebSocket. - Send an empty string to close the WebSocket connection after sending the last text message.
- You can use
alignmentto get the word-level timestamps for each word in the text. This can be useful for aligning the audio with the text in a video or for other applications that require precise timing. See the API Reference for more information.