Billing groups
Billing groups are only available to workspace admins and allow you to set limits for specific groups of users and service accounts within your workspace.
Overview
Billing groups let workspace admins set both credit usage quotas and professional voice clone (PVC) caps for specific groups of users and service accounts. This feature helps organizations control costs and manage consumption by allocating specific quotas to different teams or departments.
Credit usage limits and PVC limits are separate controls and can be managed independently.
With billing groups, you can:
- Set group limits – Define Credit Quotas and Professional Voice Clone (PVC) Caps for specific groups of users and service accounts.
- Control costs – Prevent overspending by limiting usage for specific teams.
- Track consumption – Monitor usage patterns and limits across different groups in your workspace.
- Manage access – Enforce group-level limits when either credit usage or PVC count reaches the configured cap.
How it works
Billing groups apply group-level limits to a subset of users and service accounts within your workspace. Once configured, all usage by members of a billing group counts toward that group’s allocated limit.
Each user or service account can only be in one billing group at a time.
Credit usage limit
The credit usage limit tracks group consumption during the billing cycle. All usage by members of the group counts toward the group’s configured quota.
This limit resets at the start of each subscription cycle, aligned with your workspace billing cycle.
PVC limit
The PVC limit caps the number of professional voice clones owned by members of the group.
PVC limits do not reset each billing cycle.
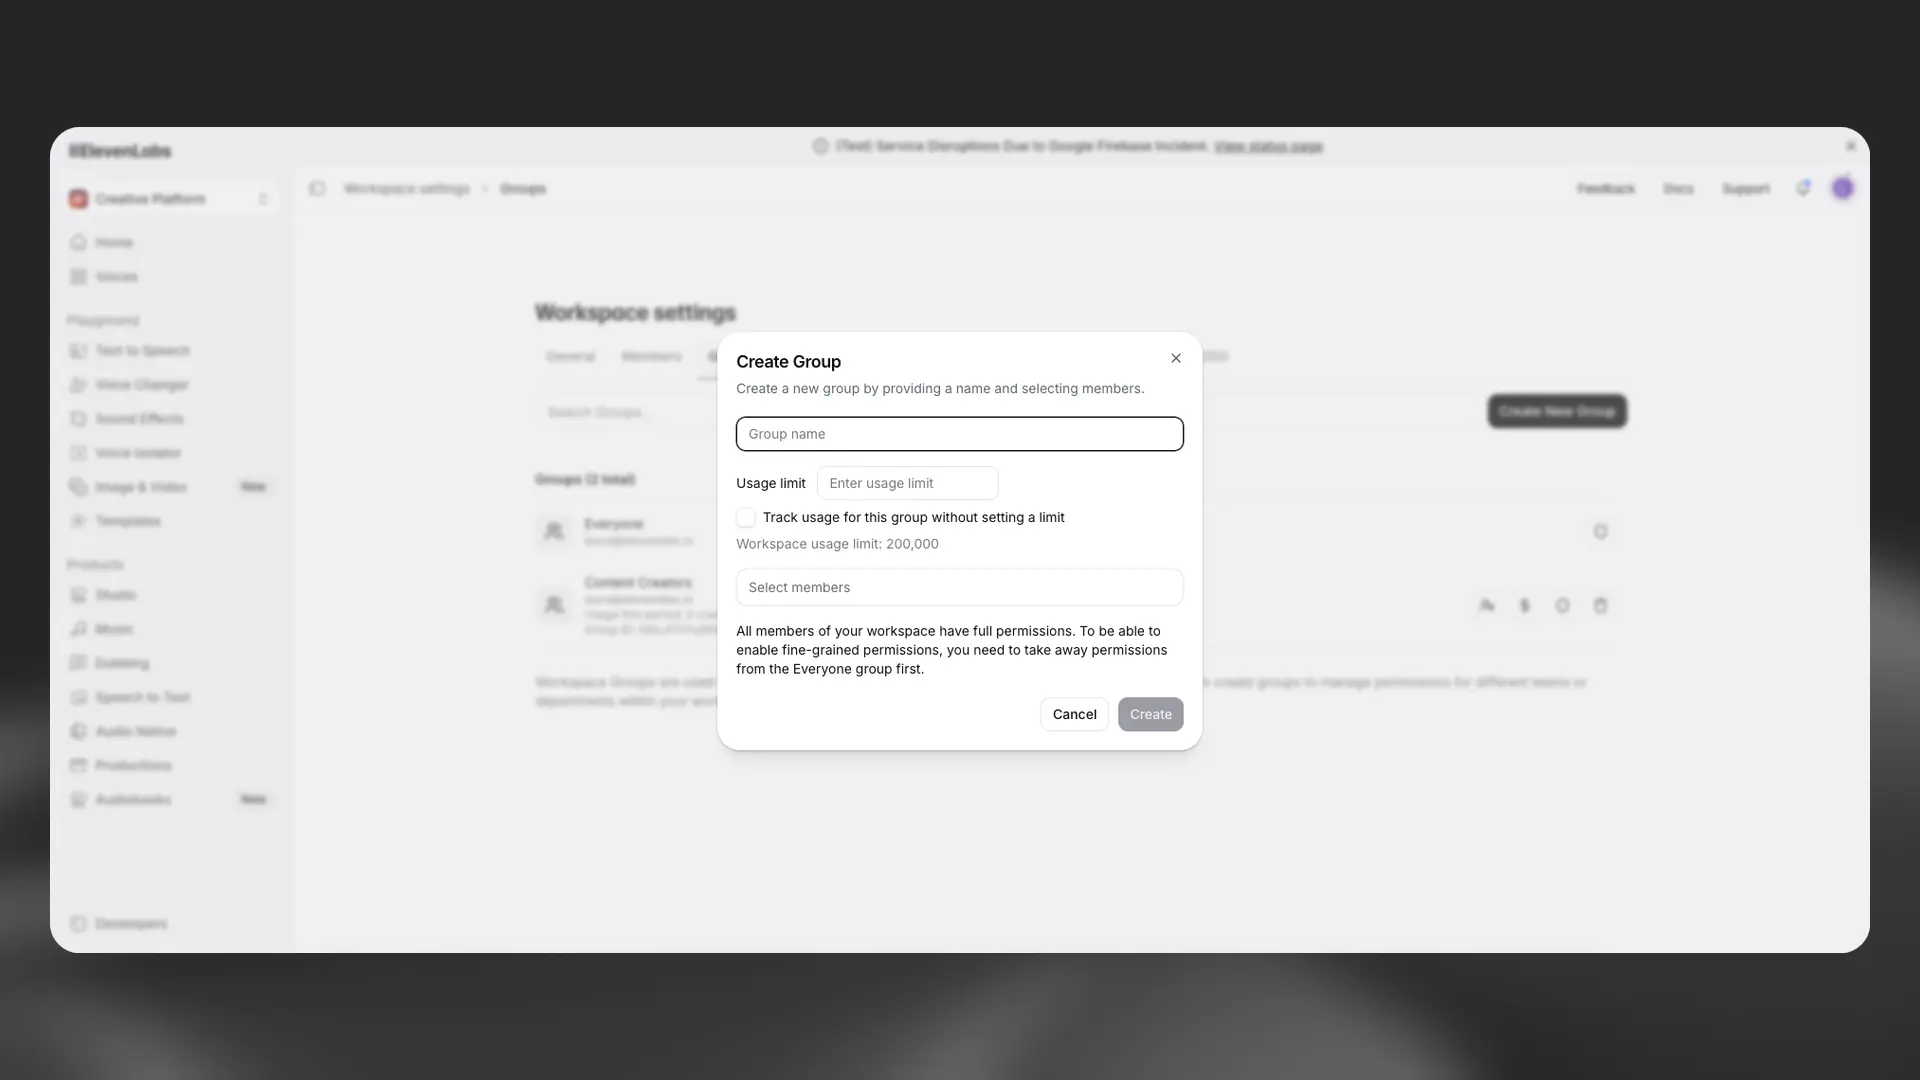
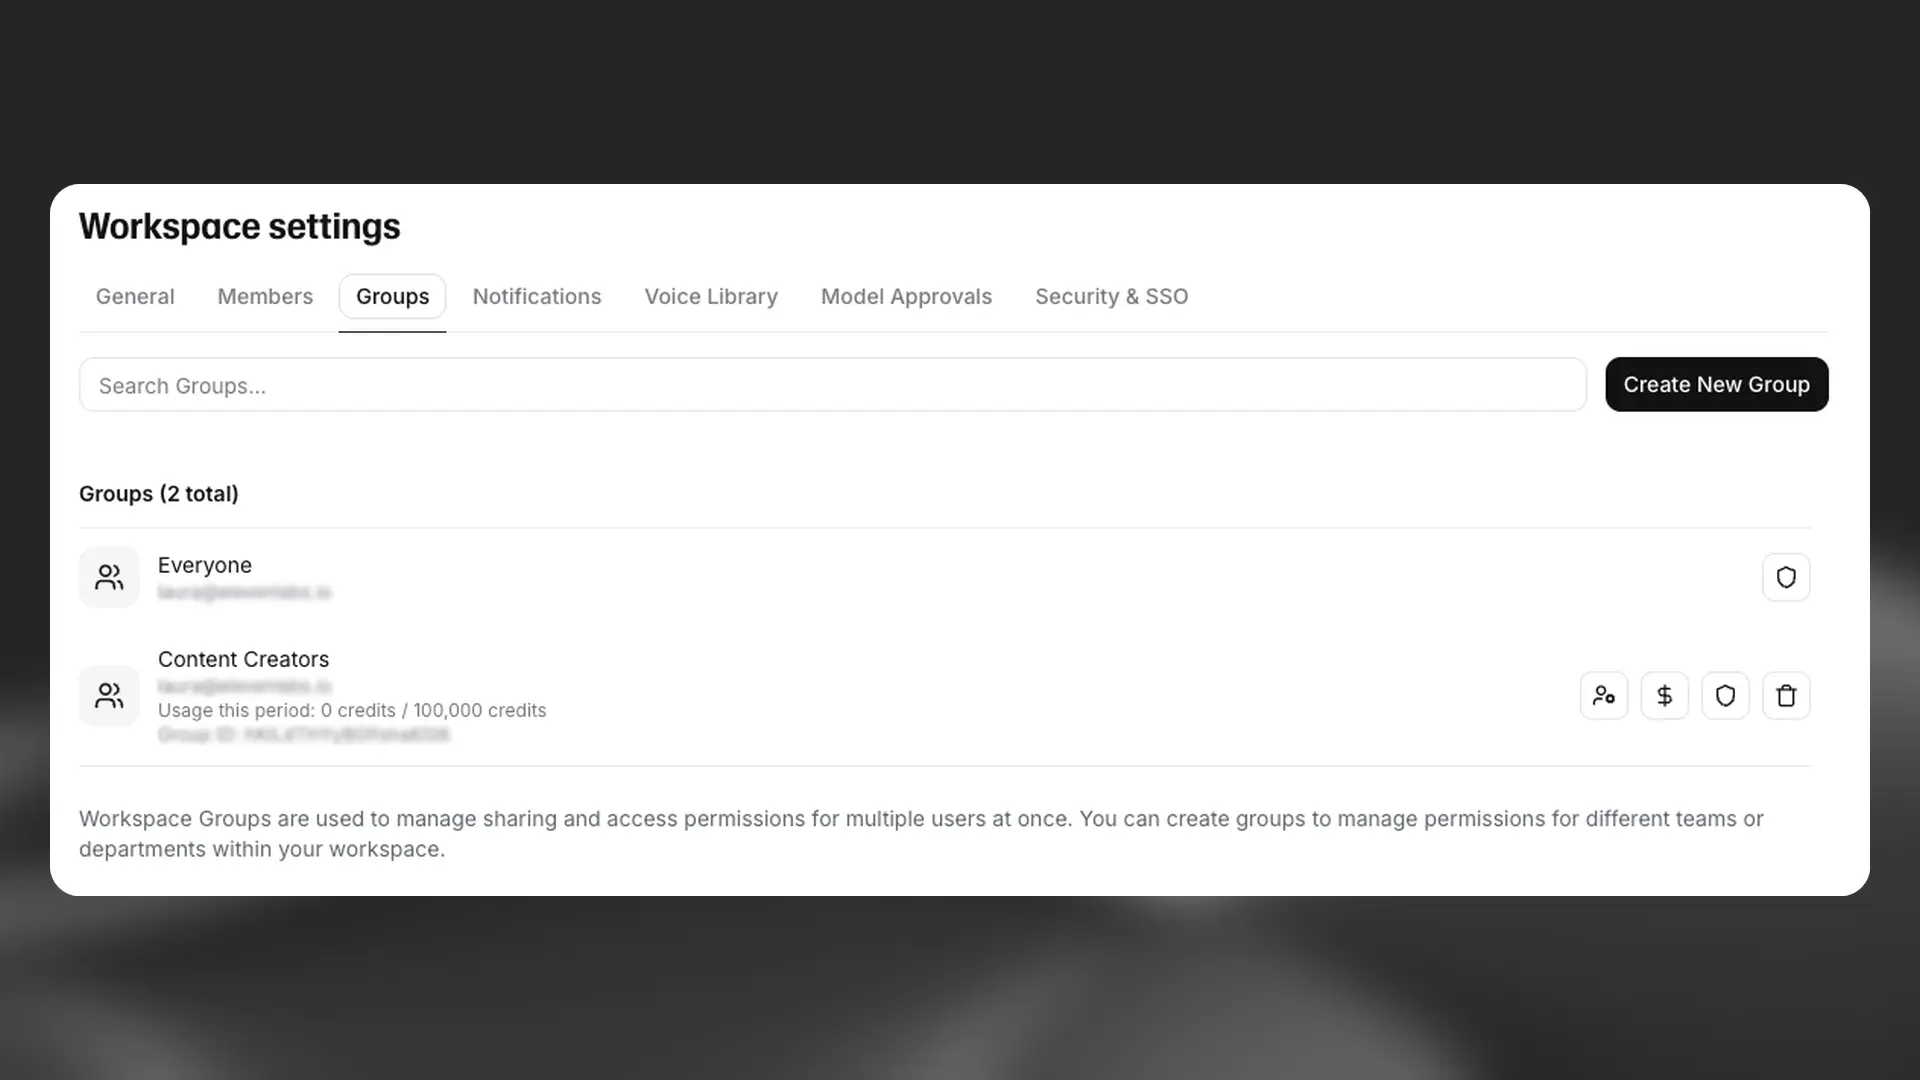
Create and manage billing groups
Workspace admins can create and manage billing groups from Workspace settings > Groups.
Create a new billing group
Adjust limits
Workspace admins can modify group limits at any time from Workspace settings > Groups. Changes take effect immediately.
When a billing group reaches its credit usage limit:
- All requests made by any member of the group are rejected.
- Users receive an error indicating the group has exceeded its quota.
- The restriction remains in place until the next subscription cycle reset.
- Other billing groups and unassigned users are not affected.
- Workspace admins can update the usage limit for the group from Workspace settings > Groups > Manage Usage Limit.
When a billing group reaches its PVCs limit:
- Members cannot create new professional voice clones.
- Existing professional voice clones remain available.
- New PVC creation remains blocked until a workspace admin increases the cap or the group’s active PVC count decreases.
- Other billing groups and unassigned users are not affected.
Track usage
Workspace admins can monitor and adjust billing group limits from Workspace settings > Groups. Click the dollar button to view current usage for each group, and to update the group’s limits.
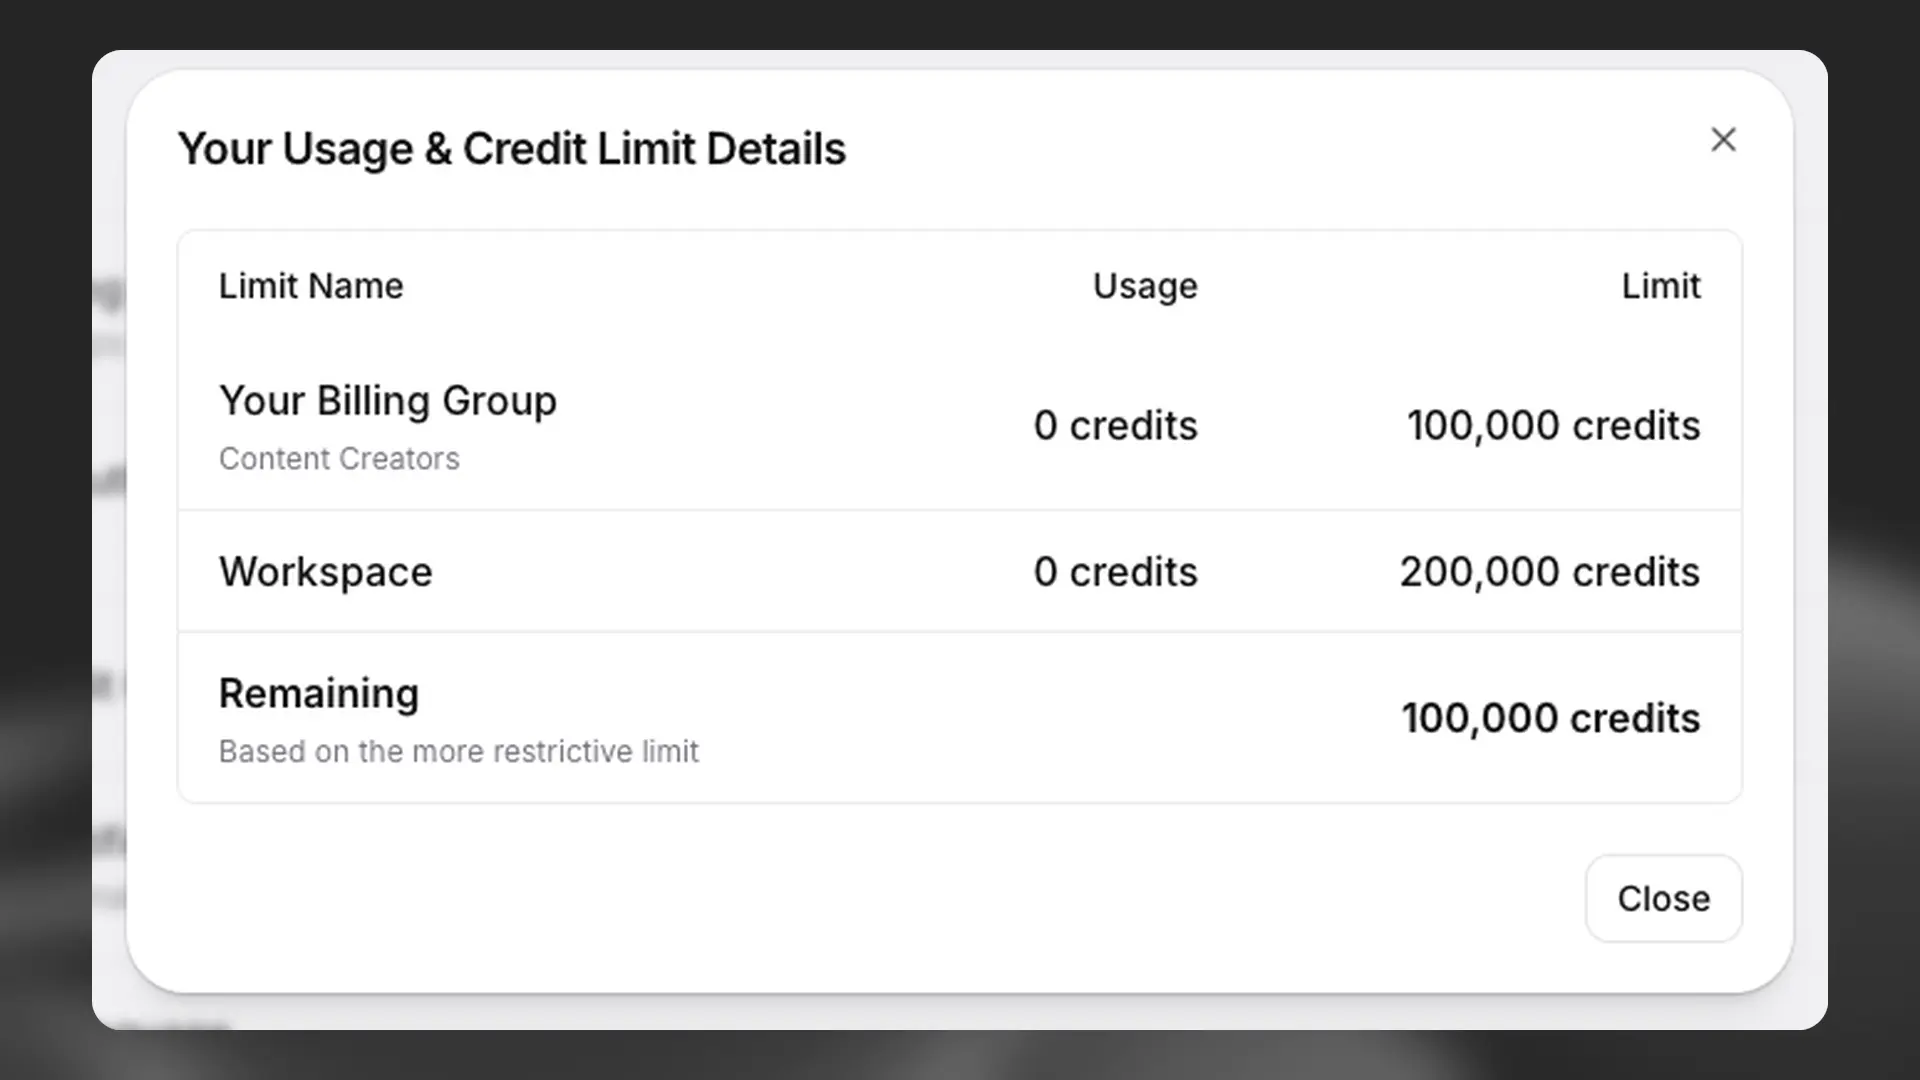
Individual users can view their own usage details from their account Settings > Usage & Credit Ceilings.
Manage billing group members
Workspace admins can manage groups for individual workspace members from Workspace settings > Members. Click the dollar button to view which group the member is part of. If they are not part of a billing group, this button will appear yellow - click it to allocate the user to an existing billing group.
You can also add or remove members from a billing group from Workspace settings > Groups > Manage Group.
When a user or service account is added to a billing group, their credit usage from that point forward starts counting toward that group’s limit. Previous credit usage is not retroactively applied to the billing group. When removed, their future usage will count toward the workspace’s overall quota or another billing group if reassigned.
For PVC limits, member-owned professional voice clones count toward the group’s PVC count once the member allocation applies. When a member is removed, their future usage will count no longer count towards the billing group’s quota.
Once a billing group reaches its credit usage limit, all members are blocked from making requests until the next billing cycle unless the limit is increased by a workspace admin.