Studio
Overview
Studio is an end-to-end workflow for creating long-form content. With this tool you can upload an entire book, document or webpage and generate a voiceover narration for it. The result can then be downloaded as a single audio file or as individual audio files for each chapter.
Guide

You can use our Audio Native feature to easily and effortlessly embed any narration project onto your website.
Starting options
Some settings are automatically selected by default when you create a new project.
The default model is Multilingual v2, our highest quality model and the model we recommend for content creation. You can change this setting after you’ve created your project in Project Settings.
The quality setting is automatically selected depending on your subscription plan, and will not increase your credit usage.
For free, Starter and Creator subscriptions the quality will be 128 kbps MP3, or WAV generated from 128 kbps source.
For Pro, Scale, Business and Enterprise plans, the quality will be 16-bit, 44.1 kHz WAV, or 192 kbps MP3 (Ultra Lossless).
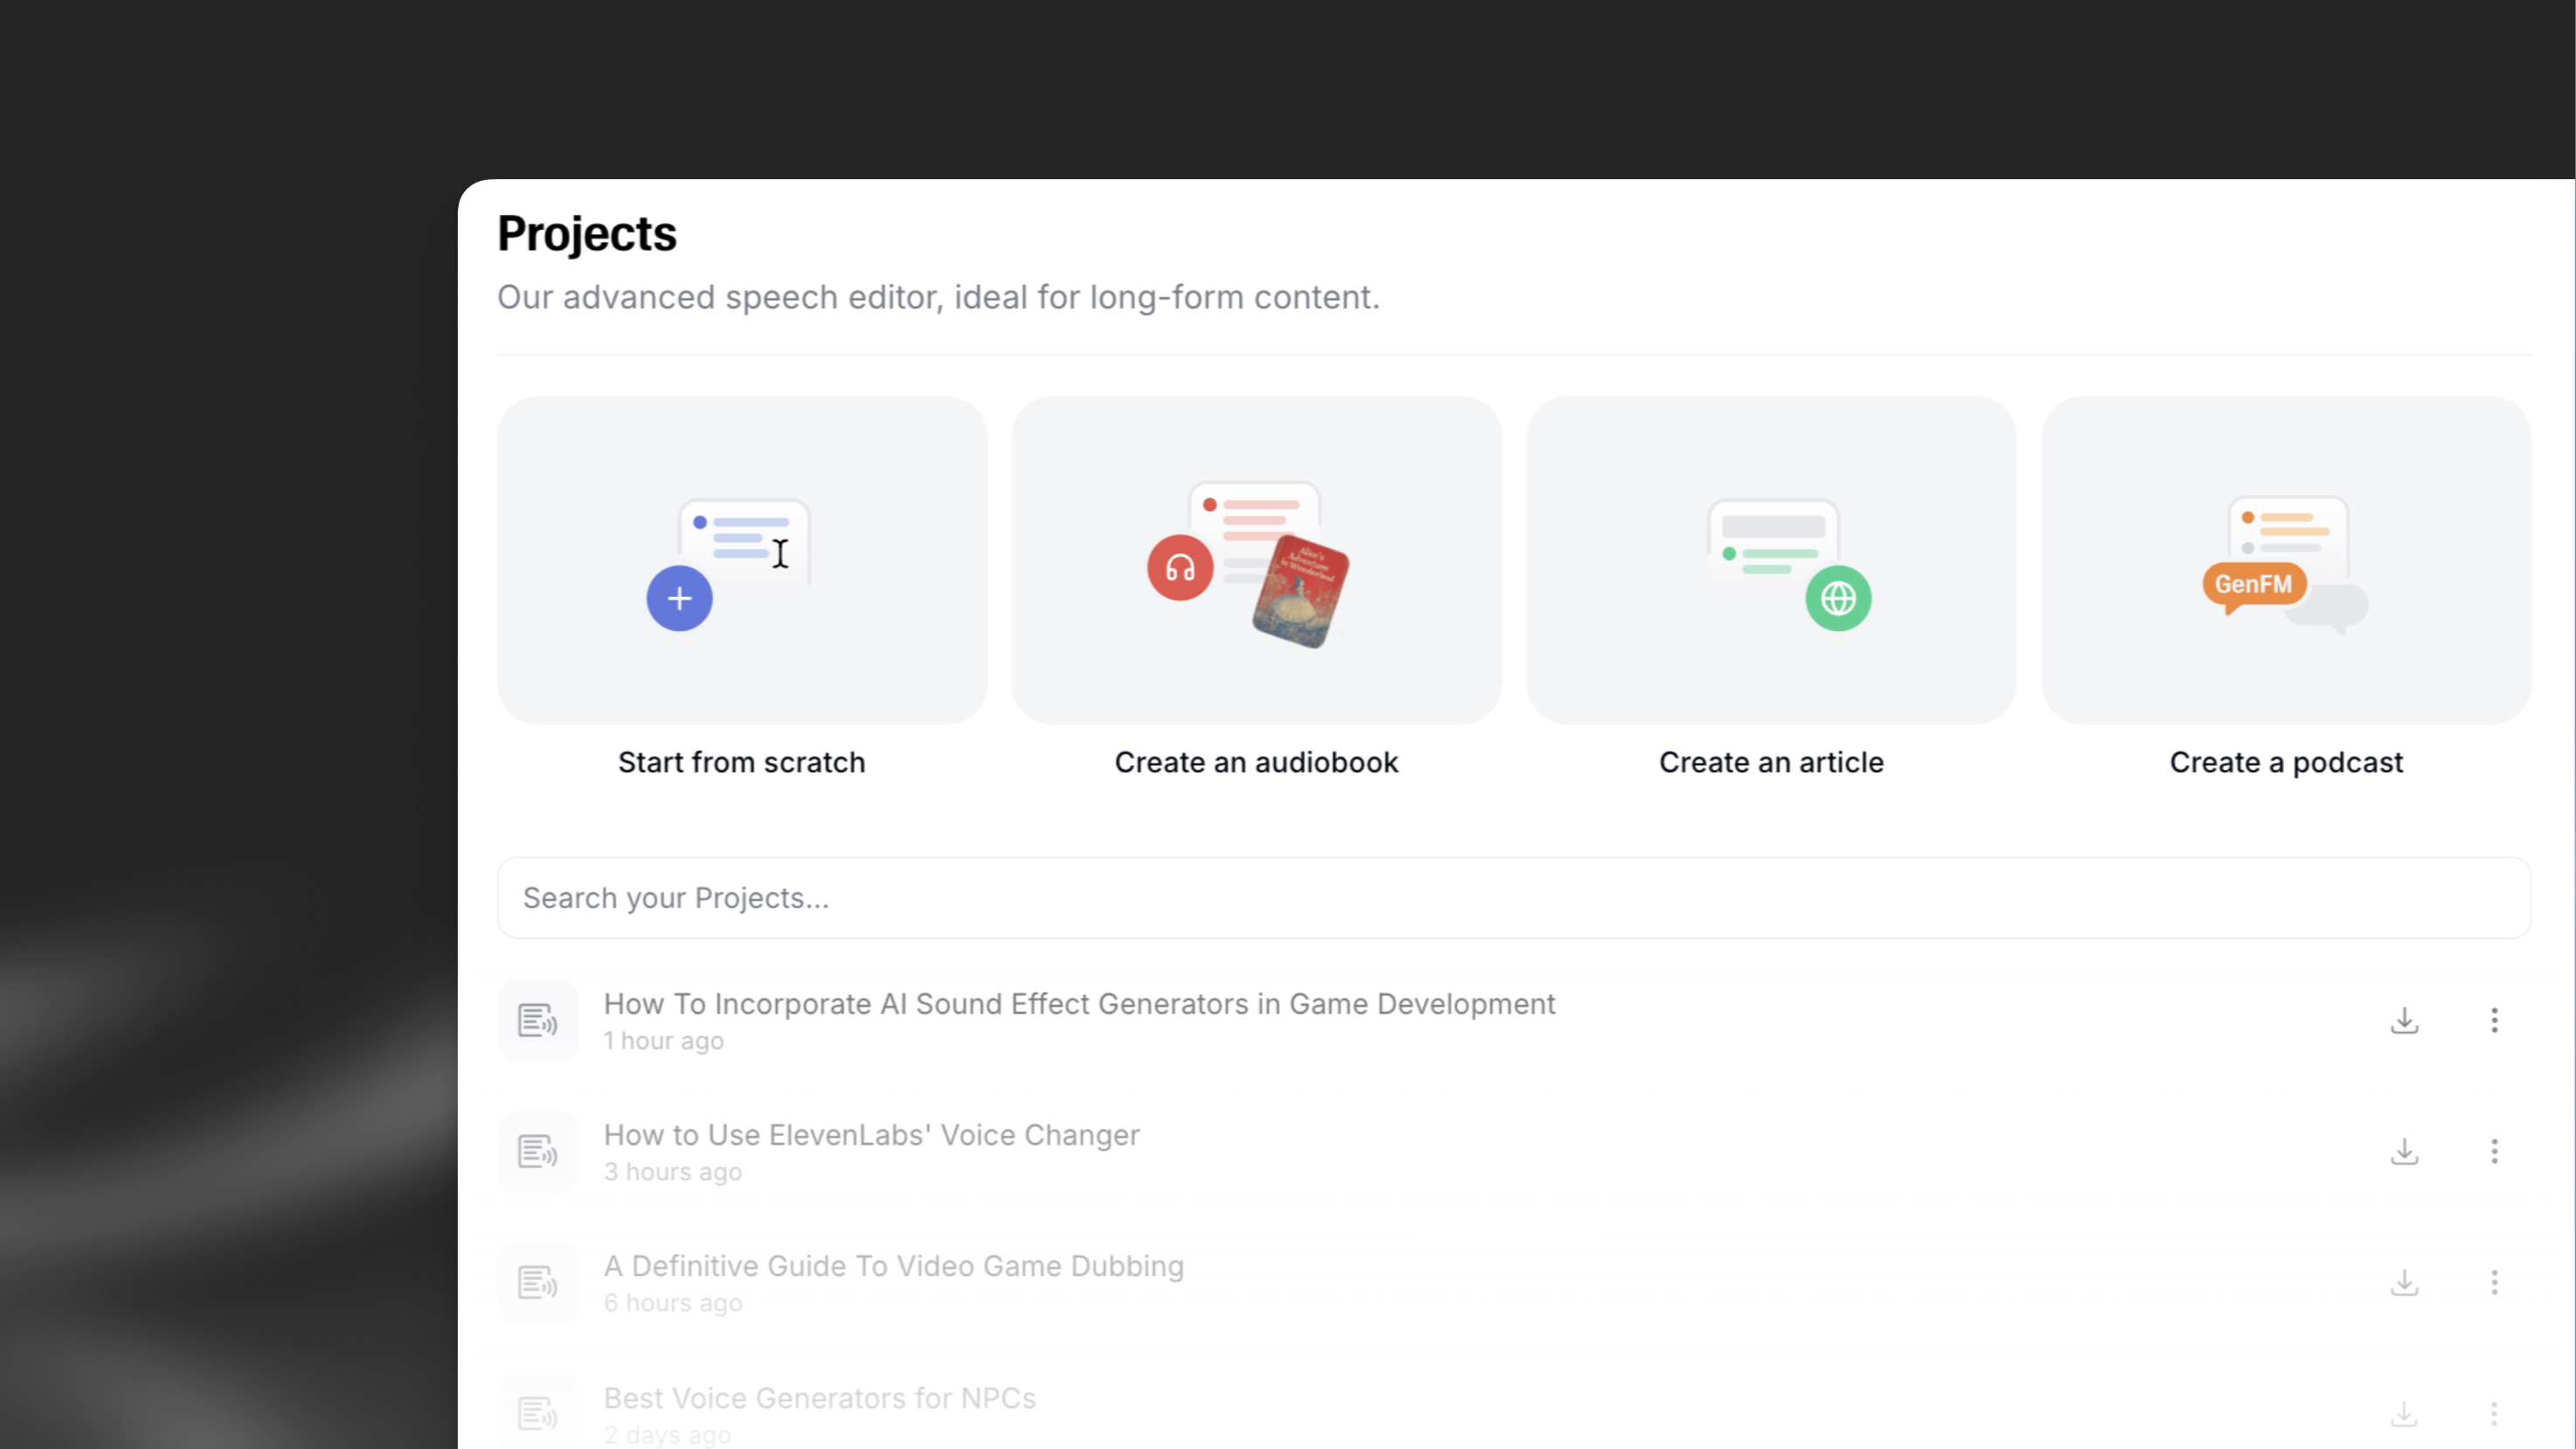
Start from scratch
Start from scratch
This option will automatically create a new blank project, ready for you to enter your own text.
Create an audiobook
Create an audiobook
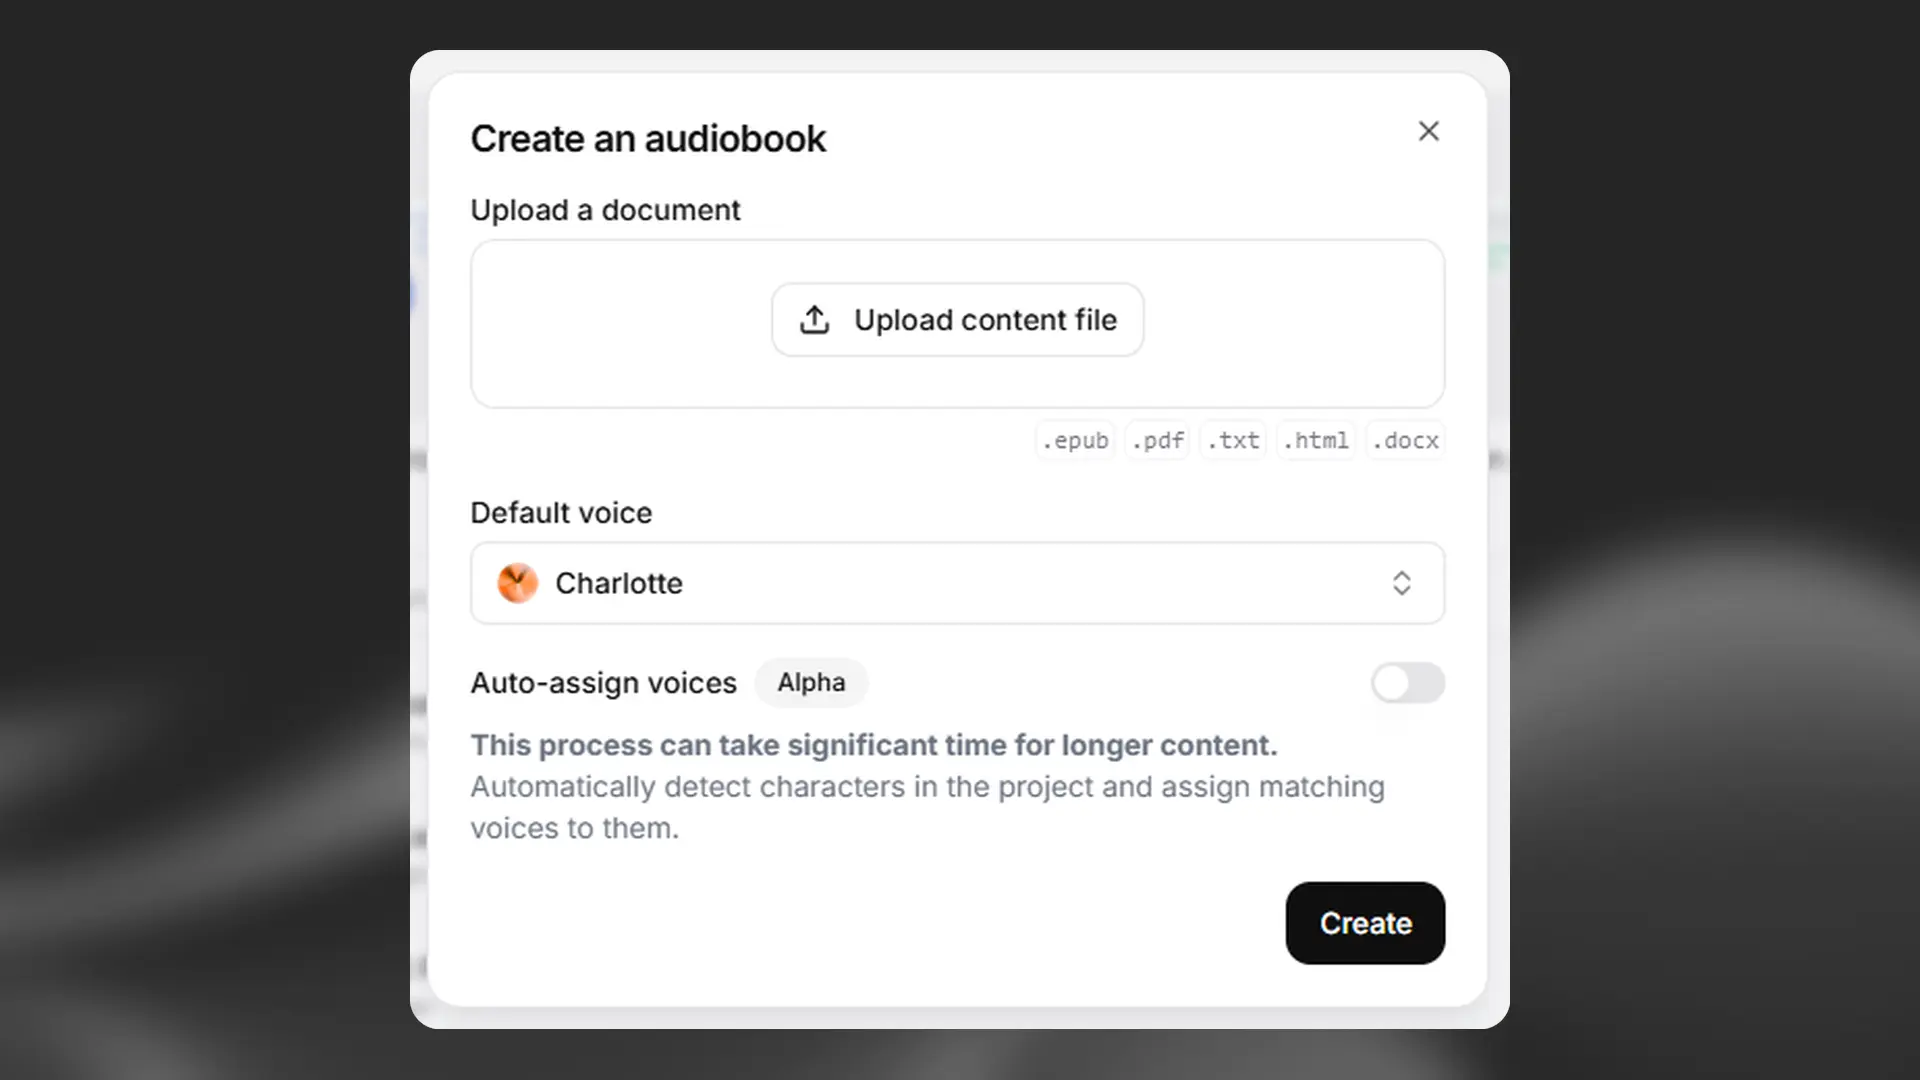
When you select this option, you will see a pop-up which will allow you to upload a file which will be imported into your new project.
You can upload EPUB, PDF, TXT, HTML and DOCX files.
You can also select a default voice for your project, and have the option to enable Auto-assign voices. This will detect characters in your text and assign matching voices to them. This feature will add additional processing time.
Create an article
Create an article
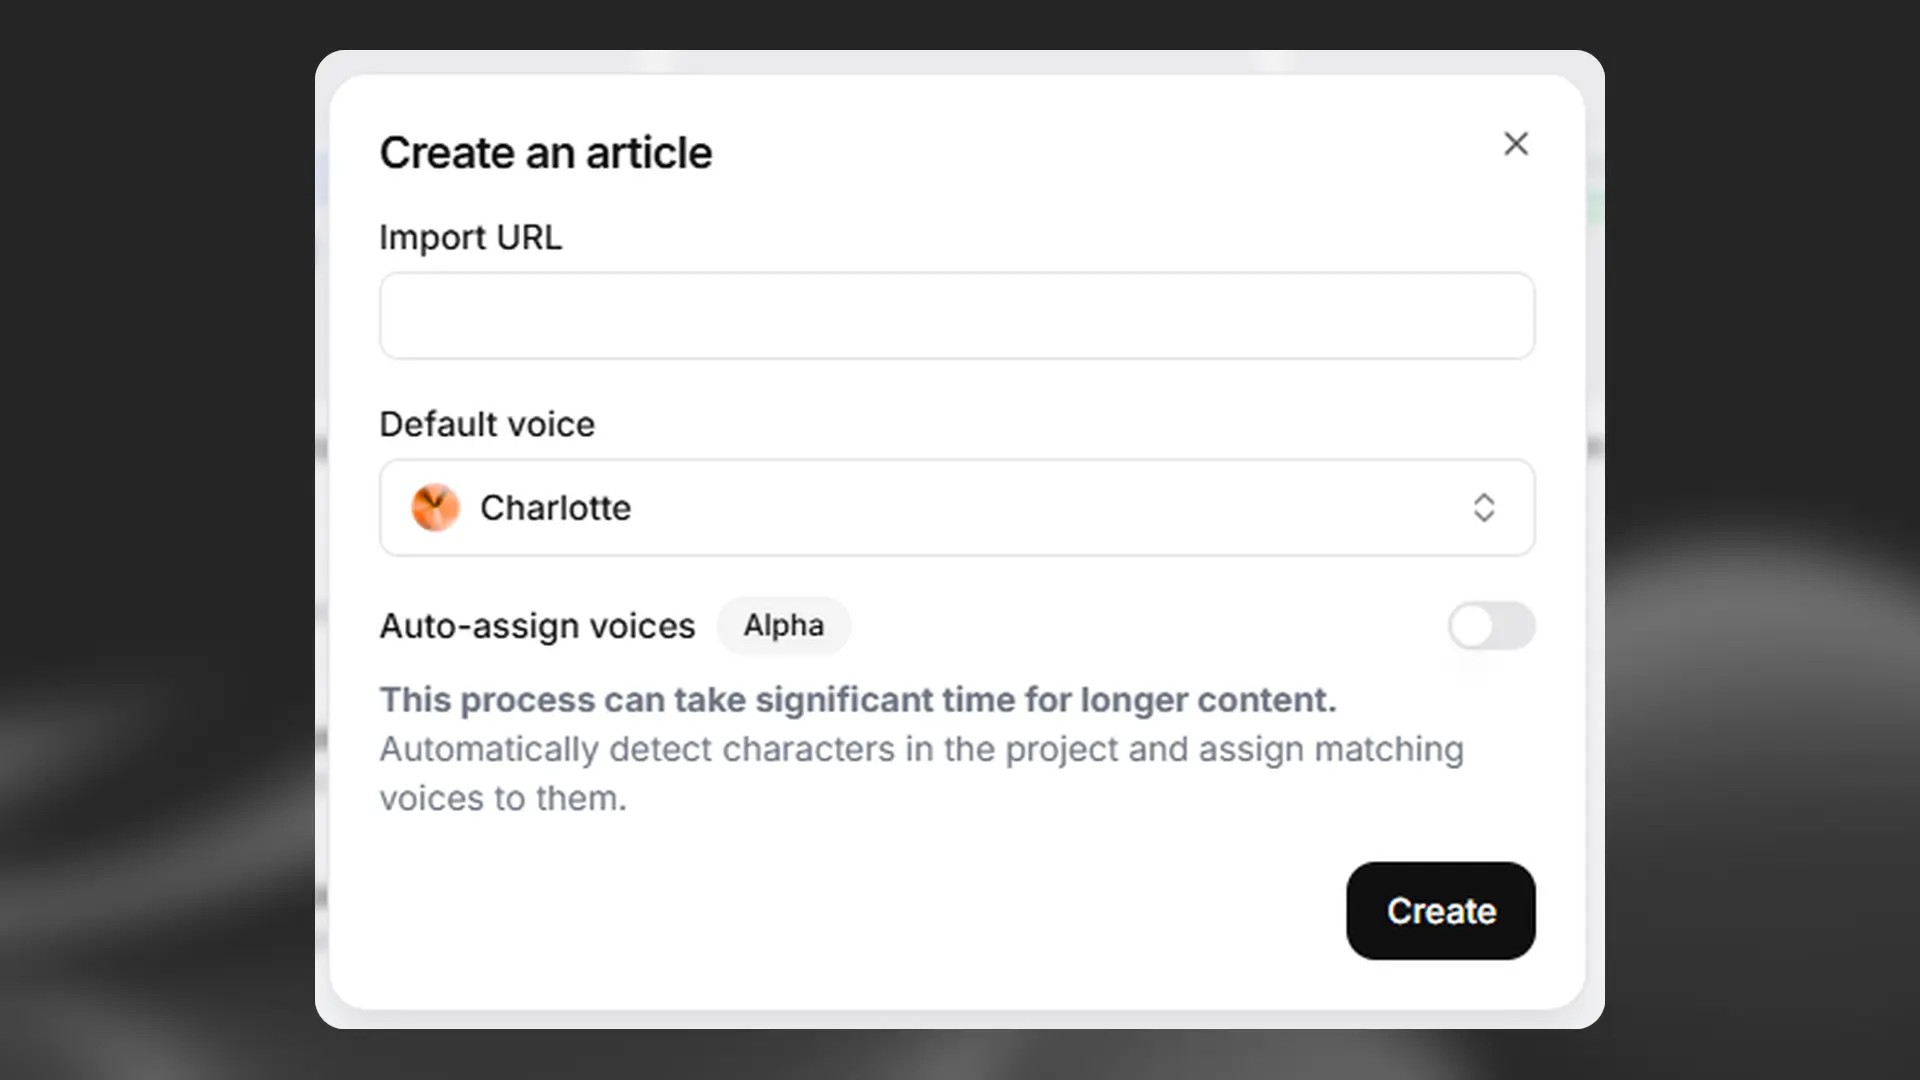
When you select this option, you will see a pop-up which will allow you to enter a URL to import the text from the page into your project.
You can also select a default voice for your project, and have the option to enable Auto-assign voices. This will detect characters in your text and assign matching voices to them. This feature will add additional processing time.
Create a podcast
Create a podcast
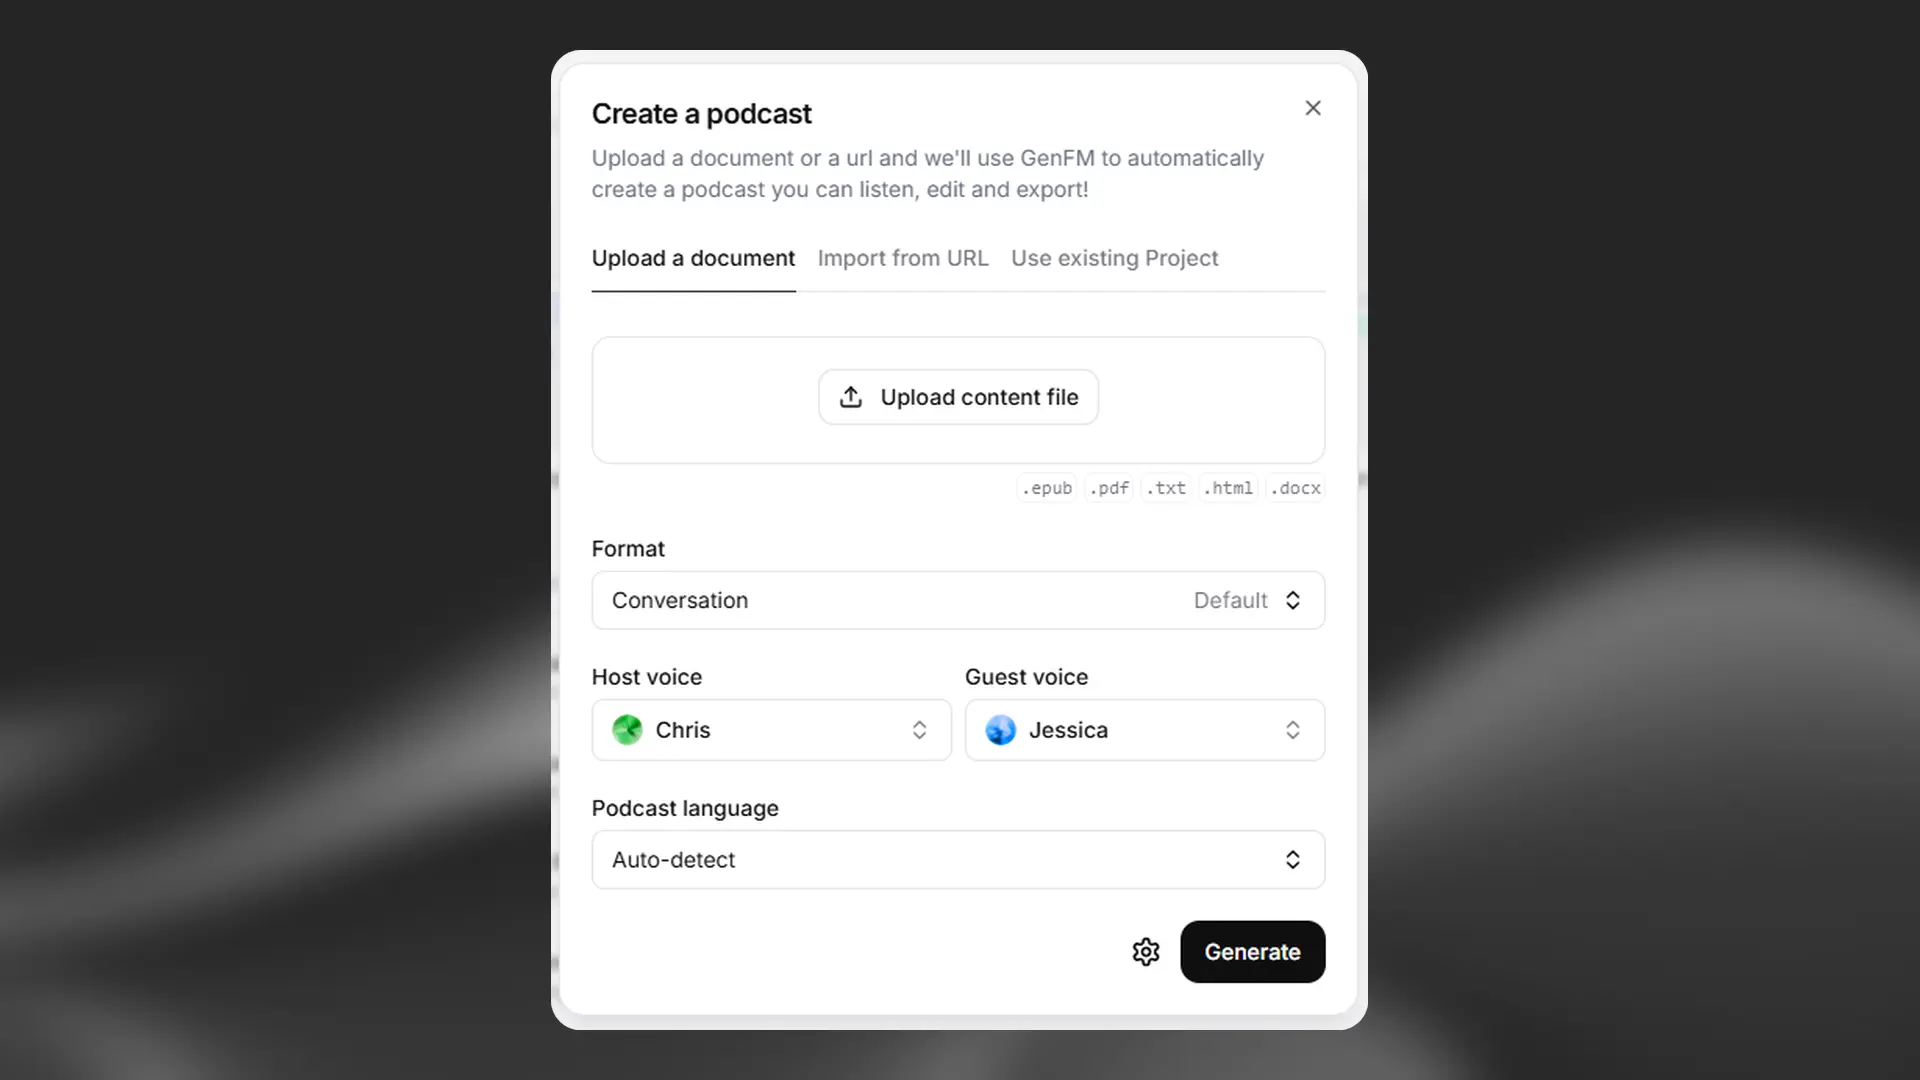
This option will use GenFM to automatically create a podcast based on an uploaded document, a webpage via URL, or an existing project.
With this option, GenFM will generate a new script based on the document you upload. If you want to generate a podcast using a script you have written and don’t want changed, you should use either Create an audiobook or Start from Scratch.
In the format settings, you can choose whether to create a conversation between a host and guest, or a more focussed bulletin style podcast with a single host. You can also set the duration to short, default or long.
You can choose your own preferred voices for the podcast host and guest, or go with our suggested voices.
You have the option to set the podcast language. If you don’t set this option, the podcast will be generated in the language of the source material.
Finally, if you click the cog icon, you can access the advanced configuration options. This allows you to specify up to three areas you would like the podcast to focus on.
Generating and Editing
Once you’ve added text, either by importing it or adding it yourself, you can use the Export button to generate audio for the entire chapter or project in one step.
This will automatically generate and download an audio file, but you can still edit your project after this.
Once you’ve finished editing, you will need to use the Export button again to generate and download a new version of your project that includes the updated audio.
Play
Play
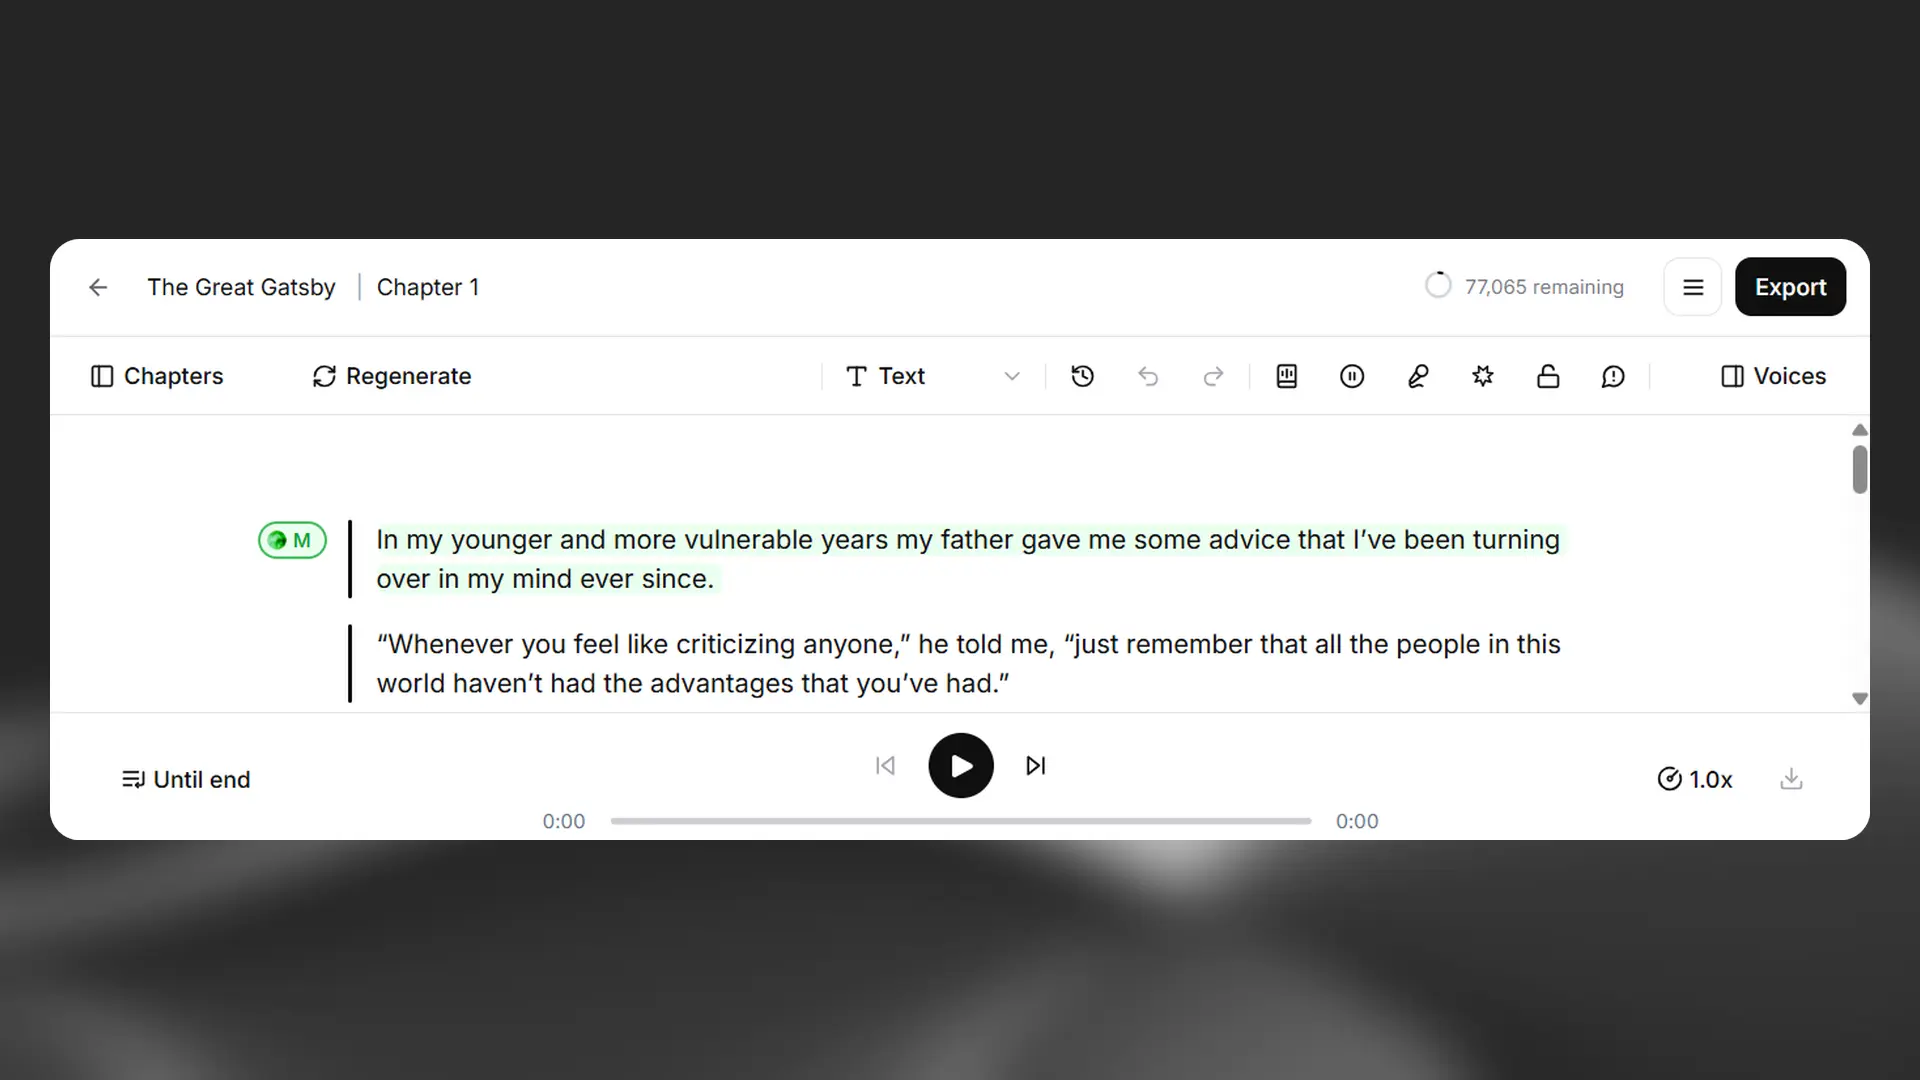
You can use the Play button in the player at the bottom of the Studio interface to play audio that has already been generated, or generate audio if a paragraph has not yet been converted. Generating audio will cost credits.
If you have already generated audio, then the Play button will play the audio that has already generated and you won’t be charged any credits.
There are two modes when using the Play button. Until end will play existing audio, or generate new audio for paragraphs that have not yet been generated, from the selected paragraph to the end of the current chapter. Selection will play or generate audio only for the selected paragraph.
Chapters sidebar
Chapters sidebar
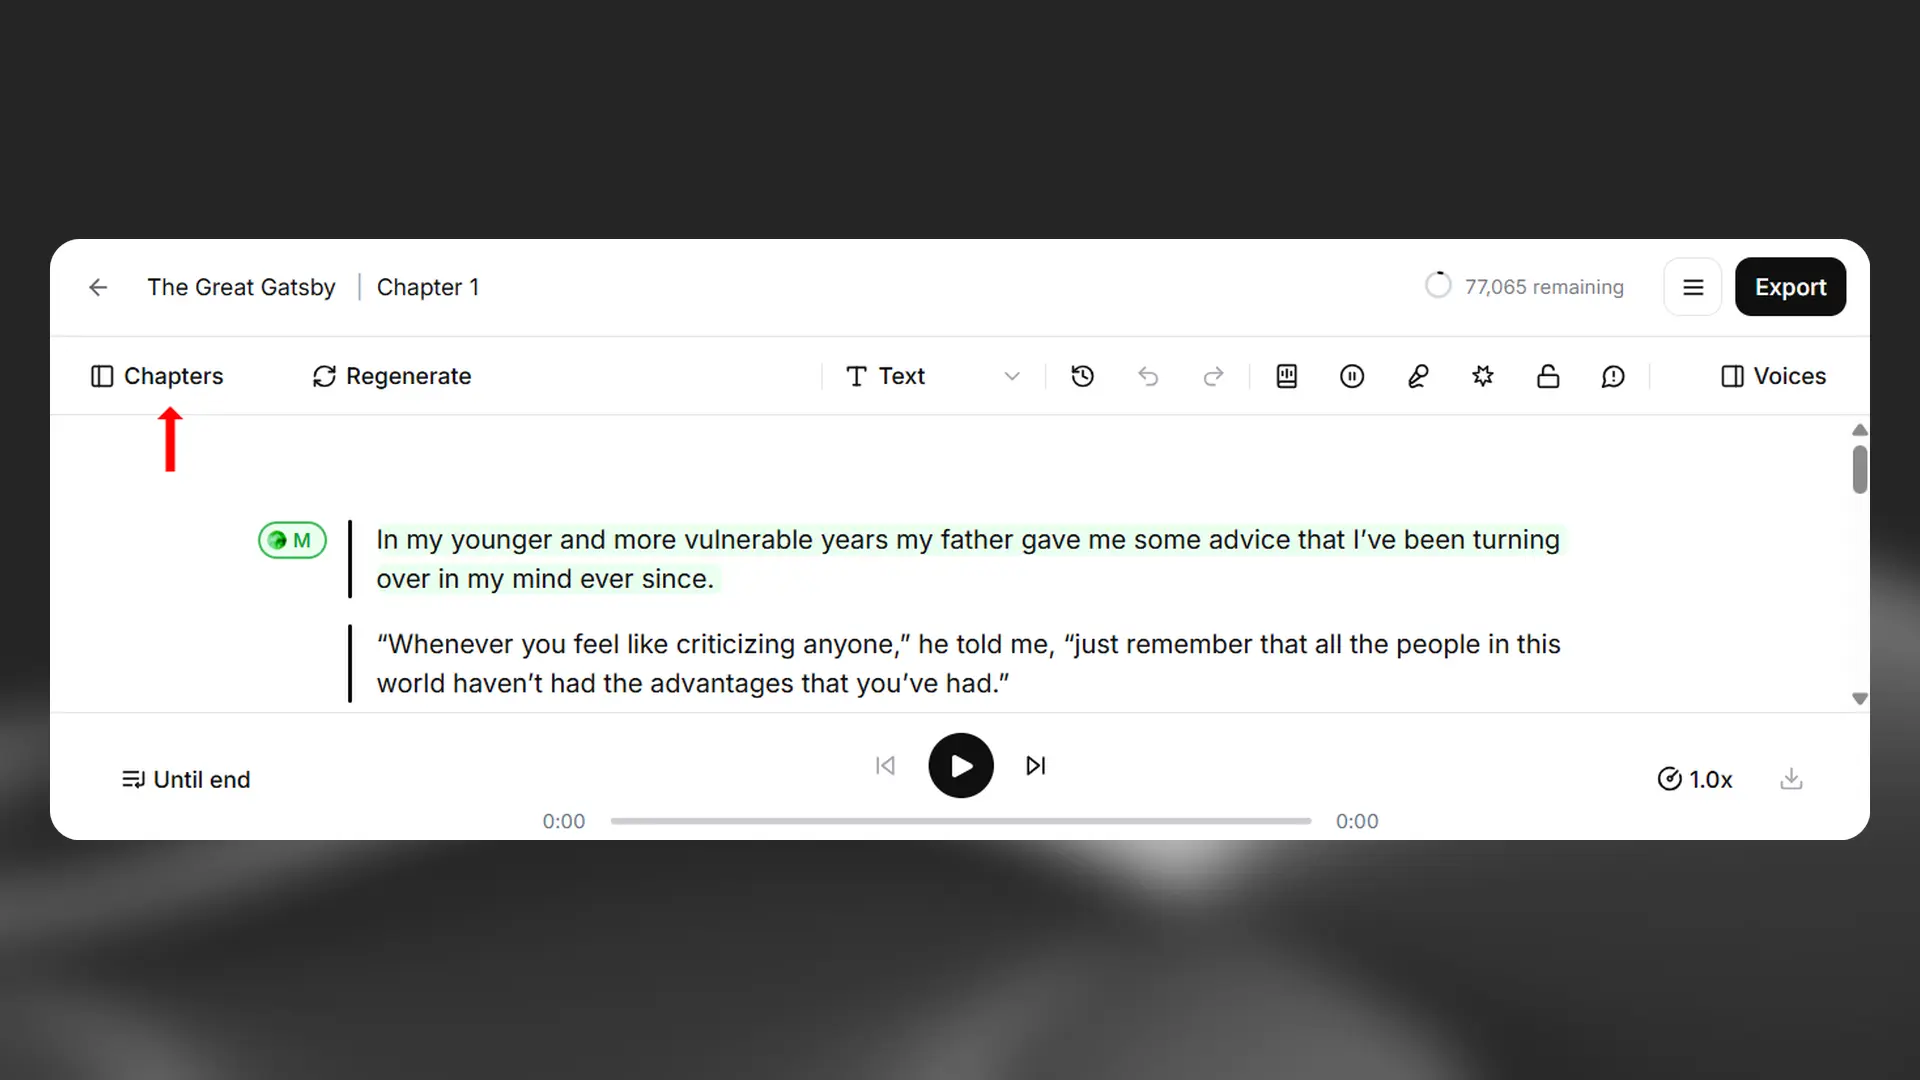
When you create a Studio project using the Create an audiobook option and import a document that includes chapters, chapters will be automatically enabled for your project. You can toggle the visibility of the Chapters sidebar by clicking Chapters.
If you want to add a new chapter, you can do this using the + button at the top of the Chapters sidebar.
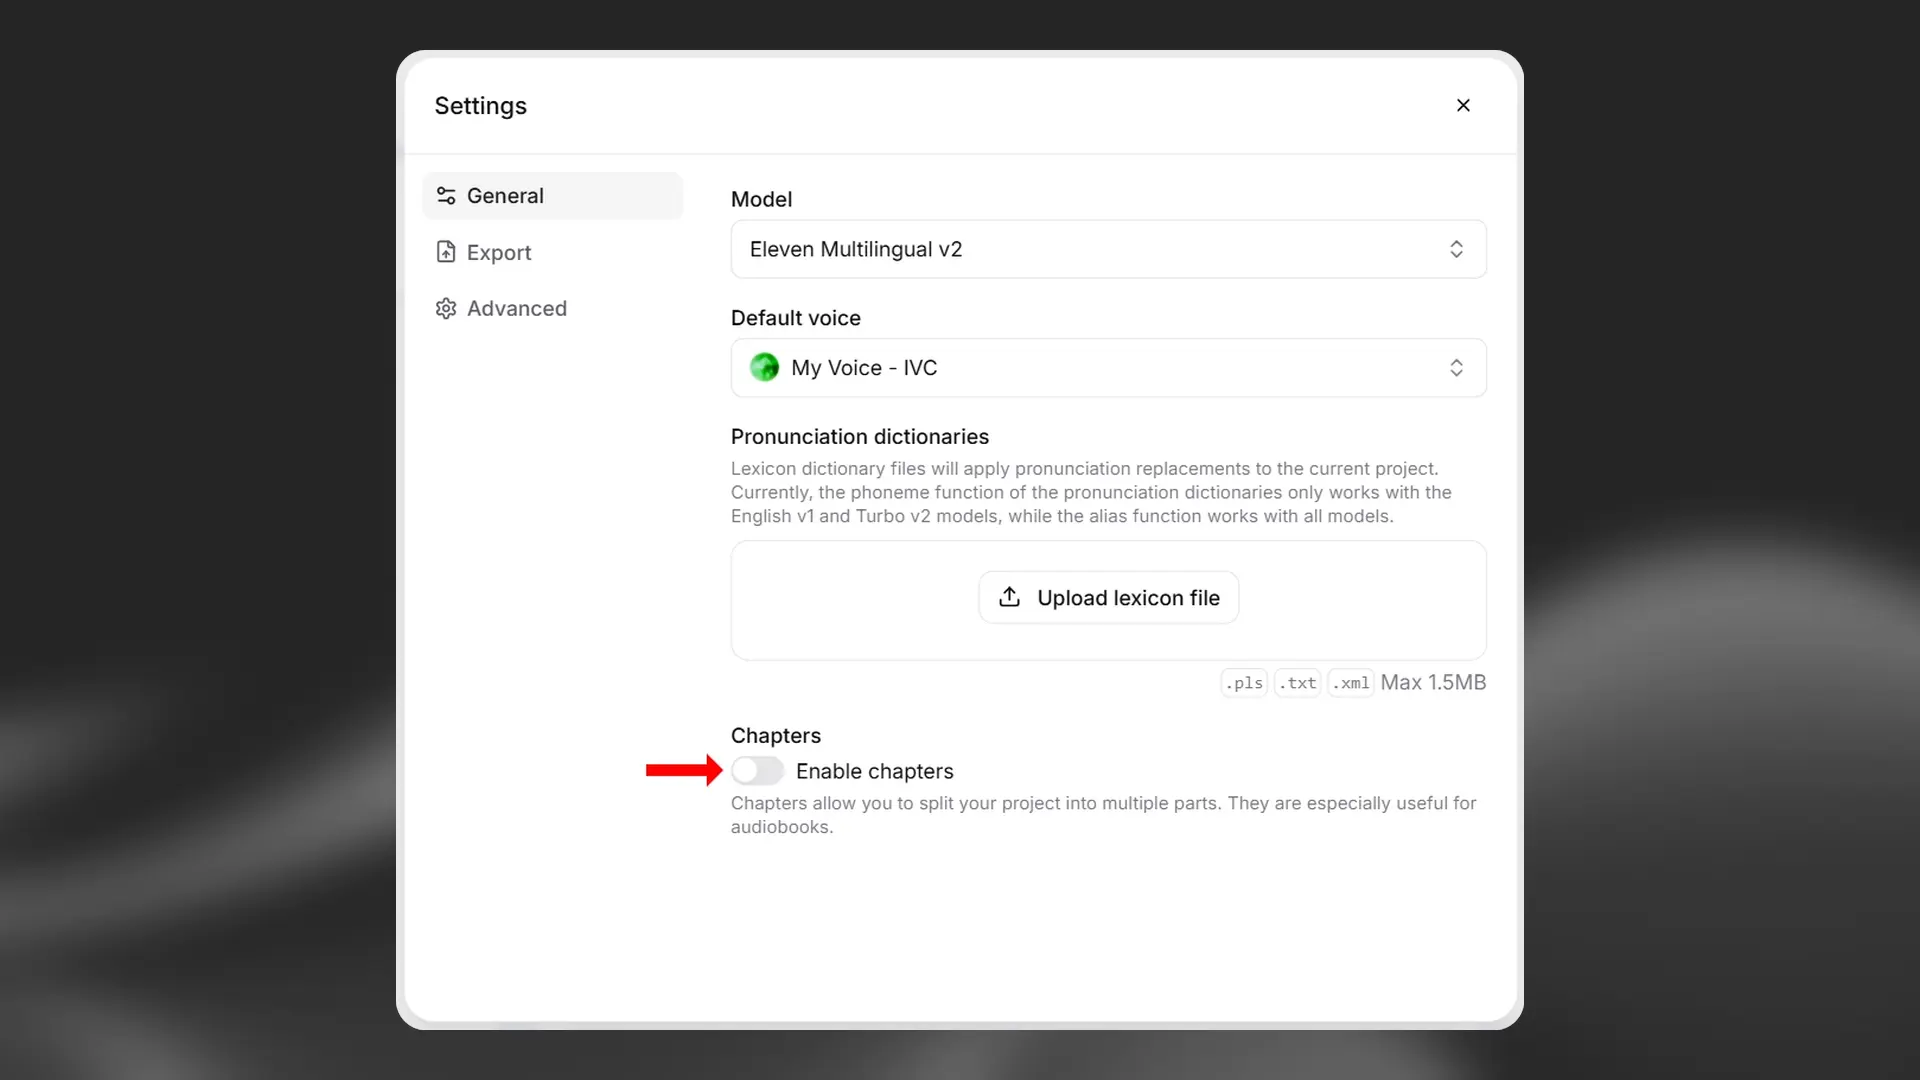
If you used the Start from scratch option to create your project, or your project didn’t originally include chapters, you’ll need to enable chapters in Project settings. You will find the Enable chapters toggle in the general settings.
Once you’ve enabled chapters, you can click + Chapter to add a new chapter to your project. After you’ve added one chapter, the Chapters sidebar will be enabled, and you can use the + button to add additional chapters.
Generate/Regenerate
Generate/Regenerate
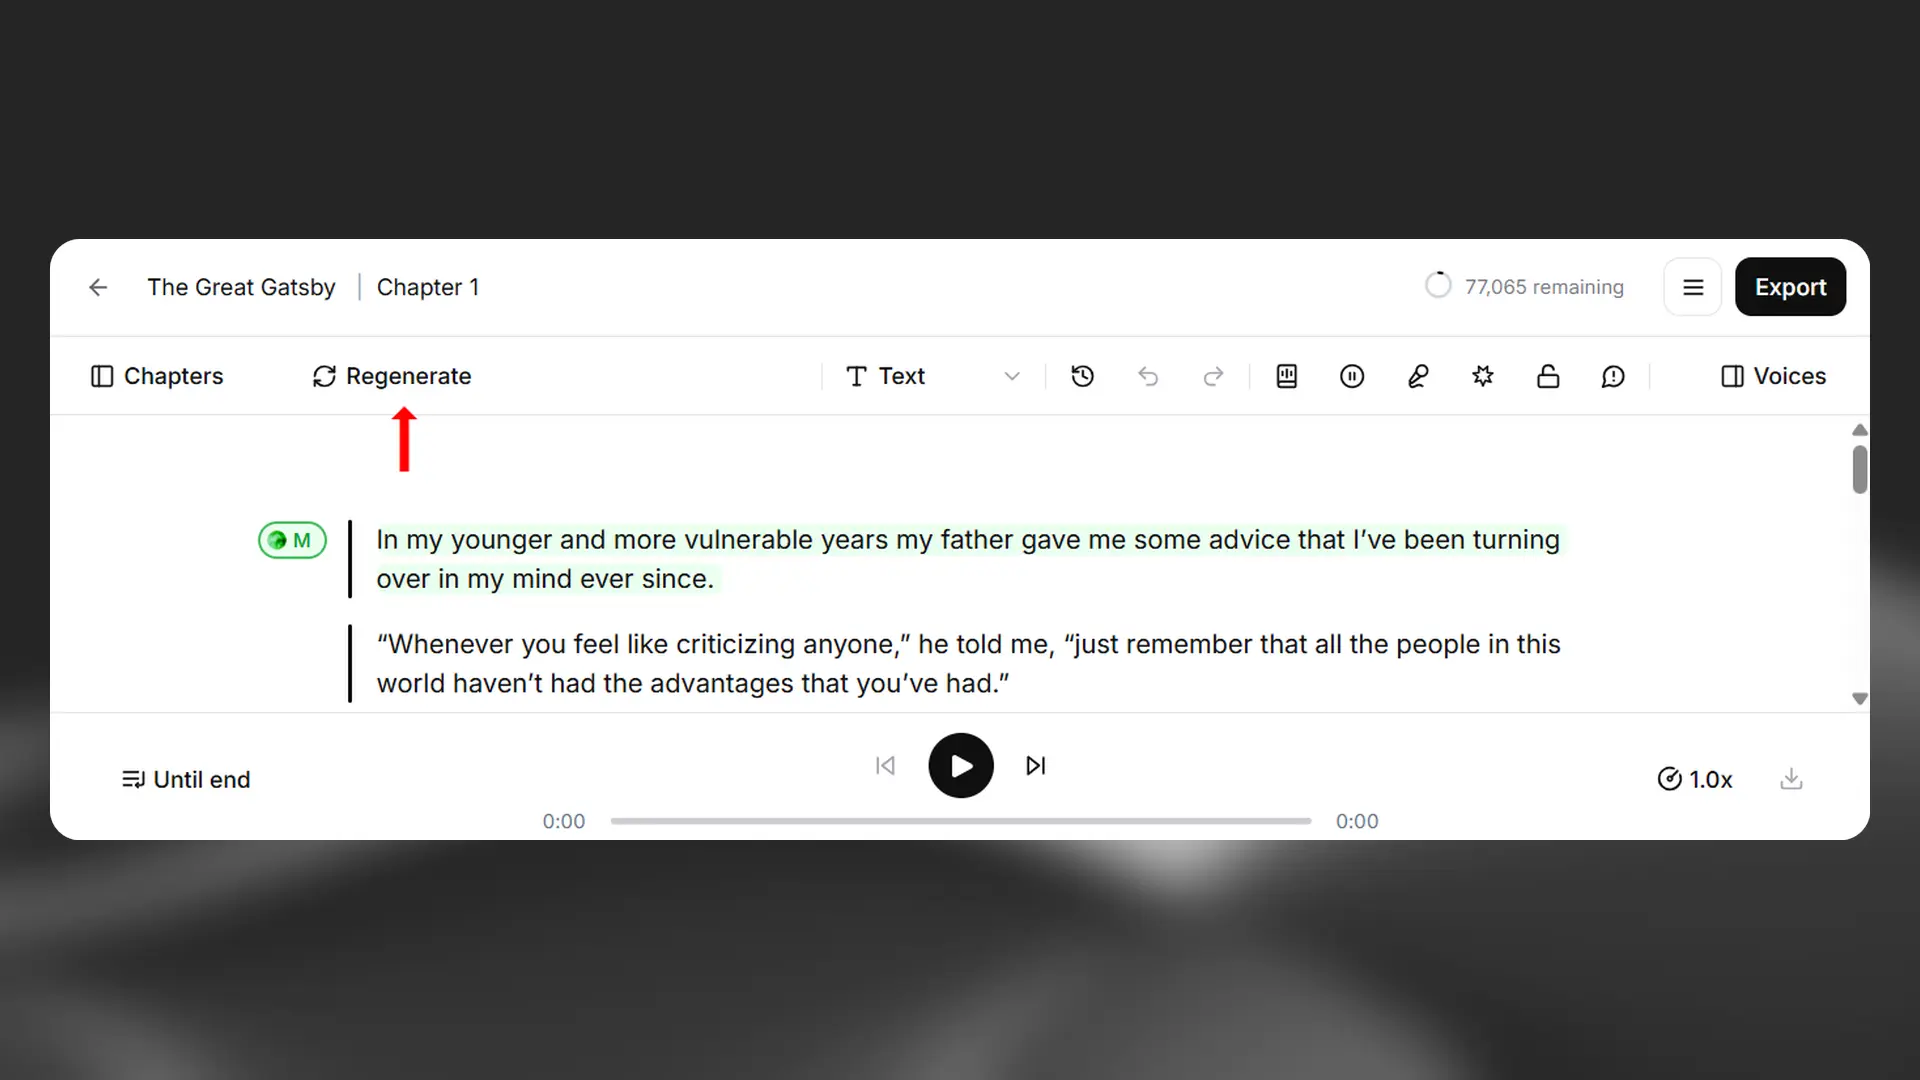
The Generate button will generate audio if you have not yet generated audio for the selected text, or will generate new audio if you have already generated audio. This will cost credits.
If you have made changes to the paragraph such as changing the text or the voice, then the paragraph will lose its converted status, and will need to be generated again.
The status of a paragraph (converted or unconverted) is indicated by the bar to the left of the paragraph. Unconverted paragraphs have a pale grey bar while converted paragraphs have a dark grey bar.
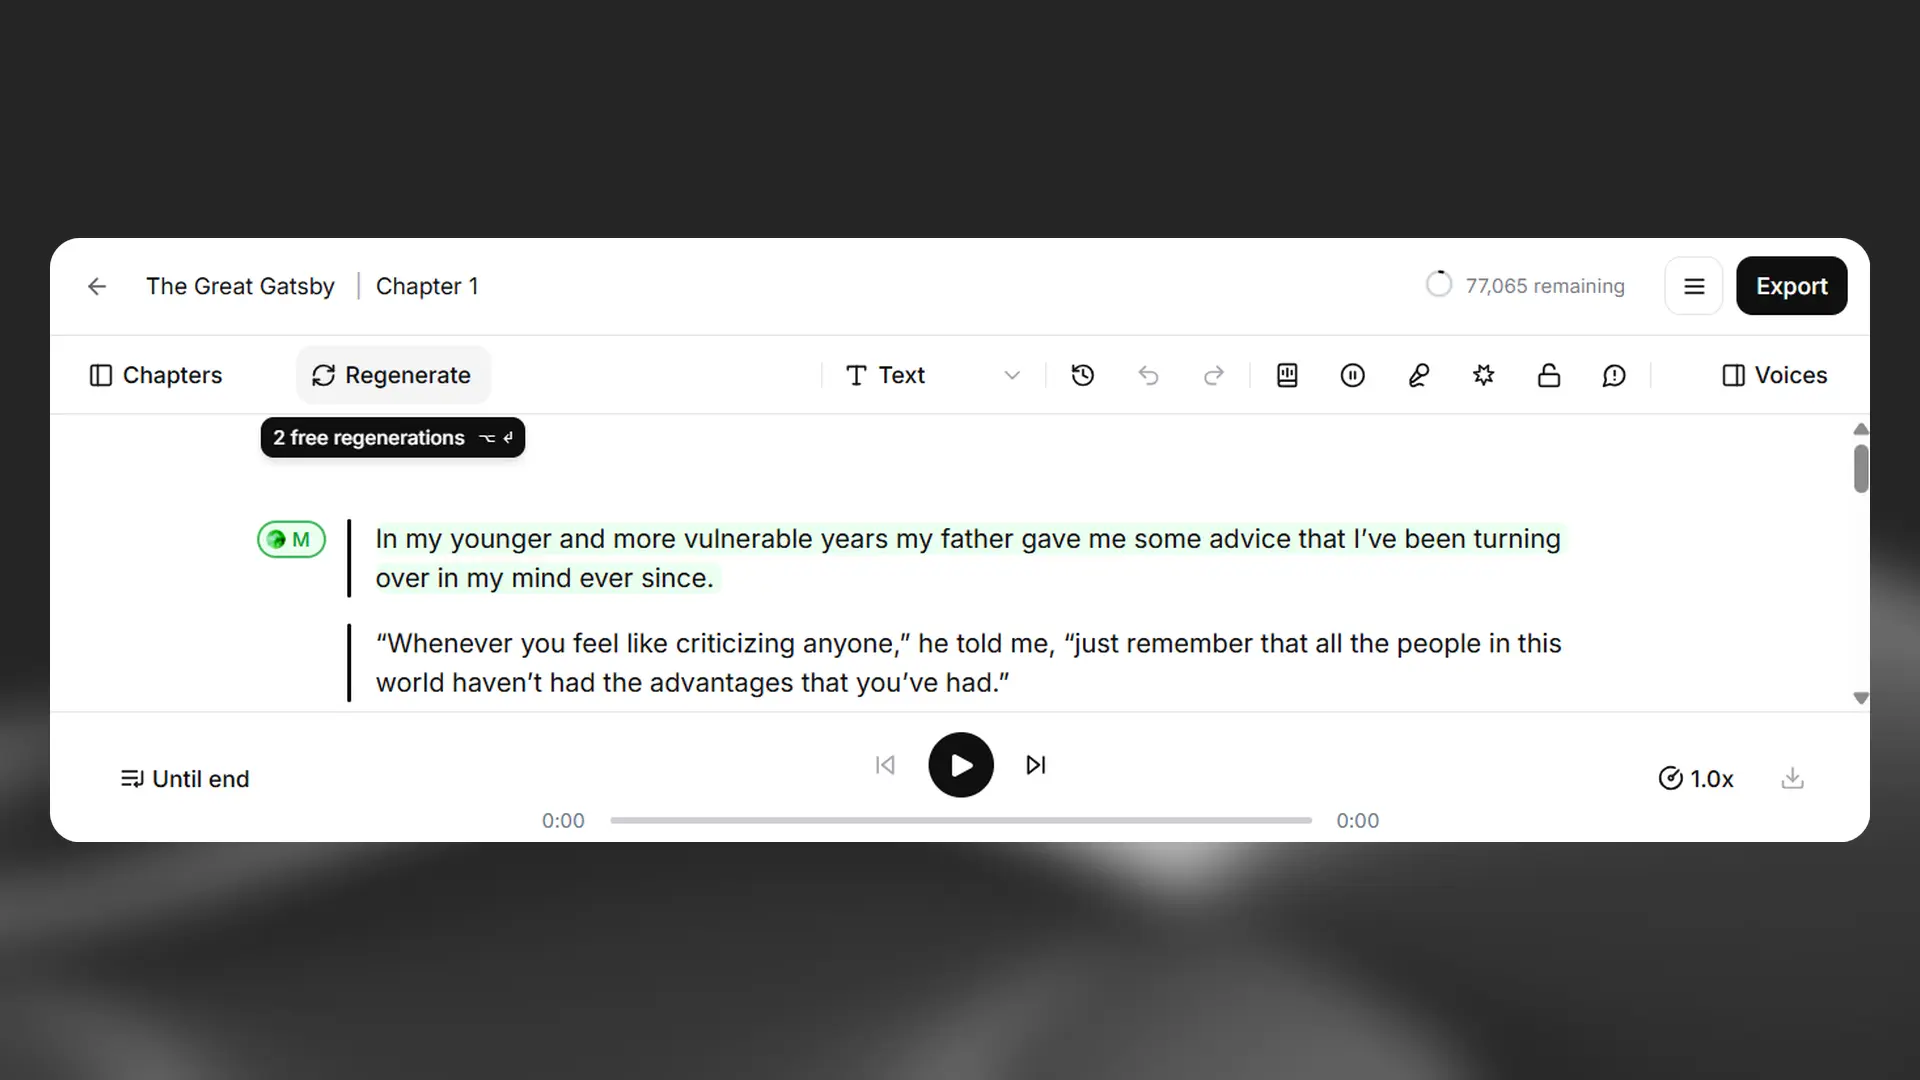
If the button says Regenerate, then this means that you won’t be charged for the next generation. You’re eligible for two free regenerations provided you don’t change the voice or the text.
Generation history
Generation history
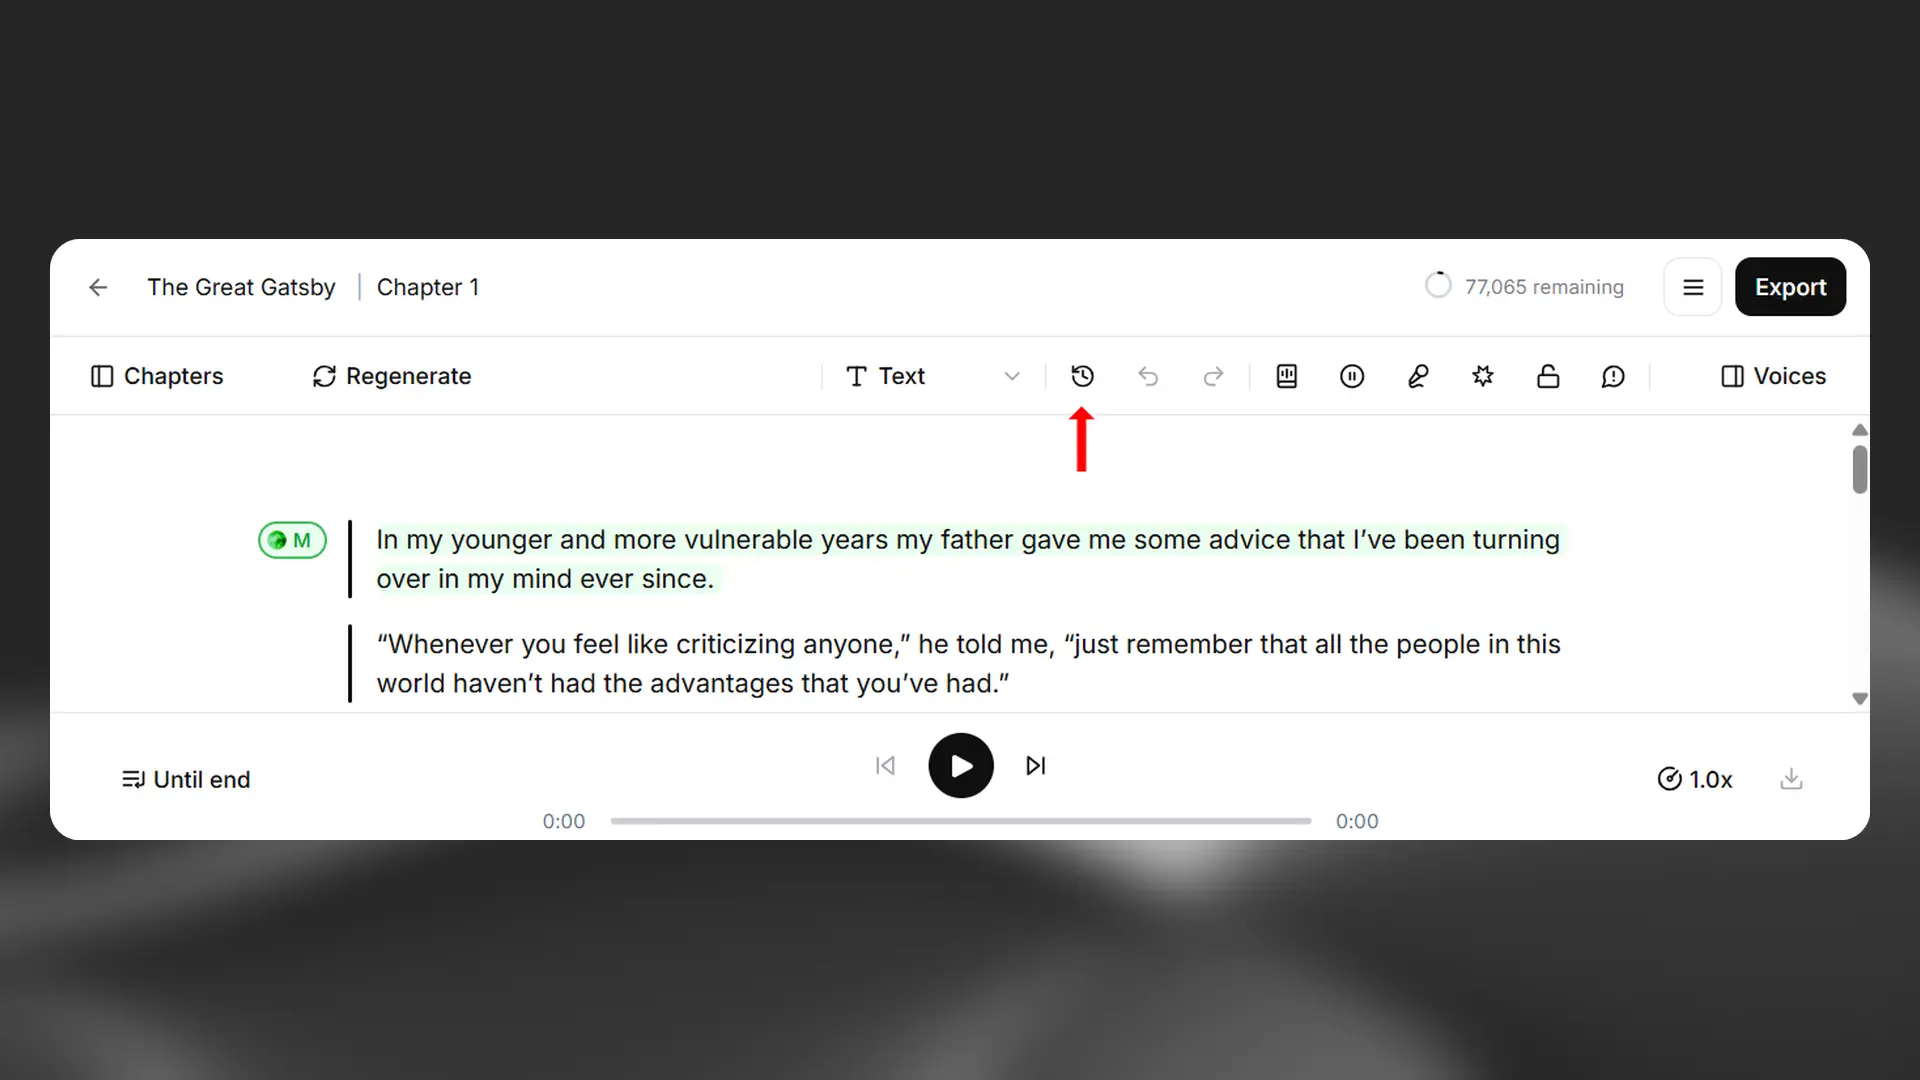
If you click the Generation history button, this will show all the previously generated audio for the selected paragraph. This allows you to listen to and download each individual generation.
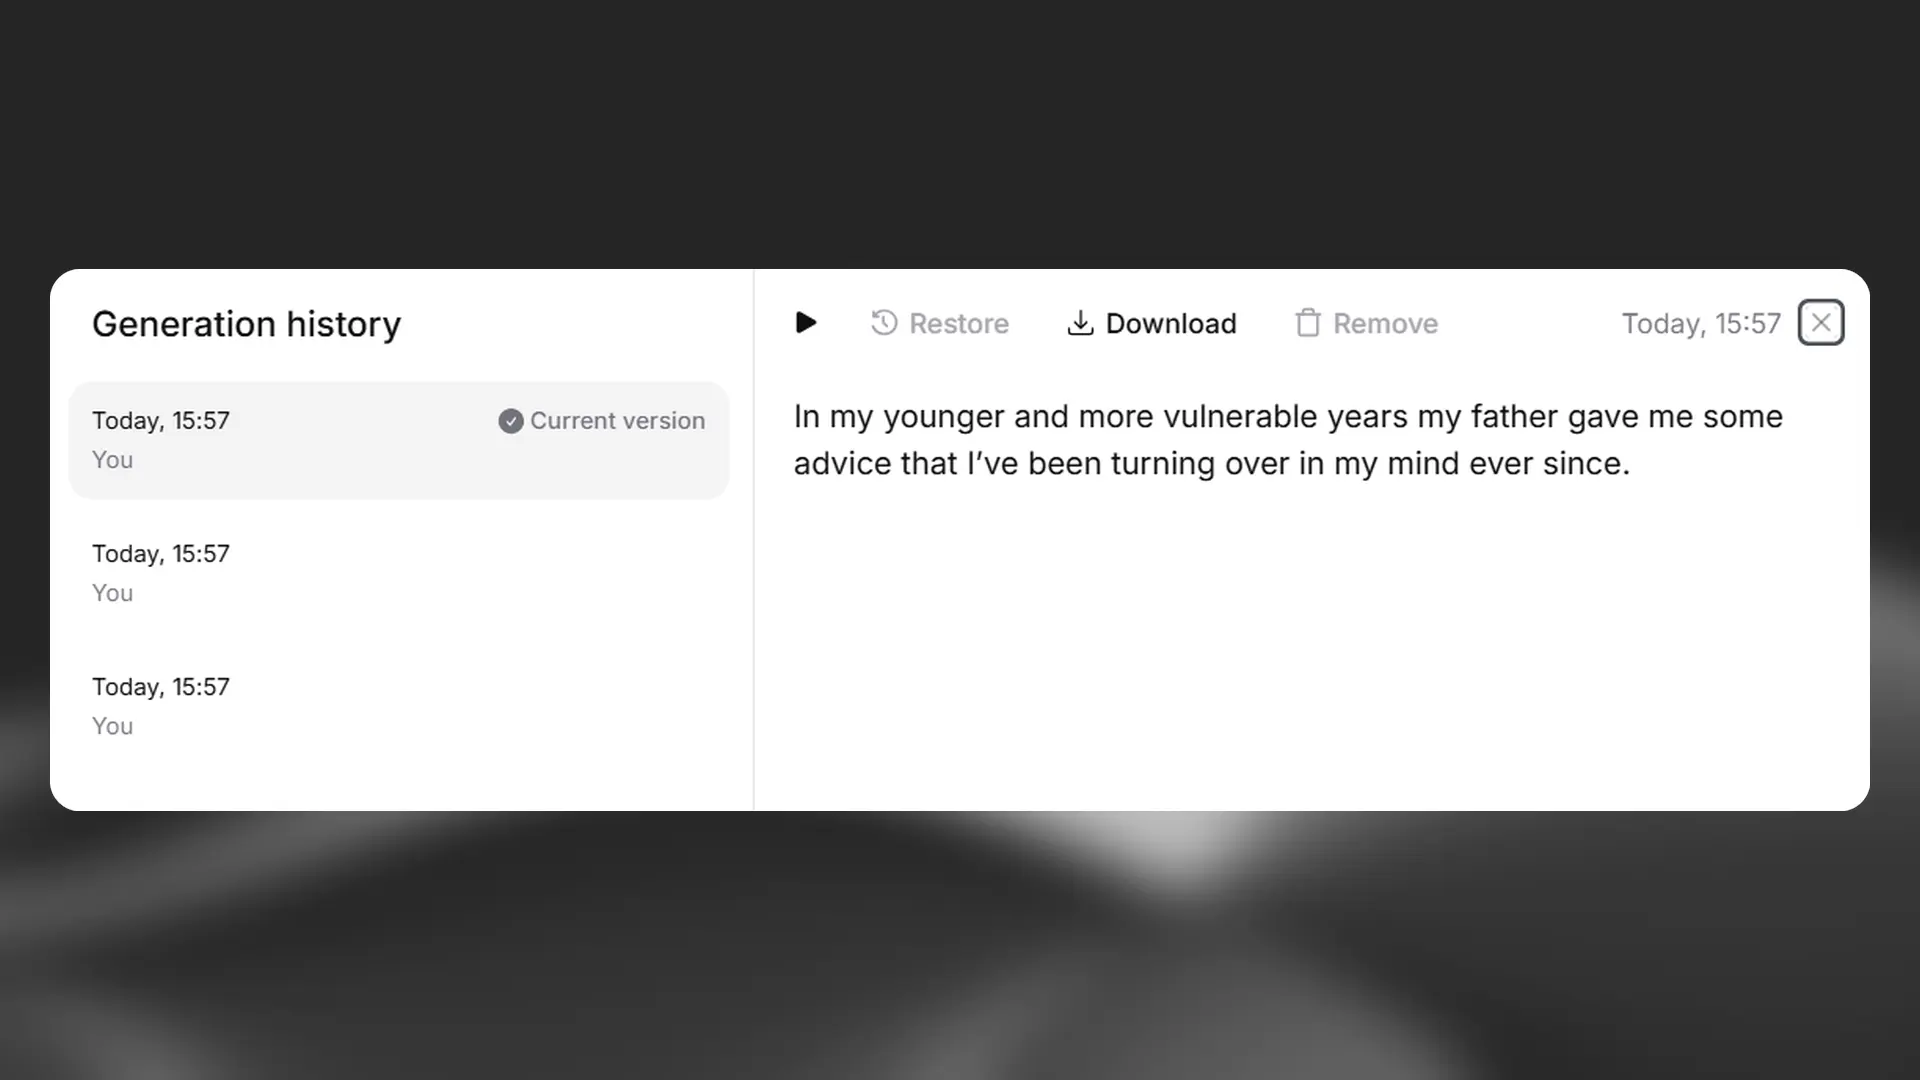
If you prefer an earlier version of a paragraph, you can restore it to that previous version. You can also remove generations, but be aware that if you remove a version, this is permanent and you can’t restore it.
Undo and Redo
Undo and Redo

If you accidentally make a change, you can use the Undo button to restore the previous version, and the Redo button to restore the change.
Breaks
Breaks
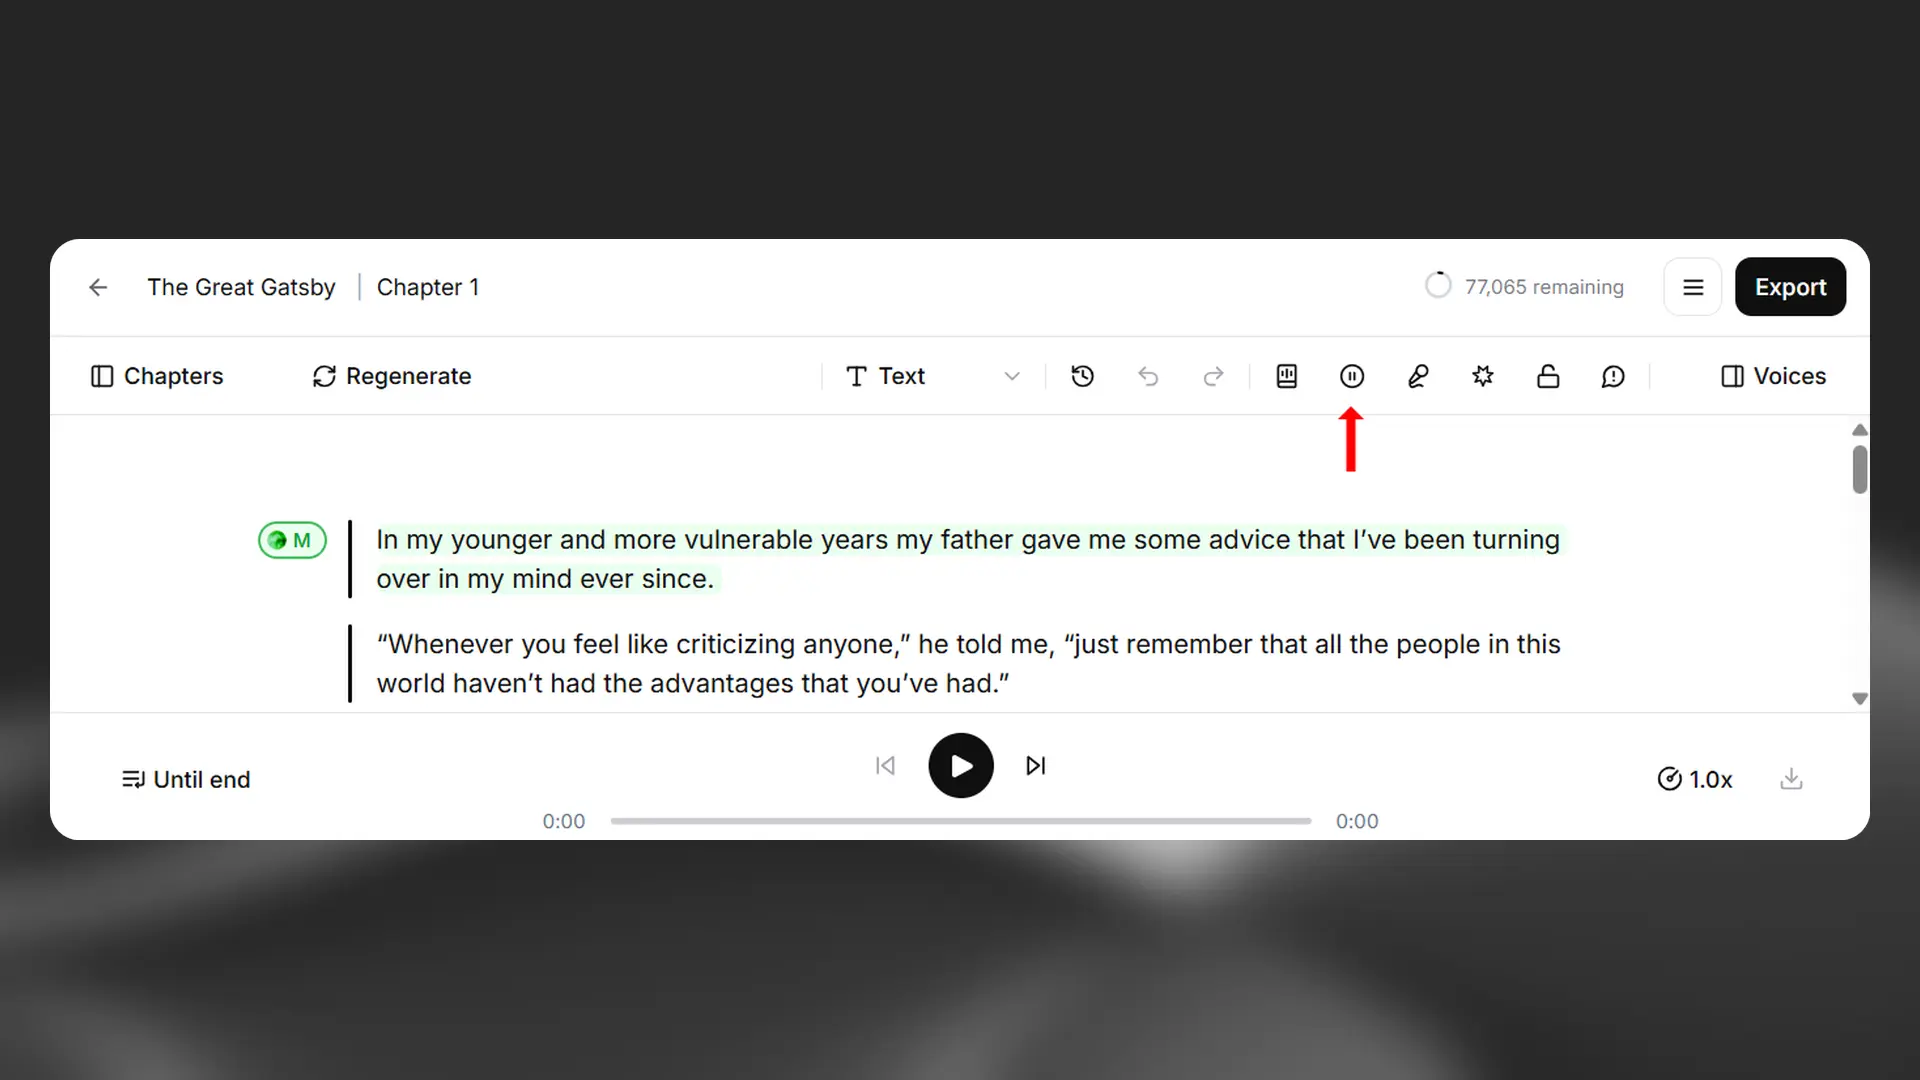
You can add a pause by using the Insert break button. This inserts a break tag. By default, this will be set to 1 second, but you can change the length of the break up to a maximum of 3 seconds.
Actor Mode
Actor Mode
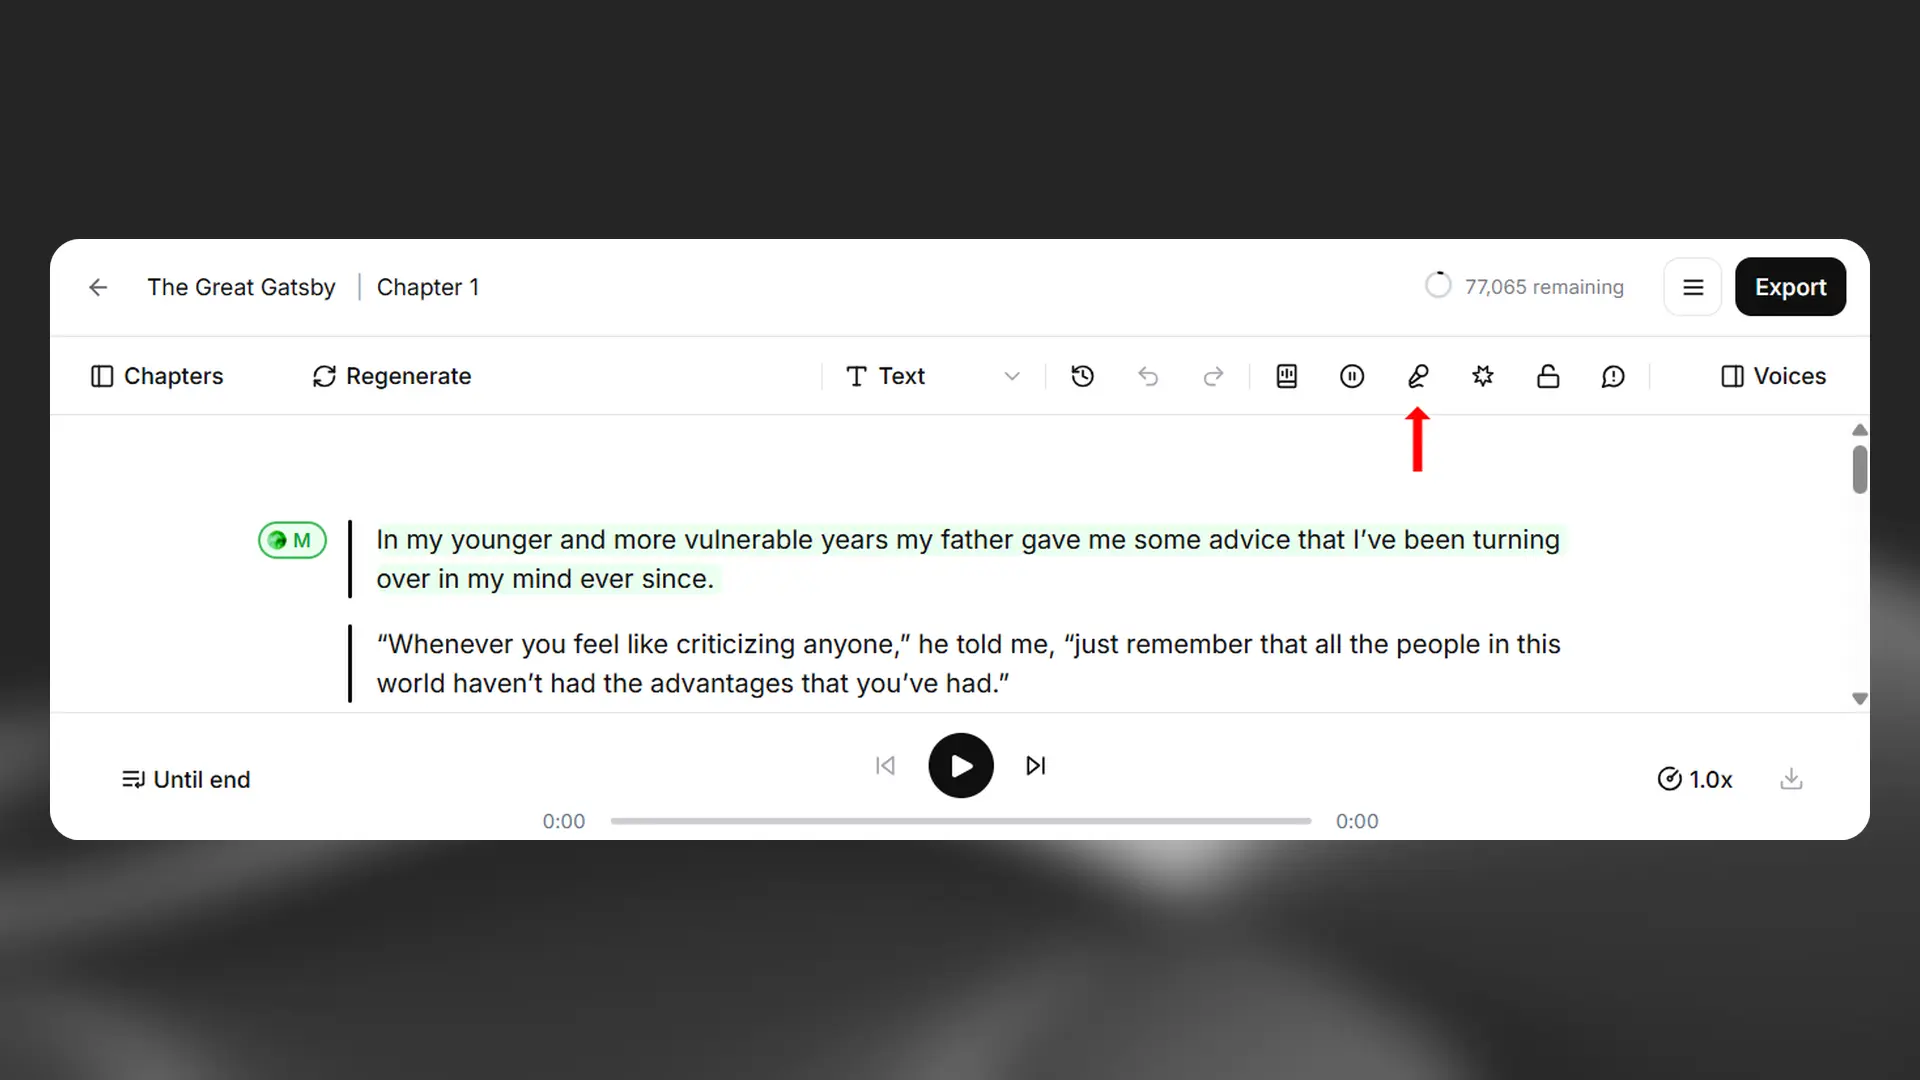
Actor Mode allows you to specify exactly how you would like a section of text to be delivered by uploading a recording, or by recording yourself directly. You can either highlight a selection of text that you want to work on, or select a whole paragraph. Once you have selected the text you want to use Actor Mode with, click the Actor Mode button, and the Actor Mode pop-up will appear.
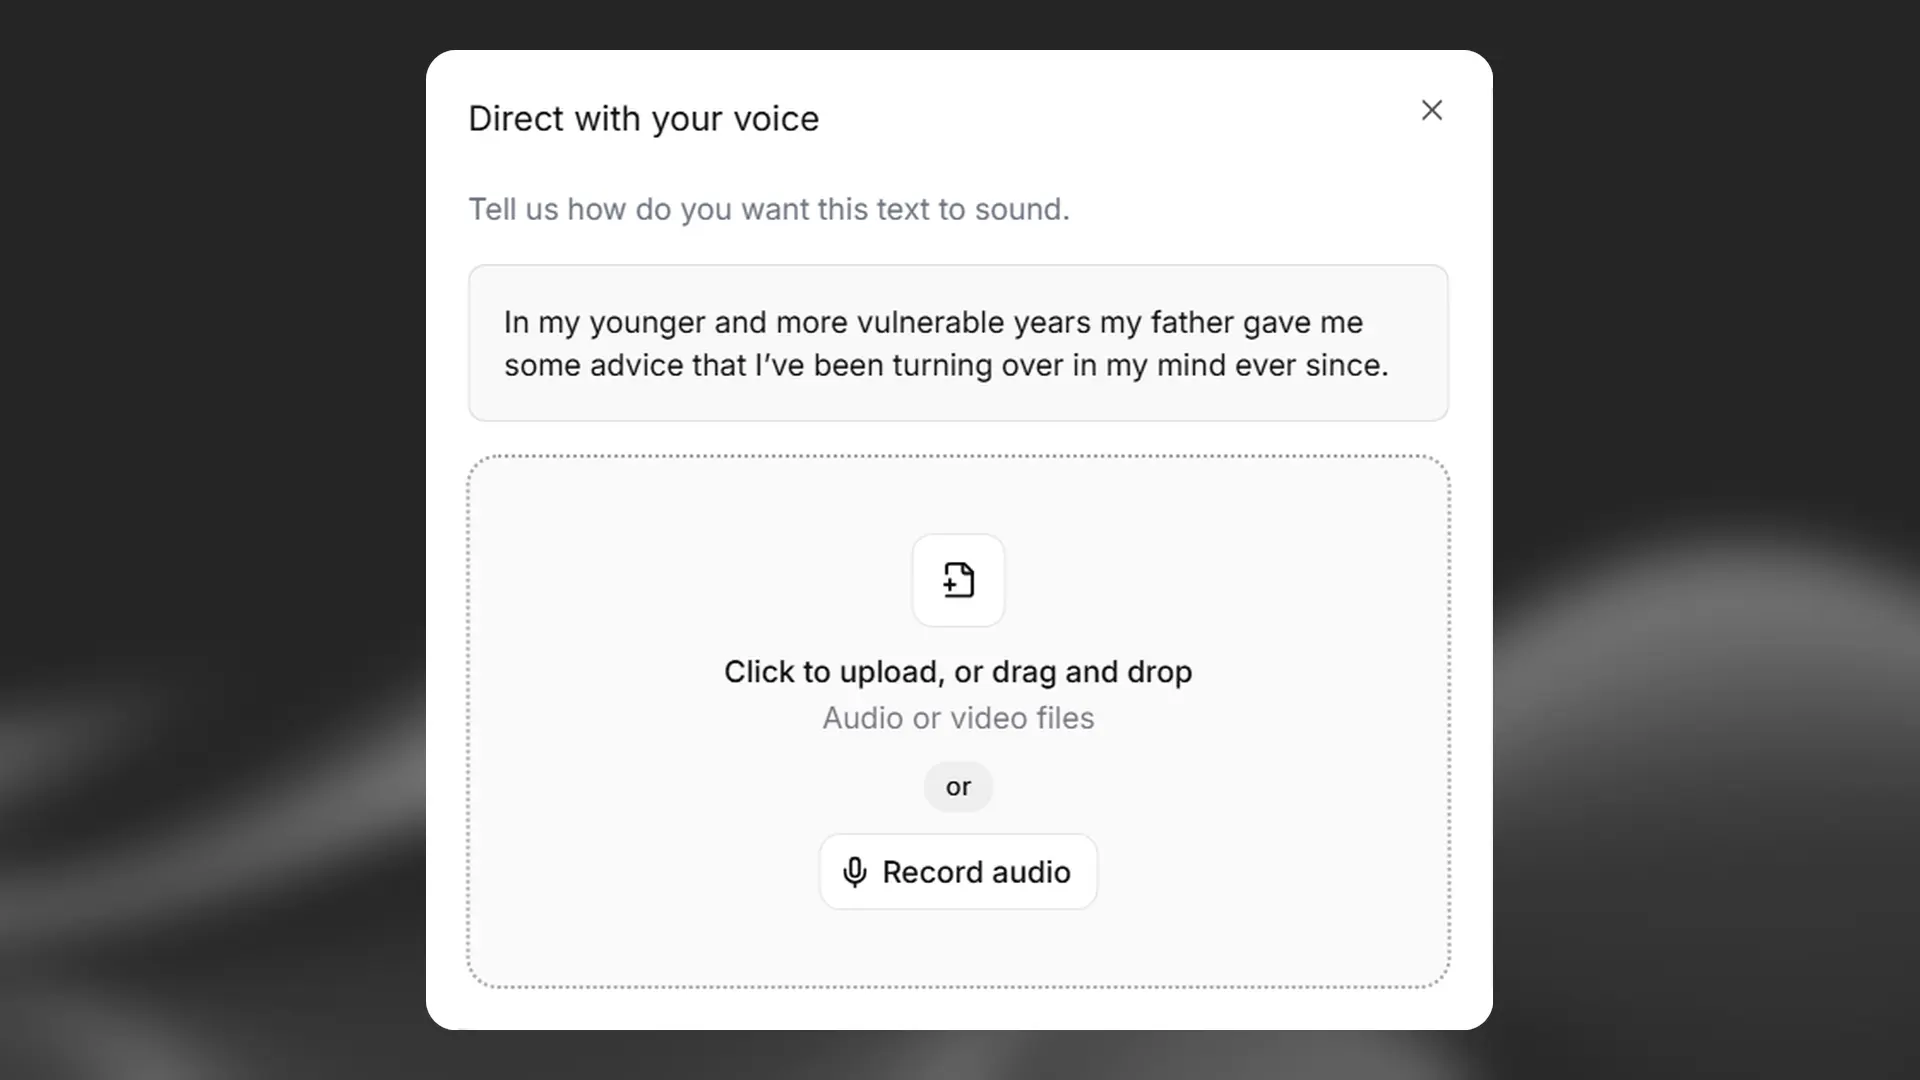
Either upload or record your audio, and you will then see the option to listen back to the audio or remove it. You will also see how many credits it will cost to generate the selected text using the audio you’ve provided.
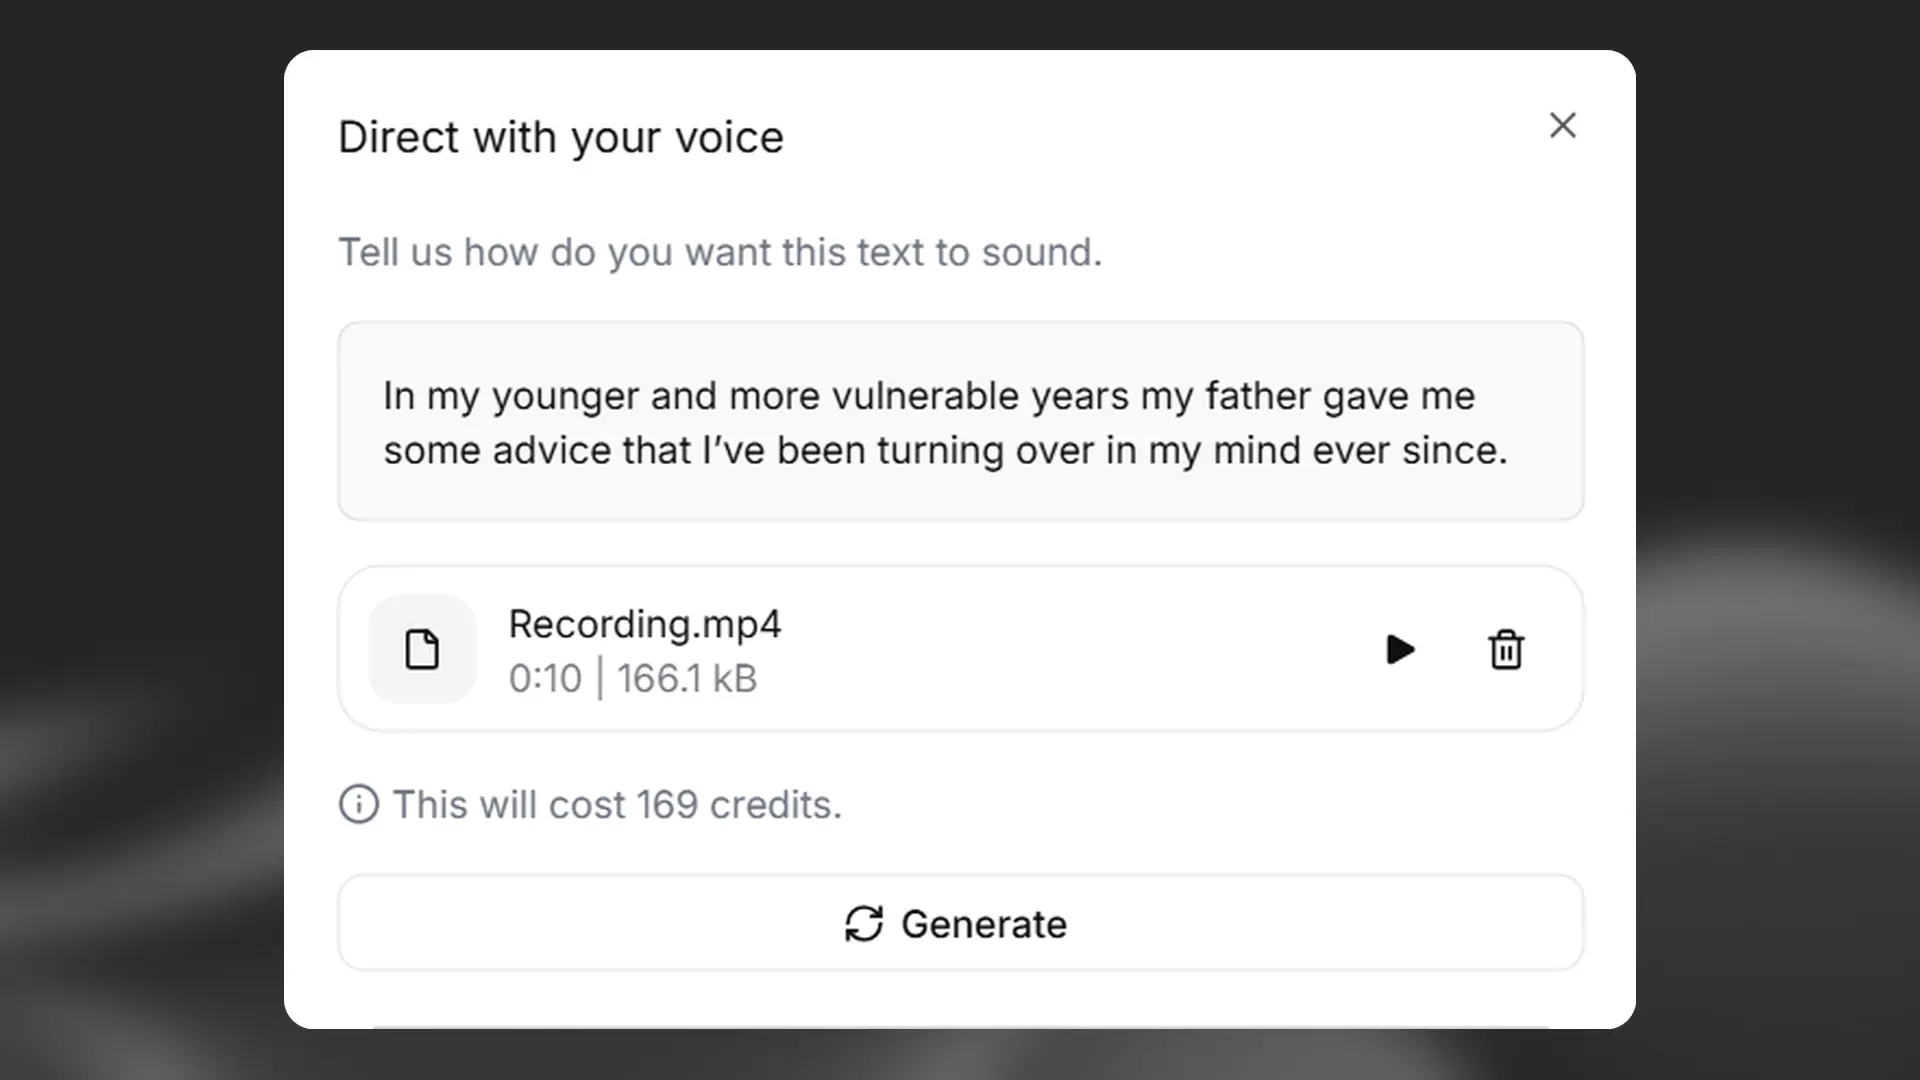
If you’re happy with the audio, click Generate, and your audio will be used to guide the delivery of the selected text.
Actor Mode will replicate all aspects of the audio you provide, including the accent.
Sound effects
Sound effects

You can add sound effects directly into your project by placing your cursor where you want the effect and clicking Insert sound effect. This inserts a new sound effect at that point, which you can reposition by dragging and dropping.
Click the sound effect to open a pop-up where you can enter a prompt and set the duration. The maximum duration depends on the remaining length of the paragraph, up to 10 seconds. If you leave the duration set to Auto, the AI will determine the appropriate length.
Click Generate preview to create four versions of the sound effect. Credit usage is as follows:
- Auto: 200 credits
- Manual: based on selected duration
You can click Regenerate to generate new effects using the same prompt, or an edited prompt. Each regeneration uses credits.
When you’re happy with your sound effect, click Apply to finalize your choice. It will play alongside the narration unless you enable the Blocking sound effect toggle, which pauses the narration during playback. You can toggle this on or off for each sound effect.
To delete a sound effect, press Backspace. You can undo the deletion with the Undo button unless the tab has been refreshed or the project has been exited.
To duplicate a sound effect, you can copy and paste it.
Sound effects are not supported in ElevenReader exports, or when streaming the project using the Studio API.
Lock paragraph
Lock paragraph
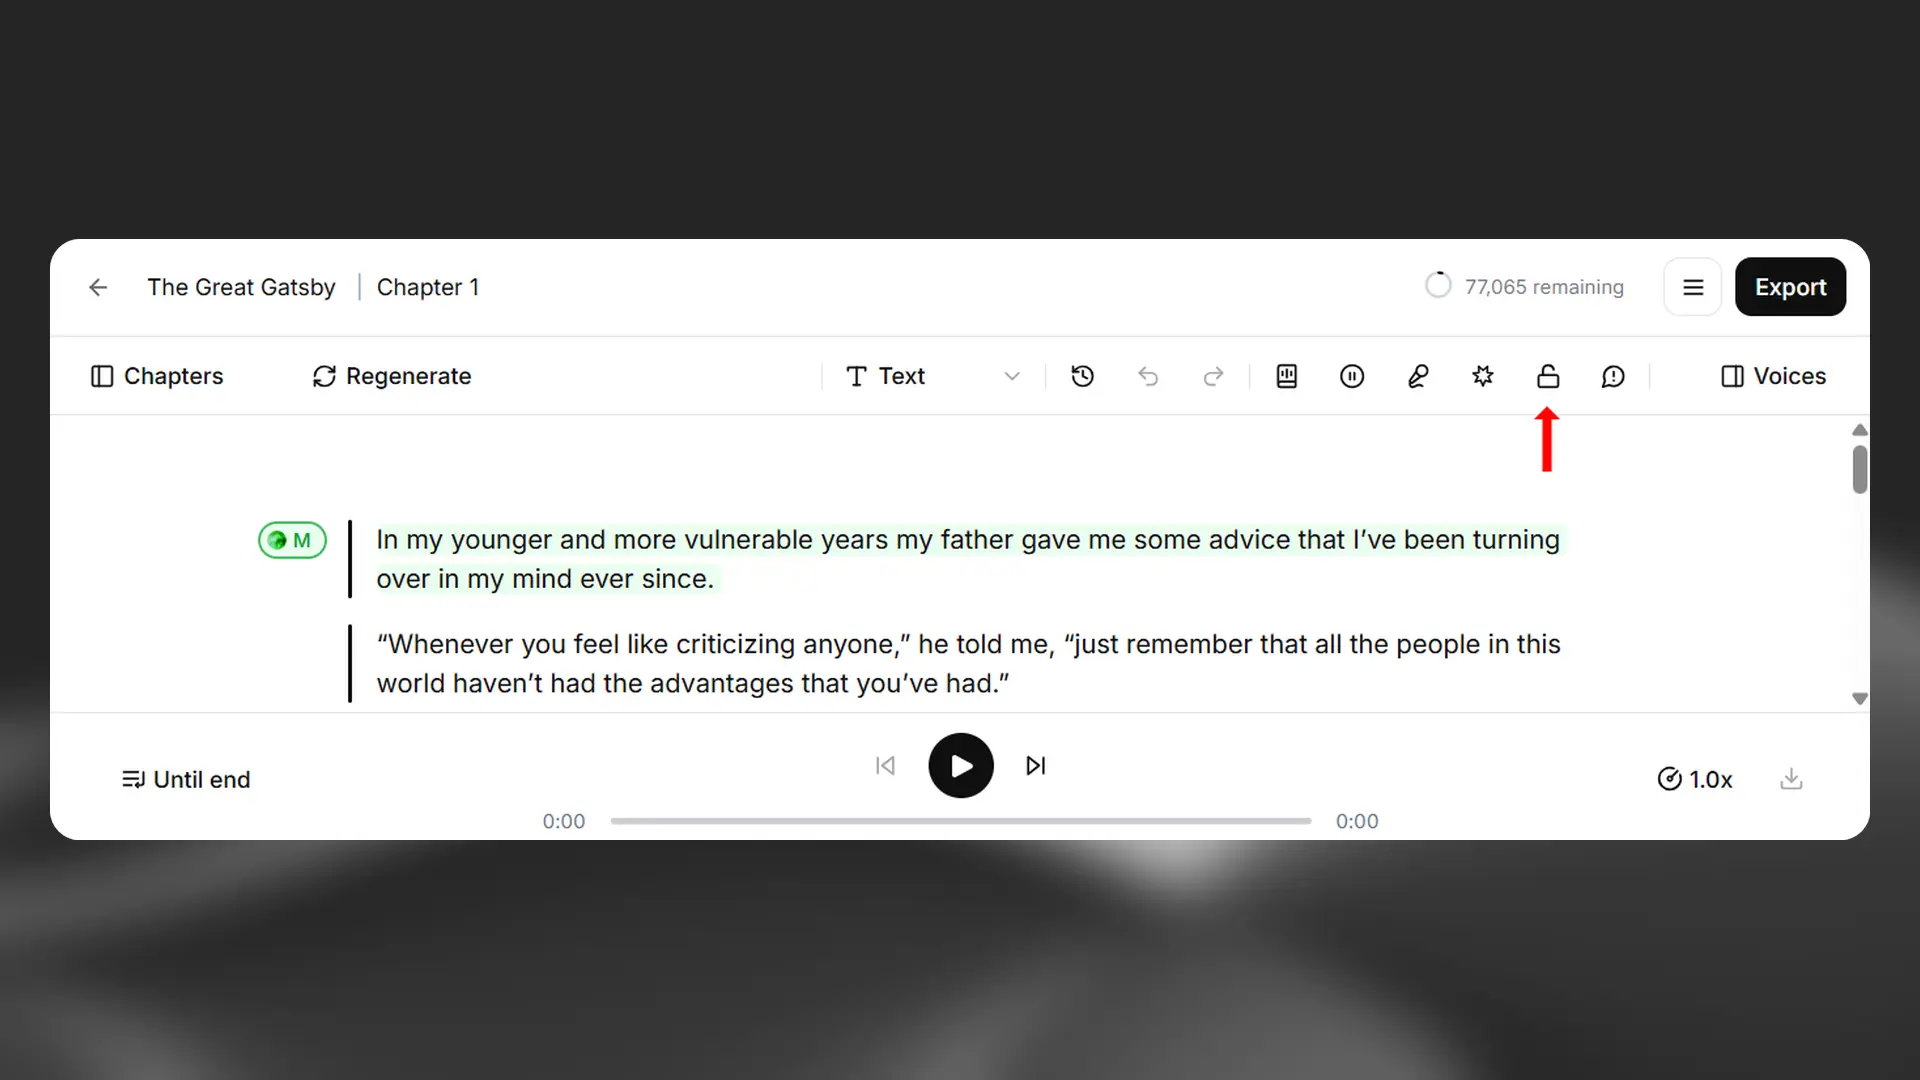
Once you’re happy with the performance of a paragraph, you can use the Lock paragraph button to prevent any further changes.
Locked paragraphs are indicated by a lock icon to the left of the paragraph. If you want to unlock a paragraph, you can do this by clicking the Lock paragraph button again.
Voices sidebar
Voices sidebar
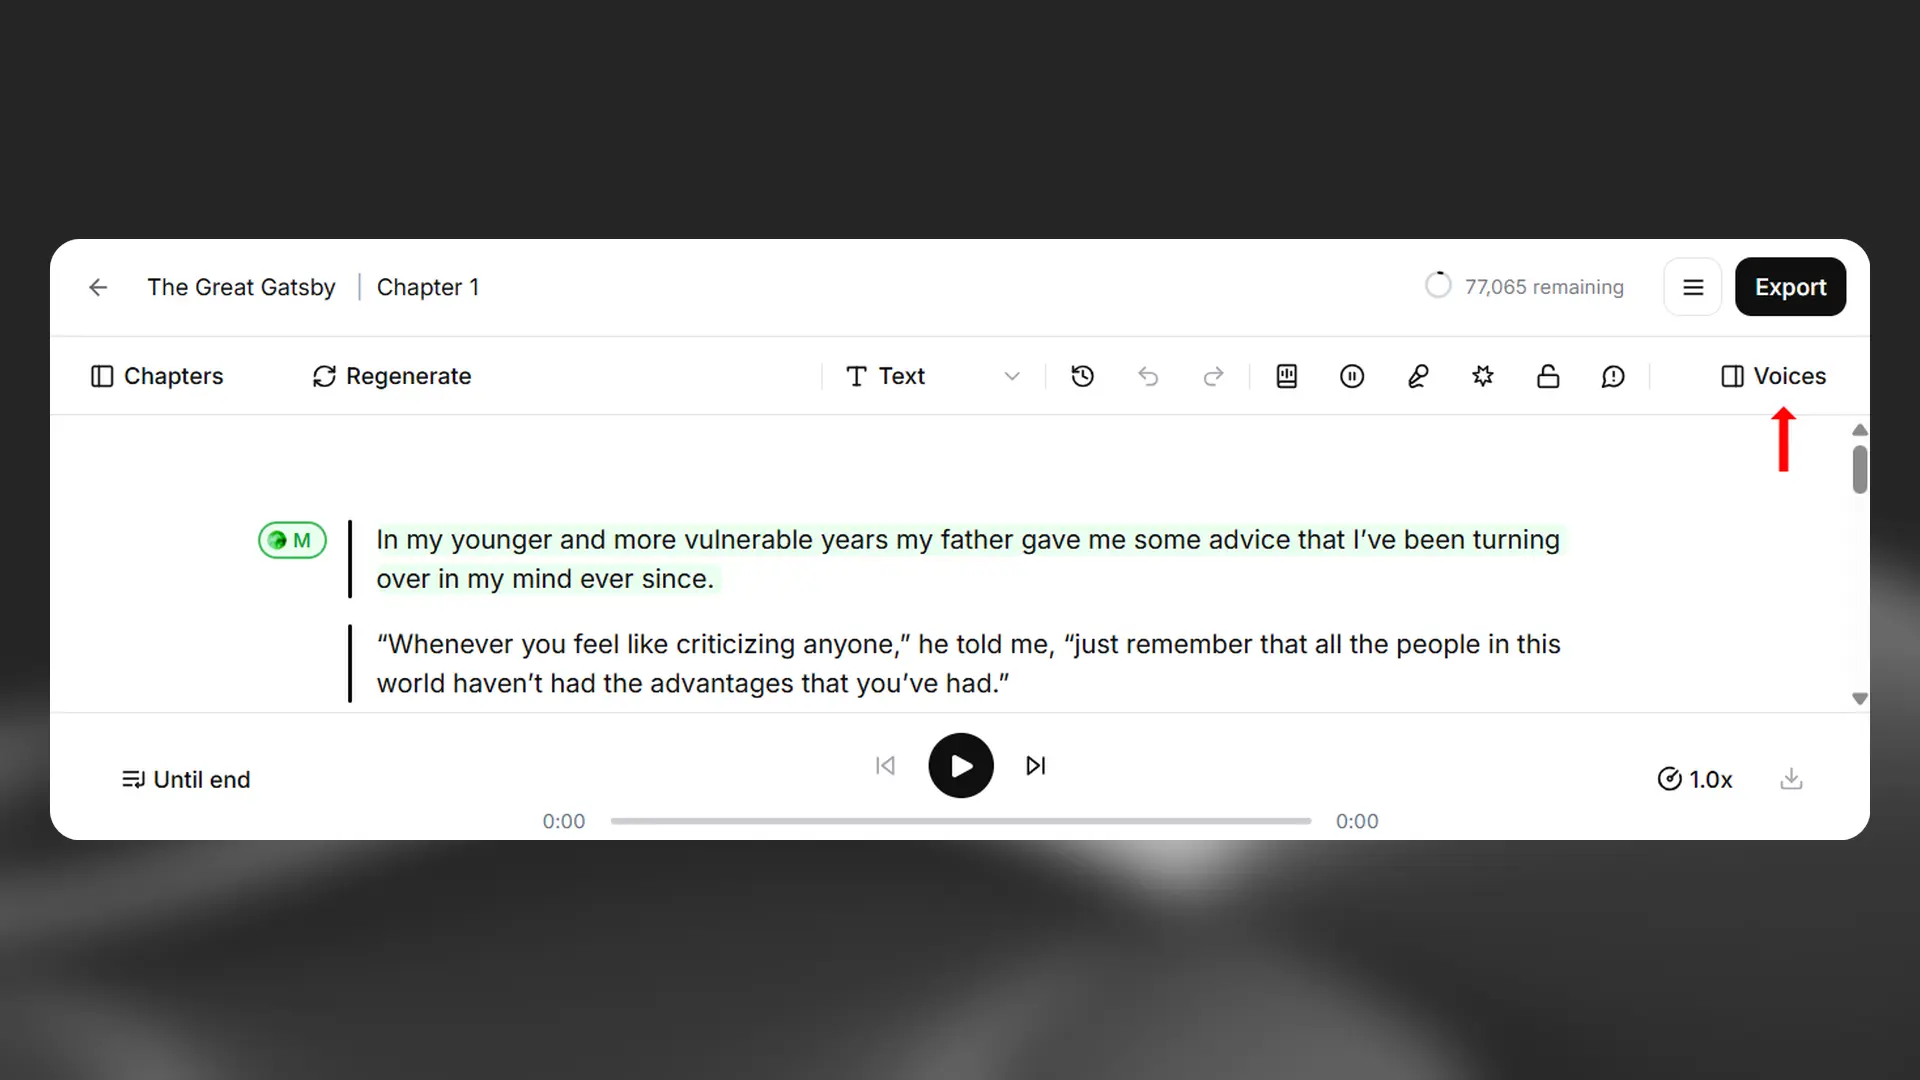
The Voices sidebar is where you will find the voices used in your project, along with the voice settings. You can toggle the visibility of the Voices sidebar by clicking Voices. For more information on voices and voice settings, see the Settings section below.
Keyboard shortcuts
Keyboard shortcuts
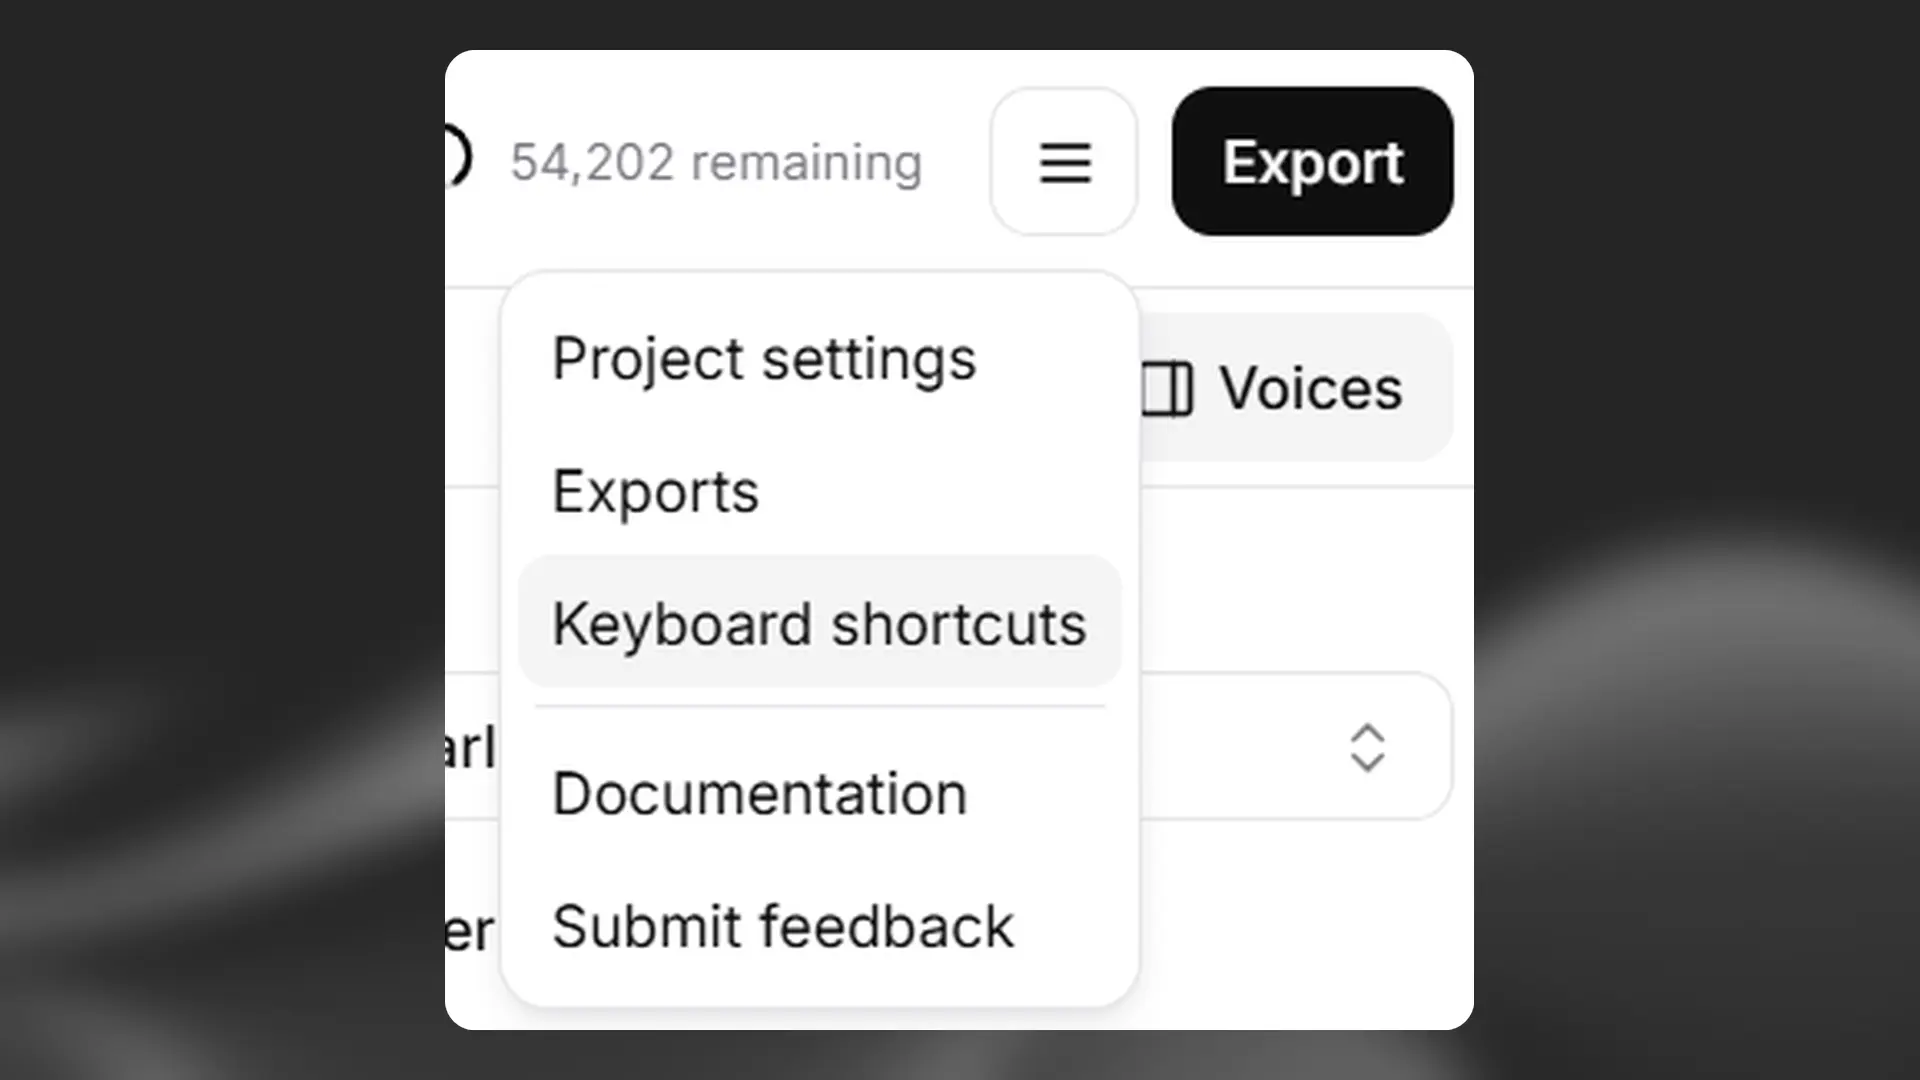
There are a range of keyboard shortcuts that can be used in Studio to speed up your workflow. To see a list of all available keyboard shortcuts, click the Project options button, then select Keyboard shortcuts.
Settings
Voices
Voices
We offer many types of voices, including the curated Default Voices library; completely synthetic voices created using our Voice Design tool; and you can create your own collection of cloned voices using our two technologies: Instant Voice Cloning and Professional Voice Cloning. Browse through our voice library to find the perfect voice for your production.
Not all voices are equal, and a lot depends on the source audio used to create that voice. Some voices will perform better than others, while some will be more stable than others. Additionally, certain voices will be more easily cloned by the AI than others, and some voices may work better with one model and one language compared to another. All of these factors are important to consider when selecting your voice.
Voice settings
Voice settings
Our users have found different workflows that work for them. The most common setting is stability around 50 and similarity near 75, with minimal changes thereafter. Of course, this all depends on the original voice and the style of performance you’re aiming for.
It’s important to note that the AI is non-deterministic; setting the sliders to specific values won’t guarantee the same results every time. Instead, the sliders function more as a range, determining how wide the randomization can be between each generation.
If you have a paragraph or text selected, you can use the Override settings toggle to change the settings for just the current selection. If you change the settings for the voice without enabling this, then this will change the settings for this voice across the whole of your project. This will mean that you will need to regenerate any audio that you had previously generated using different settings. If you have any locked paragraphs that use this voice, you won’t be able to change the settings unless you unlock them.
Alias
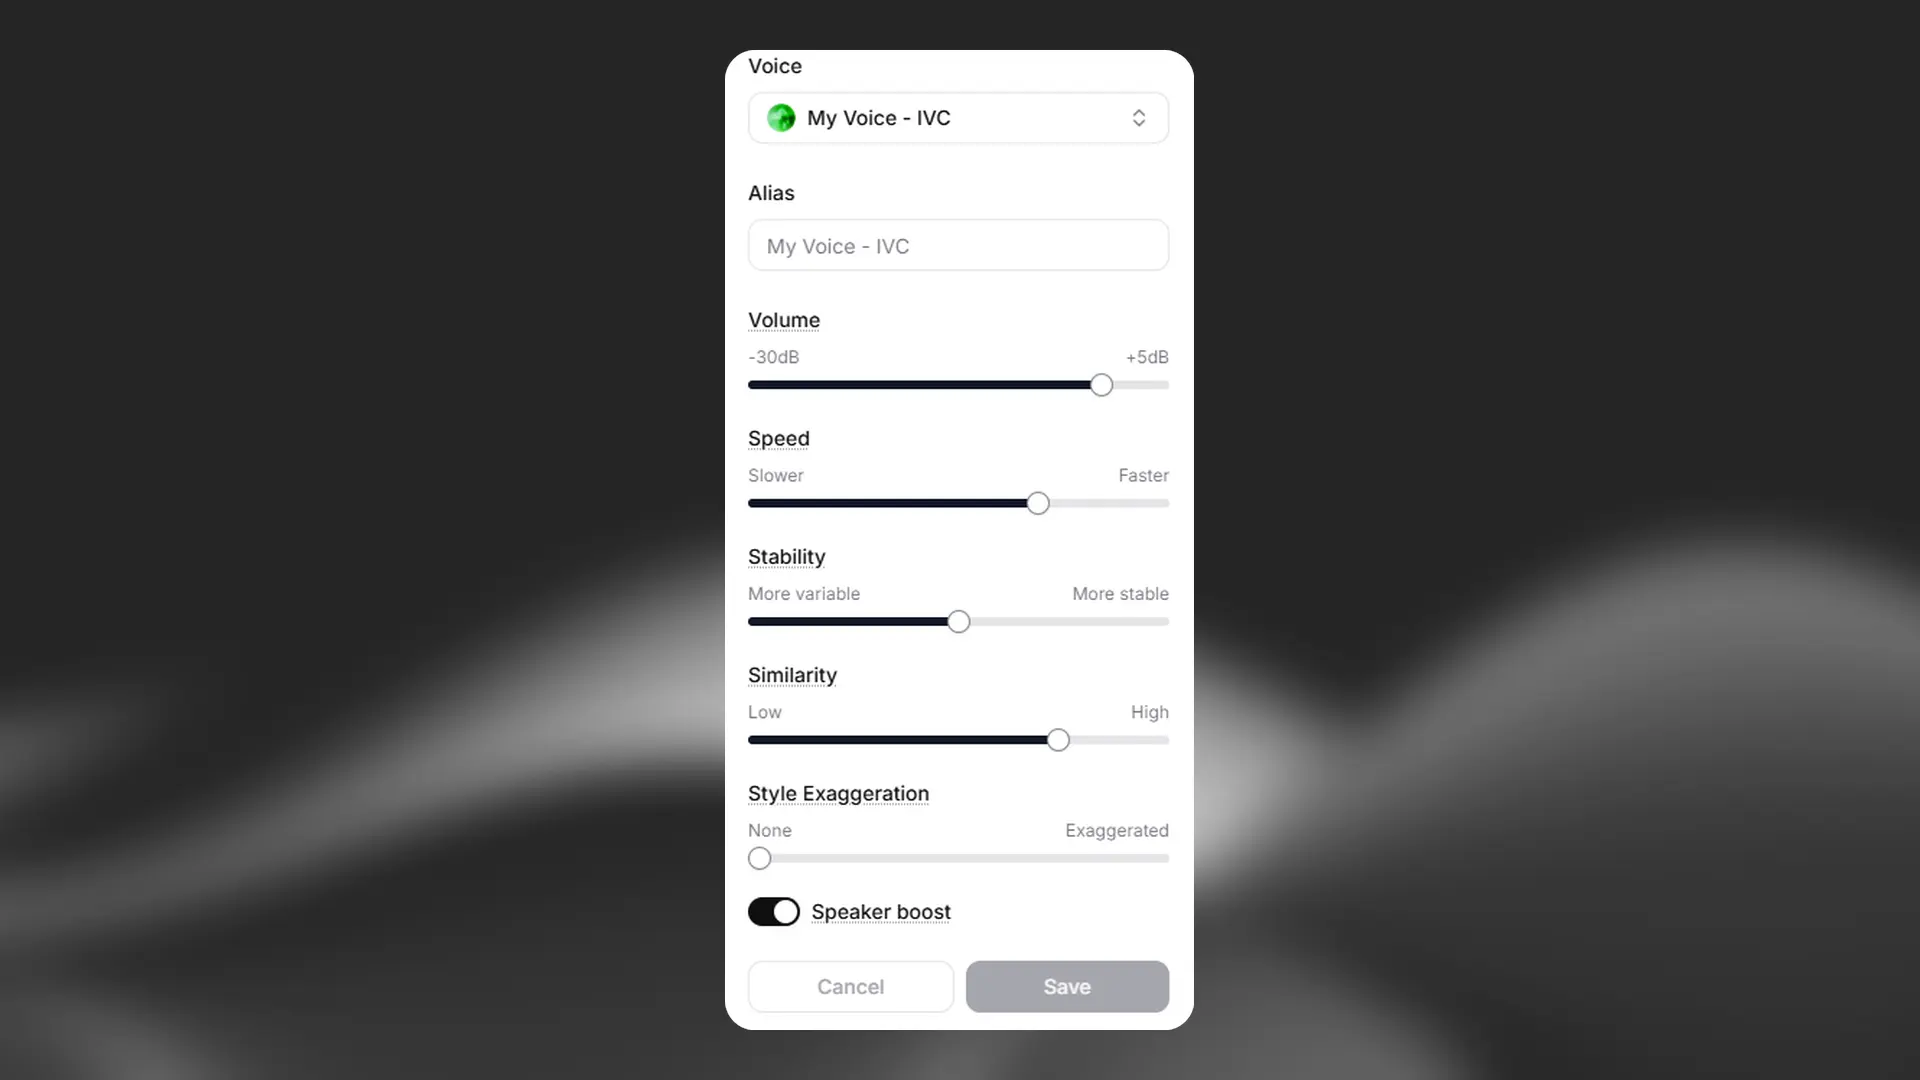
You can use this setting to give the voice an alias that applies only for this project. For example, if you’re using a different voice for each character in your audiobook, you could use the character’s name as the alias.
Volume
If you find the generated audio for the voice to be either too quiet or too loud, you can adjust the volume. The default value is 0.00, which means that the audio will be unchanged. The minimum value is -30dN and the maximum is +5dB.
Speed
The speed setting allows you to either speed up or slow down the speed of the generated speech. The default value is 1.0, which means that the speed is not adjusted. Values below 1.0 will slow the voice down, to a minimum of 0.7. Values above 1.0 will speed up the voice, to a maximum of 1.2. Extreme values may affect the quality of the generated speech.
Stability
The stability slider determines how stable the voice is and the randomness between each generation. Lowering this slider introduces a broader emotional range for the voice. This is influenced heavily by the original voice. Setting the slider too low may result in odd performances that are overly random and cause the character to speak too quickly. On the other hand, setting it too high can lead to a monotonous voice with limited emotion.
For a more lively and dramatic performance, it is recommended to set the stability slider lower and generate a few times until you find a performance you like.
On the other hand, if you want a more serious performance, even bordering on monotone at very high values, it is recommended to set the stability slider higher. Since it is more consistent and stable, you usually don’t need to generate as many samples to achieve the desired result. Experiment to find what works best for you!
Similarity
The similarity slider dictates how closely the AI should adhere to the original voice when attempting to replicate it. If the original audio is of poor quality and the similarity slider is set too high, the AI may reproduce artifacts or background noise when trying to mimic the voice if those were present in the original recording.
Style exaggeration
With the introduction of the newer models, we also added a style exaggeration setting. This setting attempts to amplify the style of the original speaker. It does consume additional computational resources and might increase latency if set to anything other than 0. It’s important to note that using this setting has shown to make the model slightly less stable, as it strives to emphasize and imitate the style of the original voice.
In general, we recommend keeping this setting at 0 at all times.
Speaker boost
This setting boosts the similarity to the original speaker. However, using this setting requires a slightly higher computational load, which in turn increases latency. The differences introduced by this setting are generally rather subtle.
Pronunciation dictionaries
Pronunciation dictionaries
Sometimes you may want to specify the pronunciation of certain words, such as character or brand names, or specify how acronyms should be read. Pronunciation dictionaries allow this functionality by enabling you to upload a lexicon or dictionary file that includes rules about how specified words should be pronounced, either using a phonetic alphabet (phoneme tags) or word substitutions (alias tags).
Phoneme tags are only compatible with “Eleven Flash v2”, “Eleven Turbo v2” and “Eleven English v1” models.
Whenever one of these words is encountered in a project, the AI will pronounce the word using the specified replacement. When checking for a replacement word in a pronunciation dictionary, the dictionary is checked from start to end and only the first replacement is used.
You can add a pronunciation dictionary to your project from the General tab in Project settings.
For more information on pronunciation dictionaries, please see our prompting best practices guide.
Export settings
Export settings
Within the Export tab under Project settings you can add additional metadata such as Title, Author, ISBN and a Description to your project. This information will automatically be added to the downloaded audio files. You can also access previous versions of your project, and enable volume normalization.
Exporting
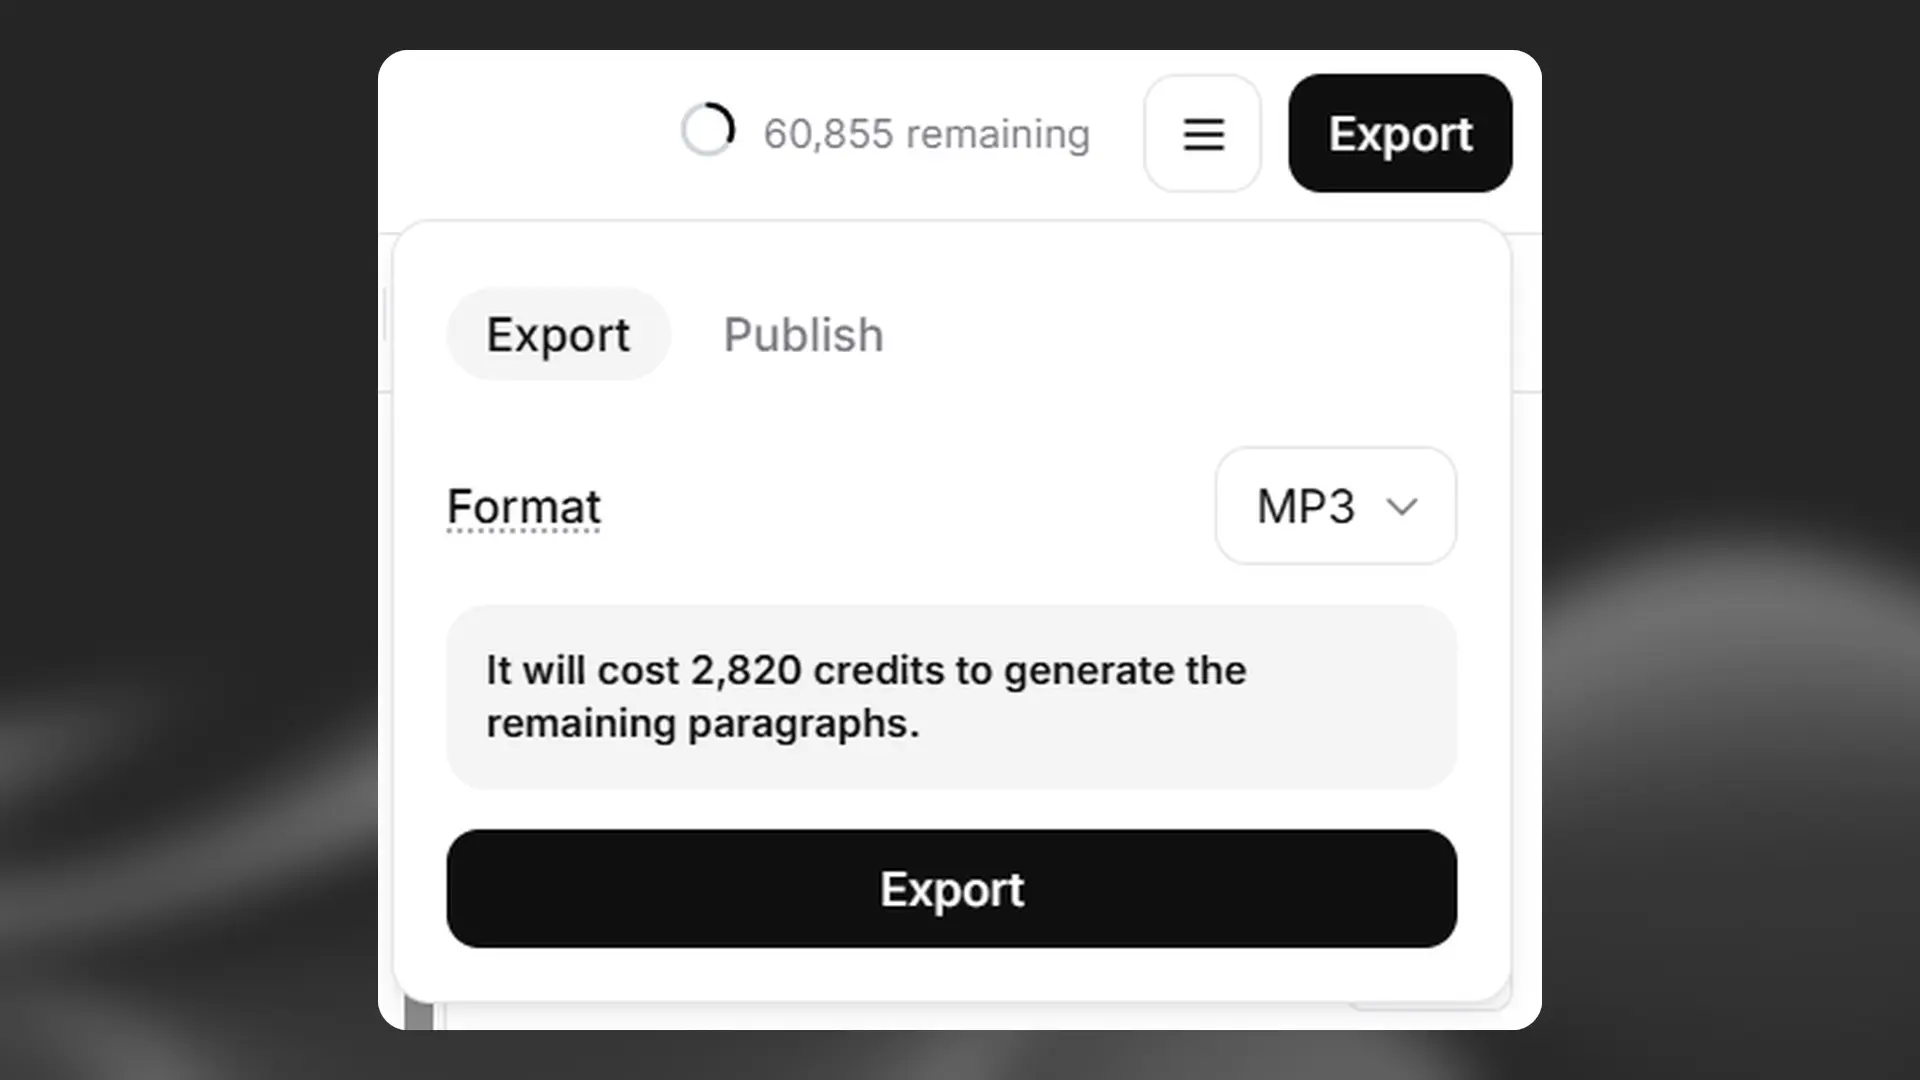
When you’re happy with your chapter or project, you will need to use the Export button to generate a new version that you can download. If you’ve already generated audio for every paragraph in either your chapter or project, you won’t be charged any additional credits to export. If there are any paragraphs that do need converting as part of the export process, you will see a notification of how many credits it will cost to export.
Export options
Export options
If your project only has one chapter, you will just see the option to export as either MP3 or WAV.
If your project has multiple chapters, you will have the option to export each chapter individually, or export the full project. If you’re exporting the full project, you can either export as a single file, or as a ZIP file containing individual files for each chapter. You can also choose whether to download as MP3 or WAV.
Quality setting
Quality setting
The quality of the export depends on your subscription plan. For newly created projects, the quality will be:
- Free, Starter and Creator: 128 kbps MP3, or WAV converted from 128 kbps source.
- Pro, Scale, Business and Enterprise plans: 16-bit, 44.1 kHz WAV, or 192 kbps MP3 (Ultra Lossless).
If you have an older project, you may have set the quality setting when you created the project, and this can’t be changed. You can check the quality setting for your project in the Export menu by hovering over Format
Downloading
Downloading
Once your export is ready, it will be automatically downloaded.
You can access and download all previous exports, of both chapters and projects, by clicking the Project options button and selecting Exports.
FAQ
Free regenerations
In Studio, provided you don’t change the text or voice, you can regenerate a selected paragraph or section of text twice for free.
If free regenerations are available for the selected paragraph or text, you will see Regenerate. If you hover over the Regenerate button, the number of free regenerations remaining will be displayed.
Once your free regenerations have been used, the button will display Generate, and you will be charged for subsequent generations.
Auto-regeneration for bulk conversions
When using Export to generate audio for a full chapter or project, auto-regeneration automatically checks the output for volume issues, voice similarity, and mispronunciations. If any issues are detected, the tool will automatically regenerate the audio up to twice, at no extra cost.
This feature may increase the processing time but helps ensure higher quality output for your bulk conversions.