ElevenCreative Studio
Overview
ElevenCreative Studio 4.0 uses a prompt-first workflow for creating video and audio projects. Describe the project you want to create, and Studio Agent creates a first draft.
Video projects use a Library of reusable assets, including generated video clips, images, and speech. Arrange these assets on a multi-track timeline. Use the Library, Script, and Captions panels to manage assets and control narration, music, and sound effects.
Share the project with your team to collect comments and feedback.
ElevenCreative Studio supports our latest speech models, including Eleven v4. You can switch models at any time in Project settings.
Guide
Starting options
Studio selects some settings when you create a project.
The default model for most new projects is Eleven Multilingual v2. You can select another model, including Eleven v3, in Project settings.
Studio selects the quality setting based on your subscription plan. The quality setting does not affect credit usage.
- Free, Starter, and Creator: 128 kbps MP3, or WAV generated from a 128 kbps source.
- Pro, Scale, Business, and Enterprise: 16-bit, 44.1 kHz WAV, or 192 kbps MP3 (Ultra Lossless).
Video exports on the Free plan include a watermark. Paid plans export videos without a watermark.
Quick start
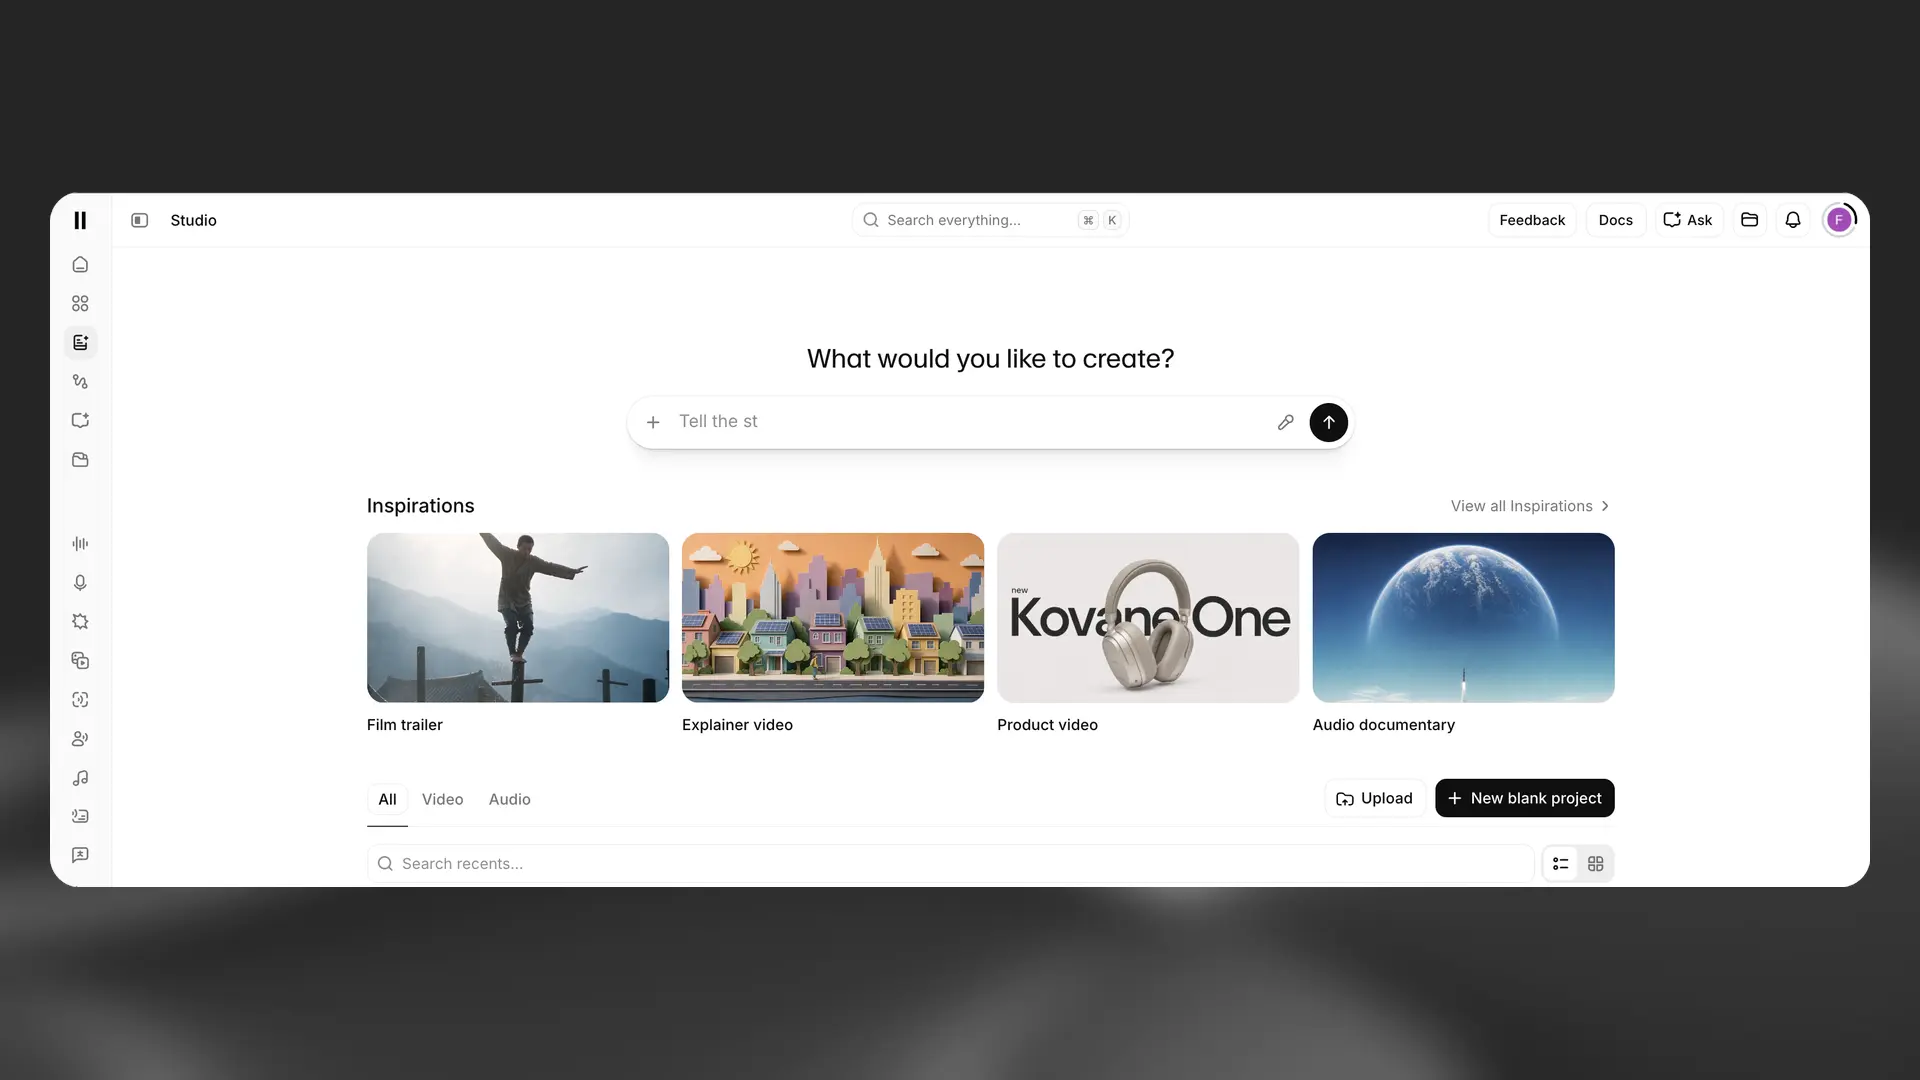
At the top of the Studio page, use the What would you like to create? prompt bar to describe your project. Studio Agent uses the description to create a first draft. You can also upload existing media or create a blank project.
Upload
Upload
Select Upload to start from existing media. Text and audio files open in the audio layout. Video files open in the video layout with captions available.
New blank project
Start a project from scratch
Select + New blank project to open the project type selector:
- Video project (New) opens the new video editor with the Library, Script, and Captions panels and Studio Agent.
- Audio project creates a blank audio project for long-form narration, podcasts, and audiobooks.
- Video project opens the previous version of Studio for video.
Get started
The Inspirations section contains example projects. Select a card to use it as the starting point for a new project. Select View all Inspirations to search the complete library by category.
Available inspirations
The available categories may change as the Inspirations library is updated.
Studio Agent
Overview
Studio Agent is an AI co-editor built directly into ElevenCreative Studio Video projects.
Studio Agent chat usage consumes credits based on token usage. Media generation consumes additional credits.
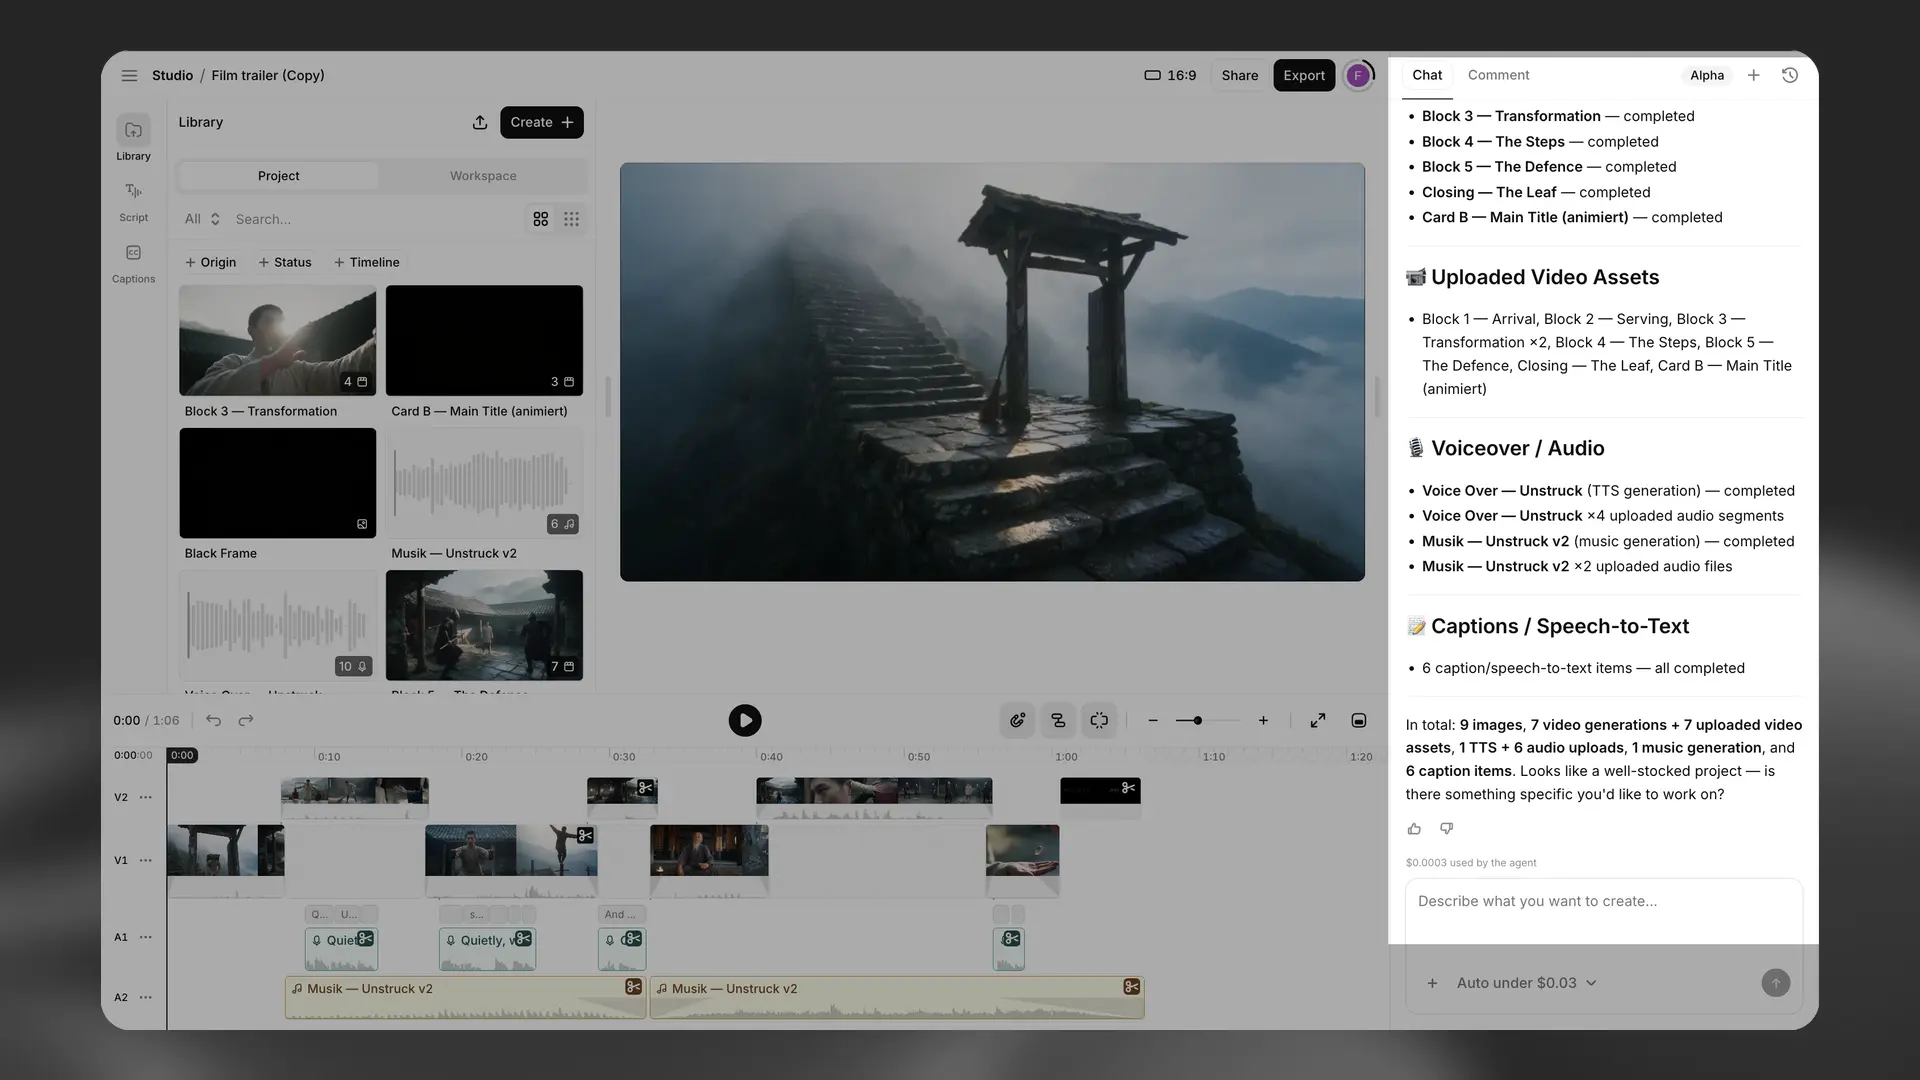
Describe what you want to create, upload files, or select assets from past generations. Studio Agent asks about the video length, tone, structure, and transitions before building a first draft on the timeline. It adds clips, voiceovers, voices, sound effects, and captions. You can edit the timeline at any point, then continue working with Studio Agent.
Key features
Analyze clips
Studio Agent builds a frame-level map of the video to identify what happens in the footage. For example, enter “add a swoosh when the logo appears” to place audio at that point.
In-chat asset discovery
Search, preview, and place voice models and sound effects in the chat without opening the Voice Library or Sound Effects catalog.
Model selection and confirmation
Studio Agent selects from five image models and five video models based on your request. You can select a different model when you confirm the generation.
Plan and create modes
Use the toggle at the top of the editor to switch between two modes:
Create mode allows Studio Agent to edit the timeline, insert clips, generate media, apply text overlays, and adjust audio.
Plan mode allows Studio Agent to outline its approach without changing the timeline. Use this mode to review the proposed changes.
In Plan mode, Studio Agent can:
- Analyze footage and transcribe speech.
- Search assets and voice models.
- Draft scripts and scene plans.
- Plan timeline edits and calculate gap management.
- Provide guidance for TikTok, YouTube, and Instagram.
Manual control
You can edit the timeline at any point, then continue working with Studio Agent.
Limits and file handling
File size
Studio Agent does not impose an additional file size limit.
Availability
Studio Agent is available in the web app. It is not available through the API.
Pricing
Studio Agent is available on all plans. Chat usage consumes credits based on five token categories: input, output, thinking, cache read, and cache write. The cost depends on token consumption in each category.
Speech, image, music, sound effects, and video generation are billed at the standard rates for those capabilities. Commercial usage rights are determined by your subscription plan, consistent with other ElevenLabs products.
Standard subscription plans use credits. Enterprise plans may use fiat billing. Contact Enterprise Sales for details.
To upgrade your plan, visit your Subscription page.
Generating and editing
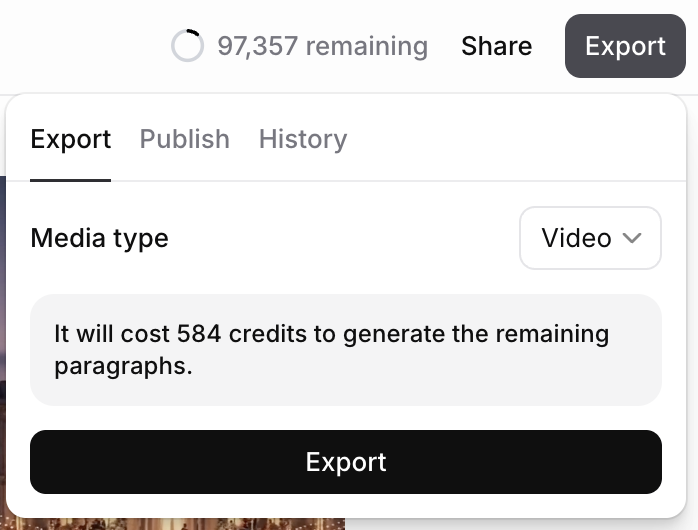
Select Export to render the current chapter or project. Studio generates any required narration and creates an audio or video file based on the project’s tracks and settings.
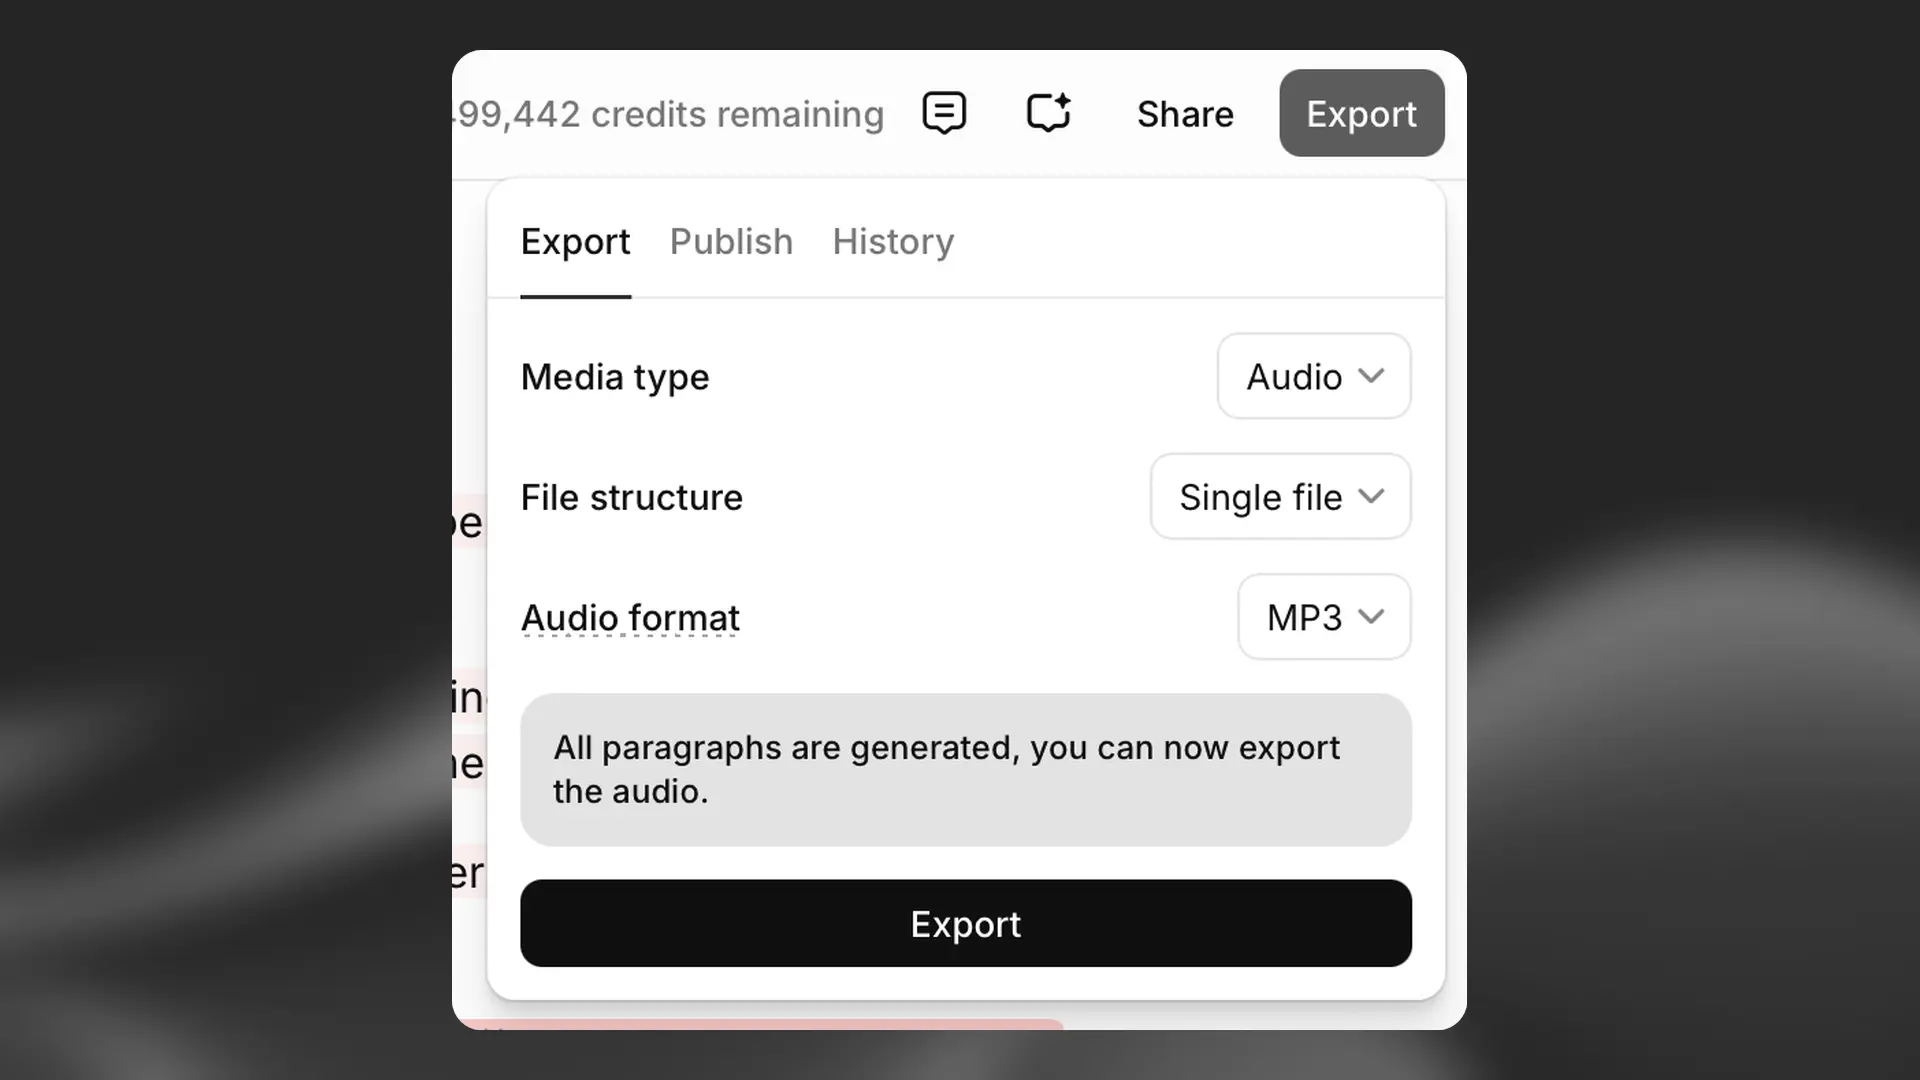
You can continue editing after export. Select Export again to create a version that includes the updated media.
Audio projects
Contextual sidebar for Audio projects
Contextual sidebar for Audio projects
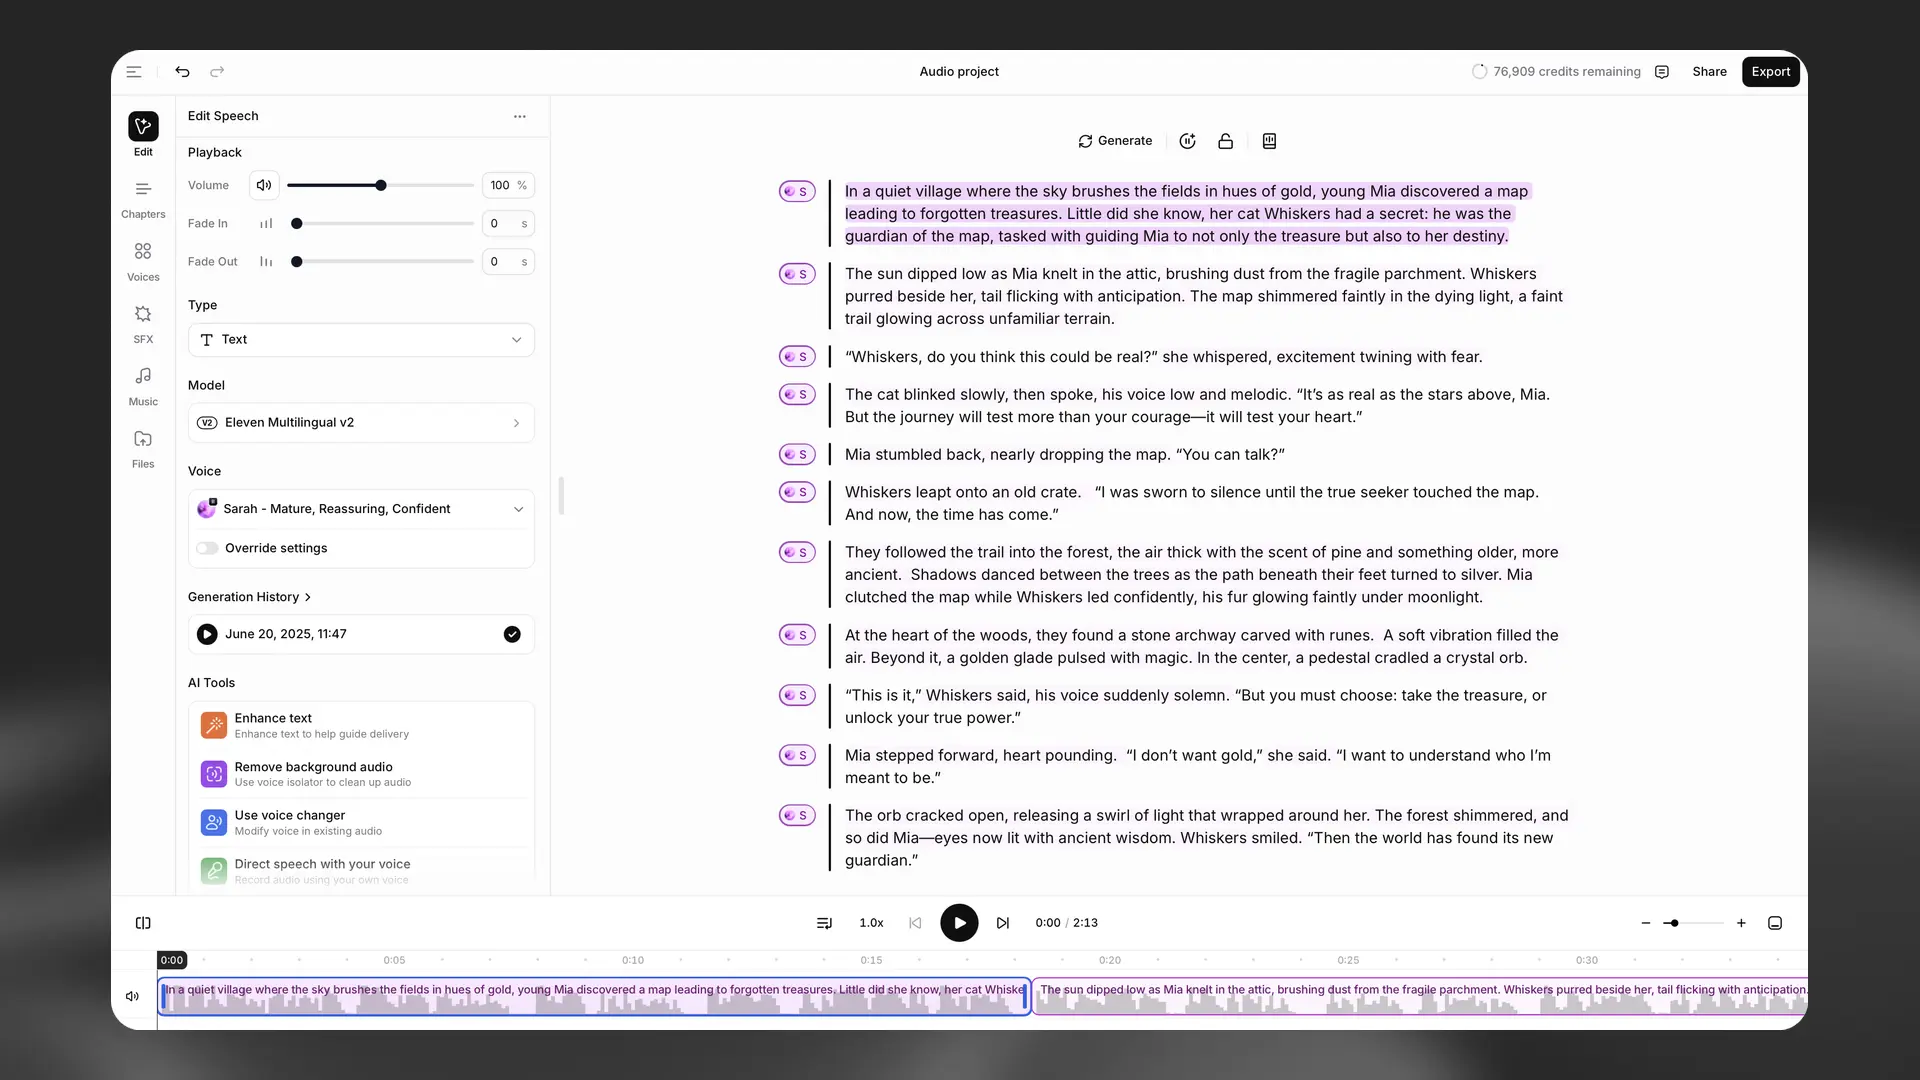
The contextual sidebar shows tools and details for the selected item.
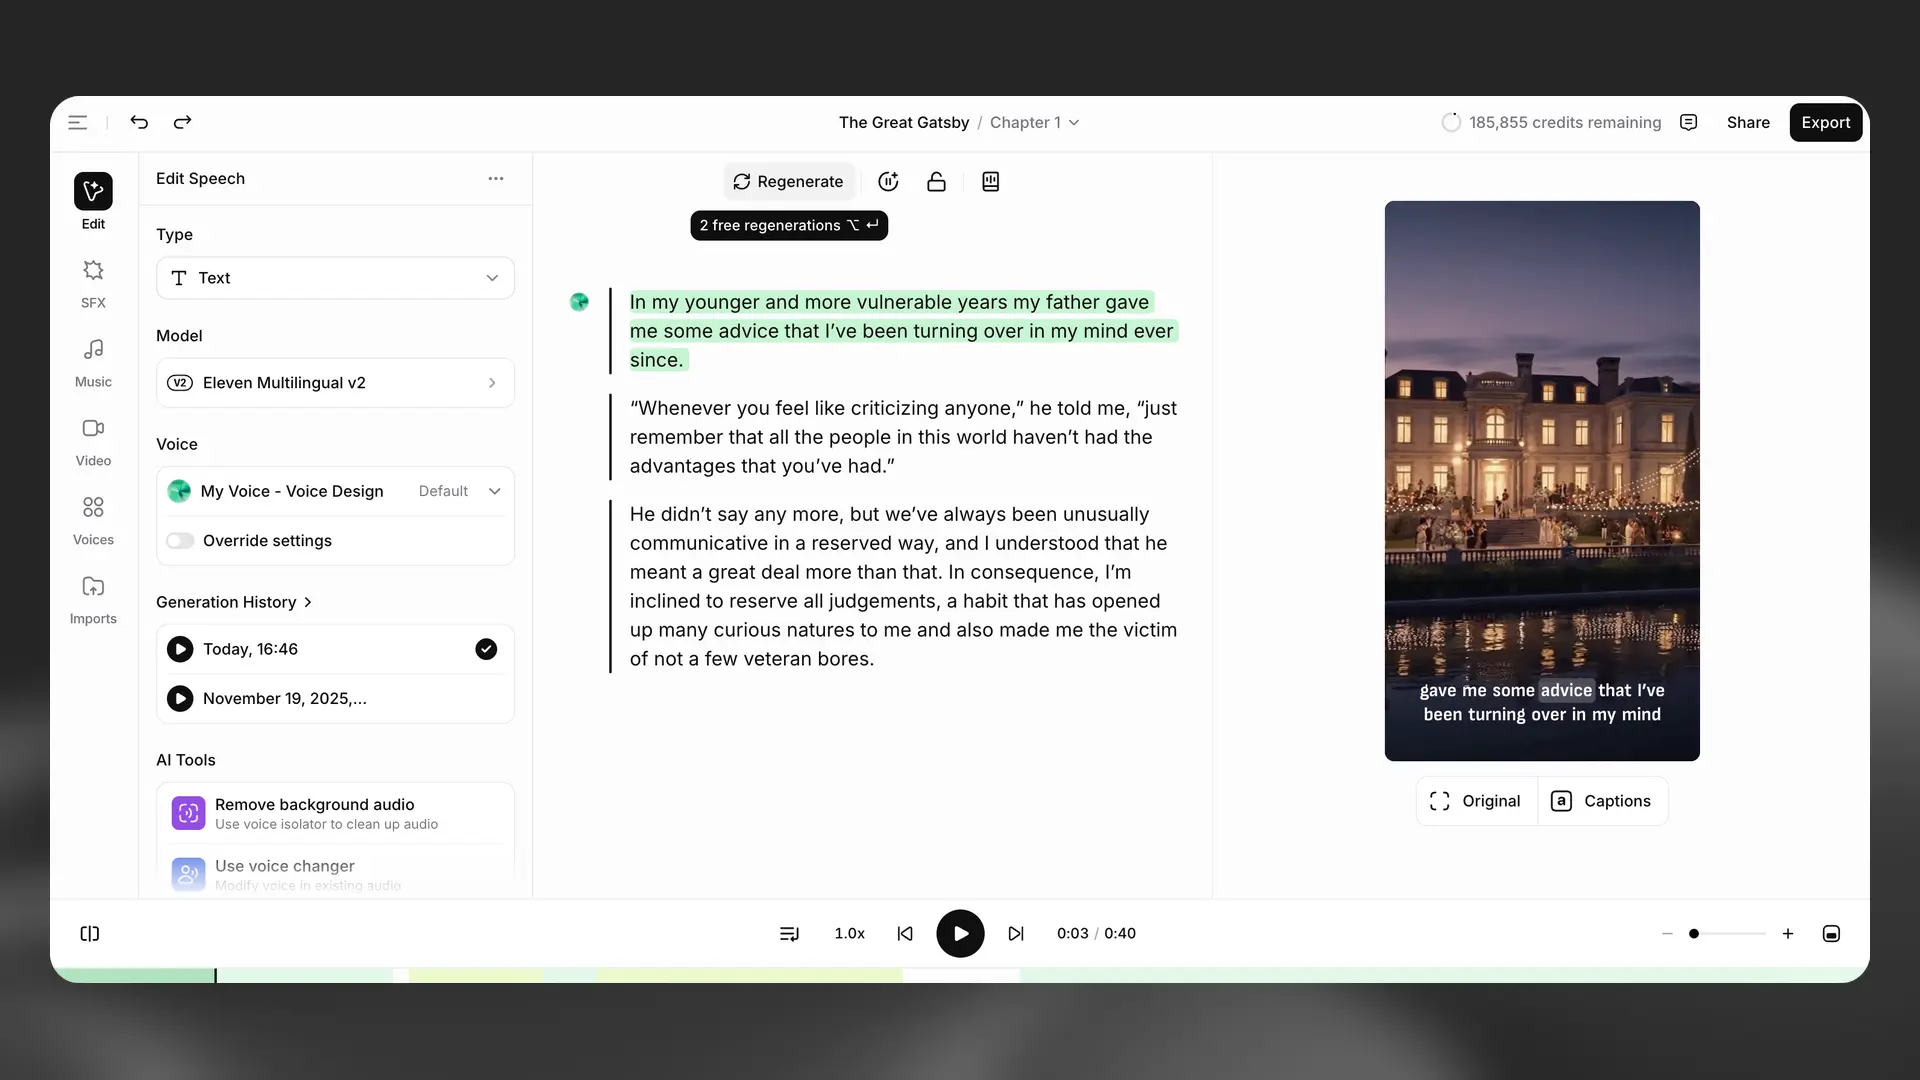
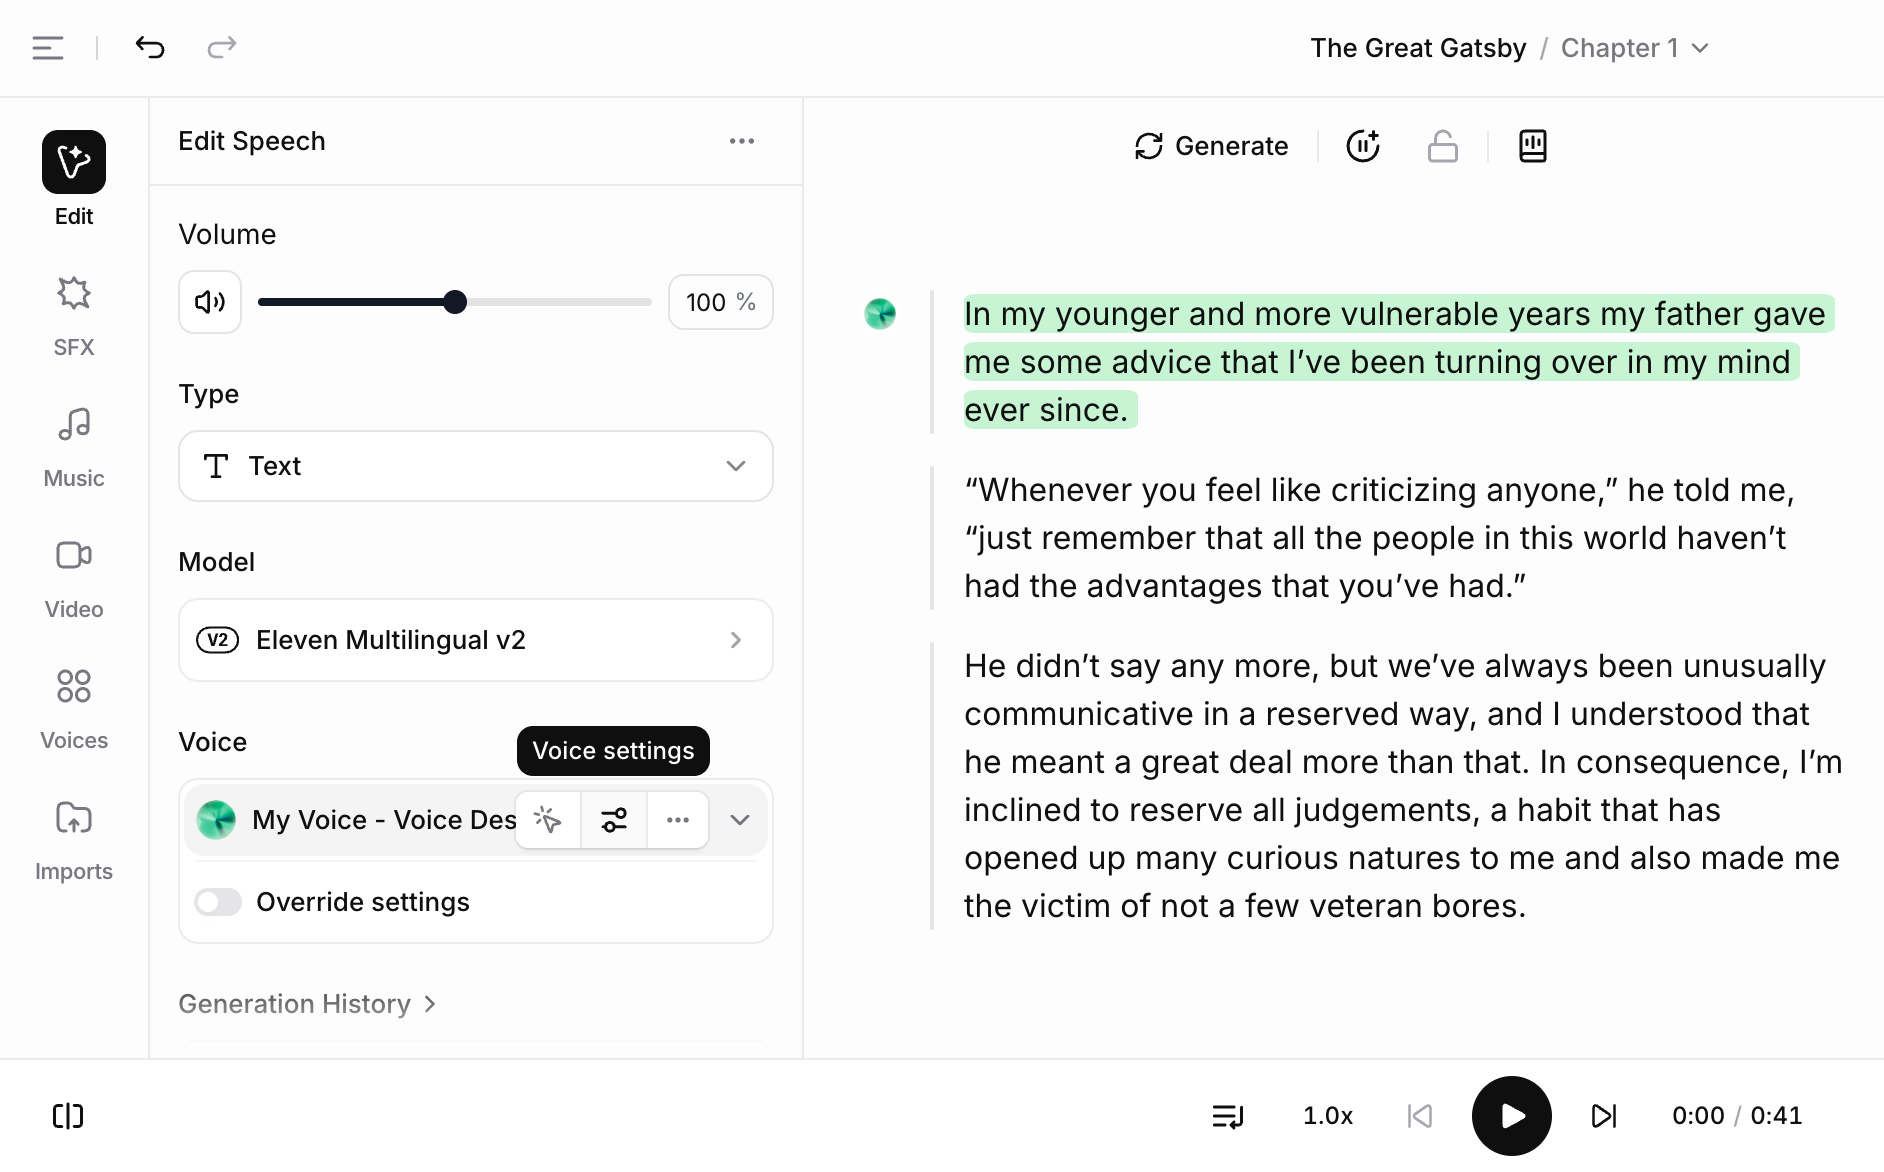
For narration, the sidebar includes Playback controls, Type, Model, Voice, Override settings, and Generation history. The AI Tools section provides these actions:
- Enhance text refines the text to guide delivery.
- Remove background audio uses Voice Isolator to remove background audio.
- Use voice changer modifies the voice in existing audio.
- Direct speech with your voice records reference audio to guide delivery with Actor Mode.
For media clips, the sidebar shows the relevant clip properties and actions.
Timeline and tracks
Timeline and tracks
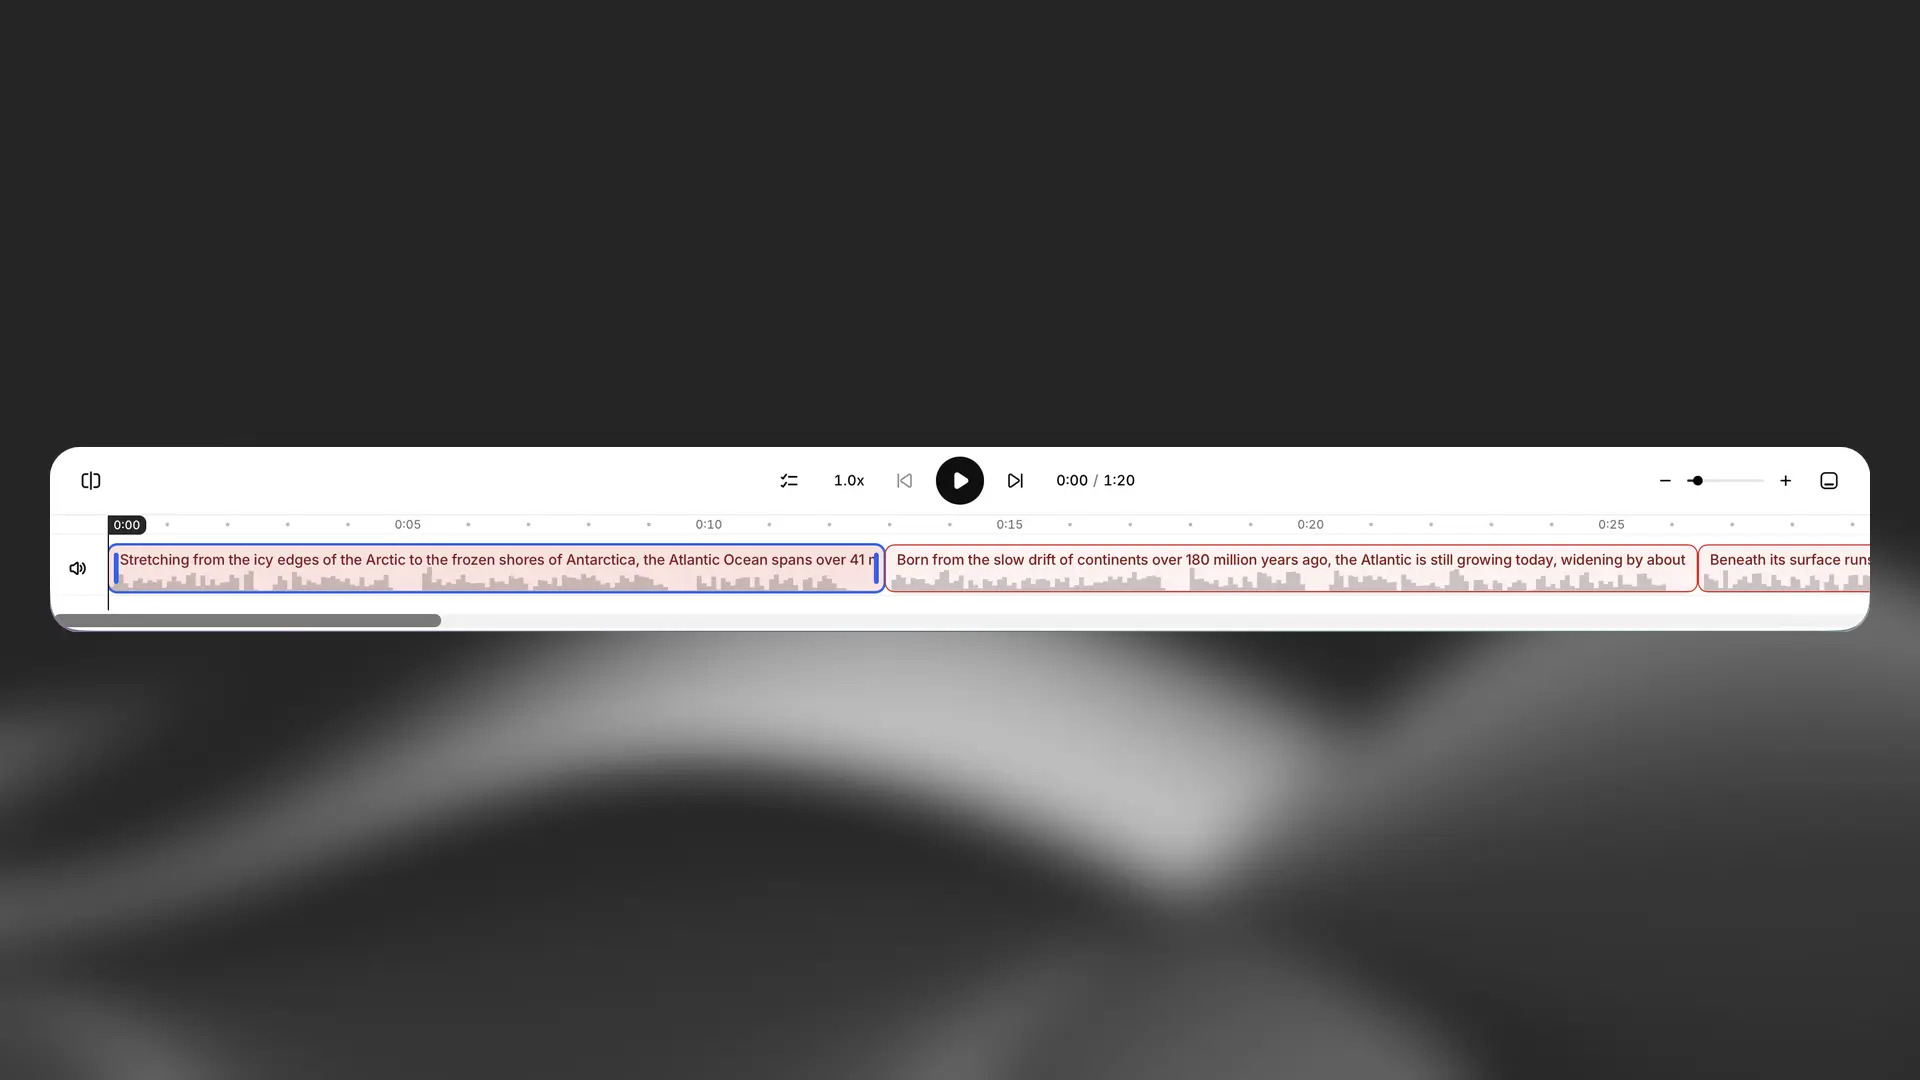
The timeline gives you a chapter‑wide view of your project so you can see narration, music, and SFX at a glance.
Adjust timing between paragraphs or individual sentences. You can also trim, split, and duplicate clips or zoom and pan across longer chapters. Waveforms show relative loudness across tracks.
Chapters sidebar
Chapters sidebar
When you create a new Audio project, you’ll have access to the Chapters sidebar, and if you import a document, chapters will be automatically detected.
Select the Chapters tab to manage chapters in an existing project.
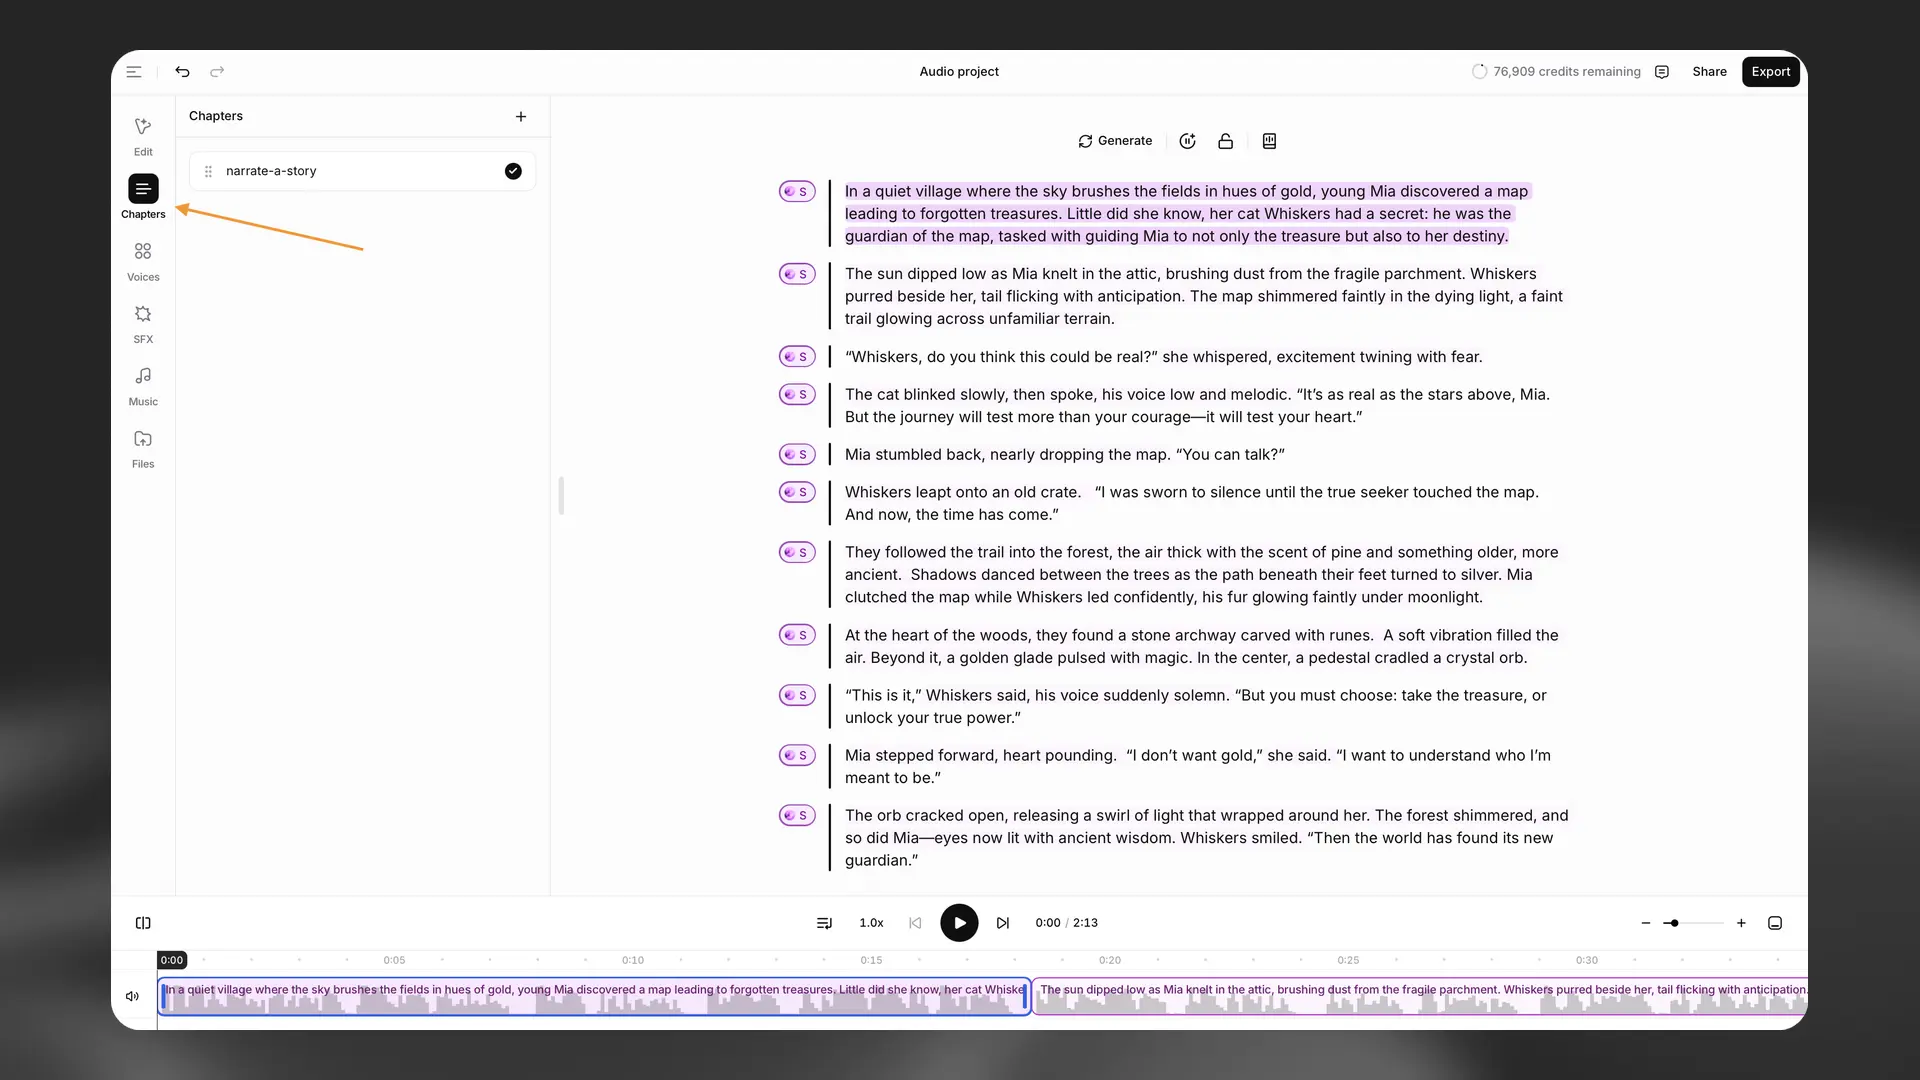
Select + to add a chapter. Use Chapter actions to rename or remove a chapter. Drag chapters to reorder them.
Generate/Regenerate
Generate/Regenerate
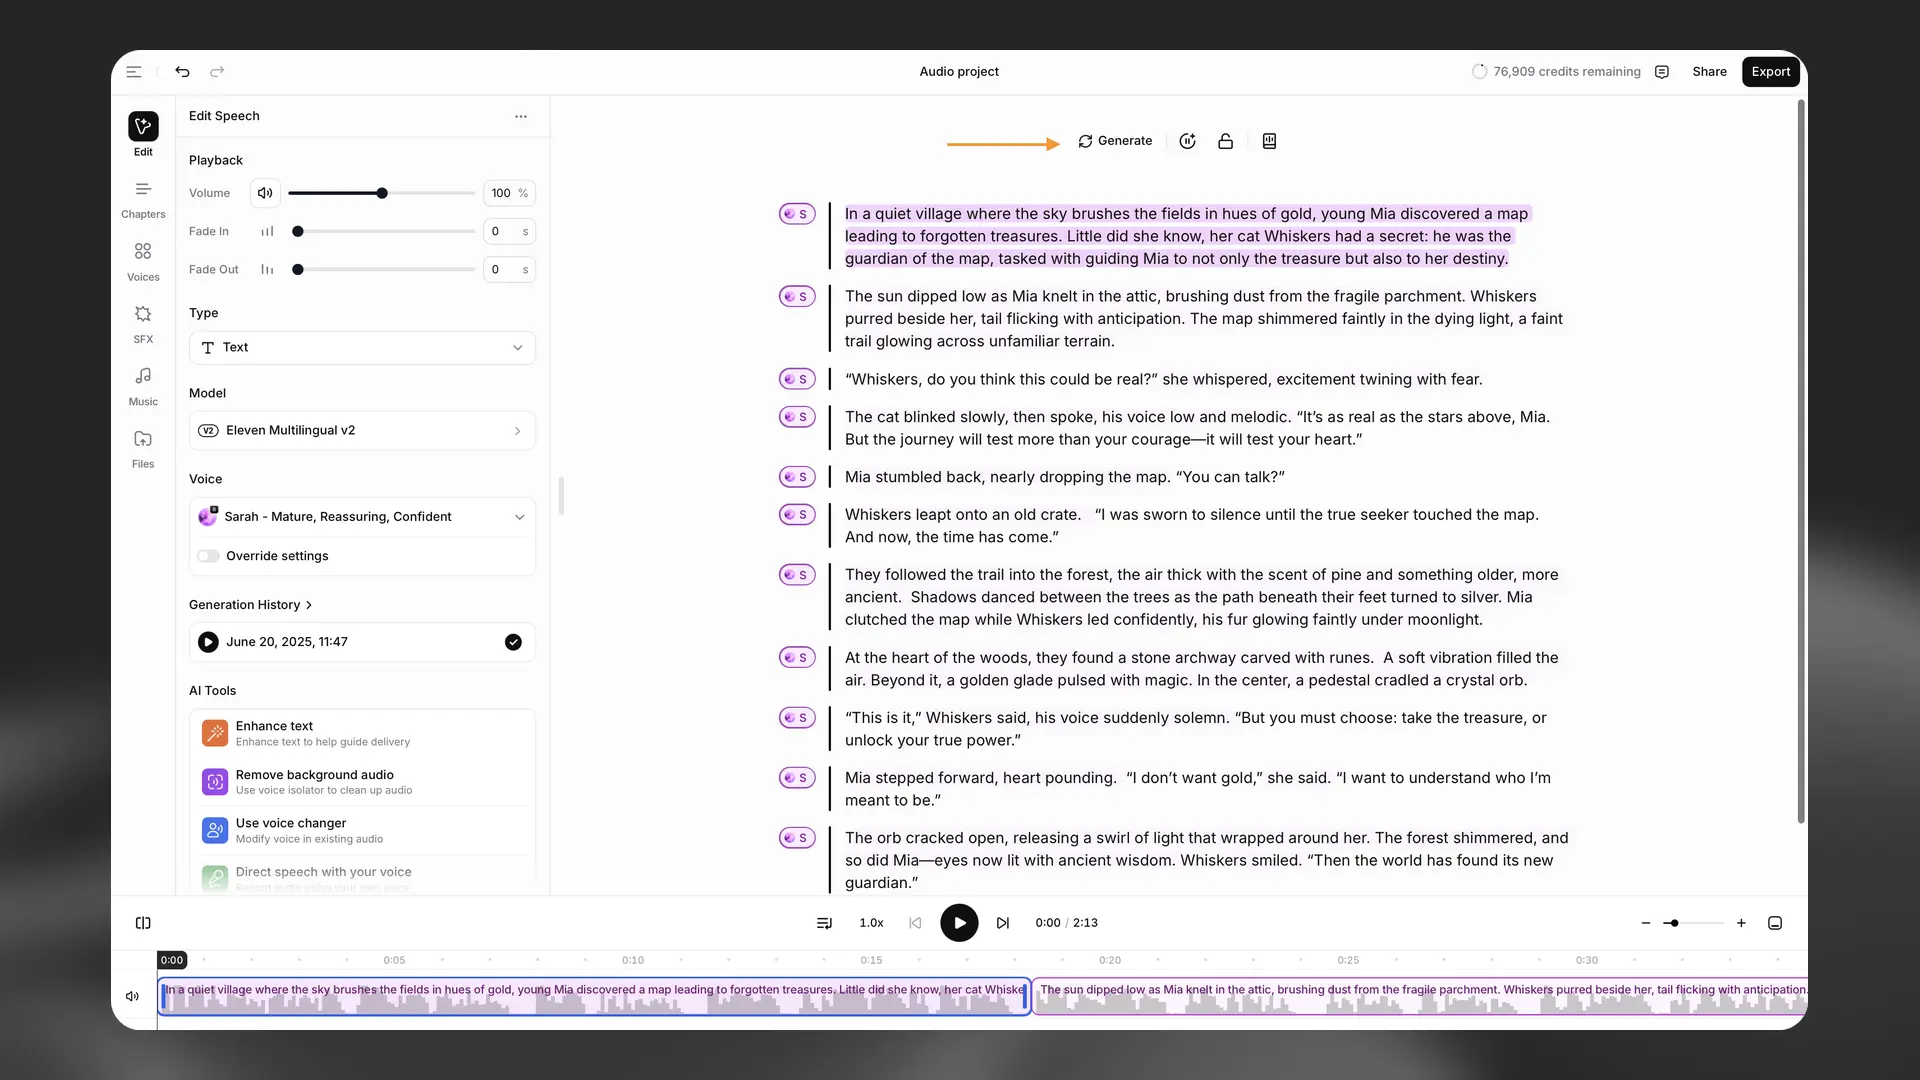
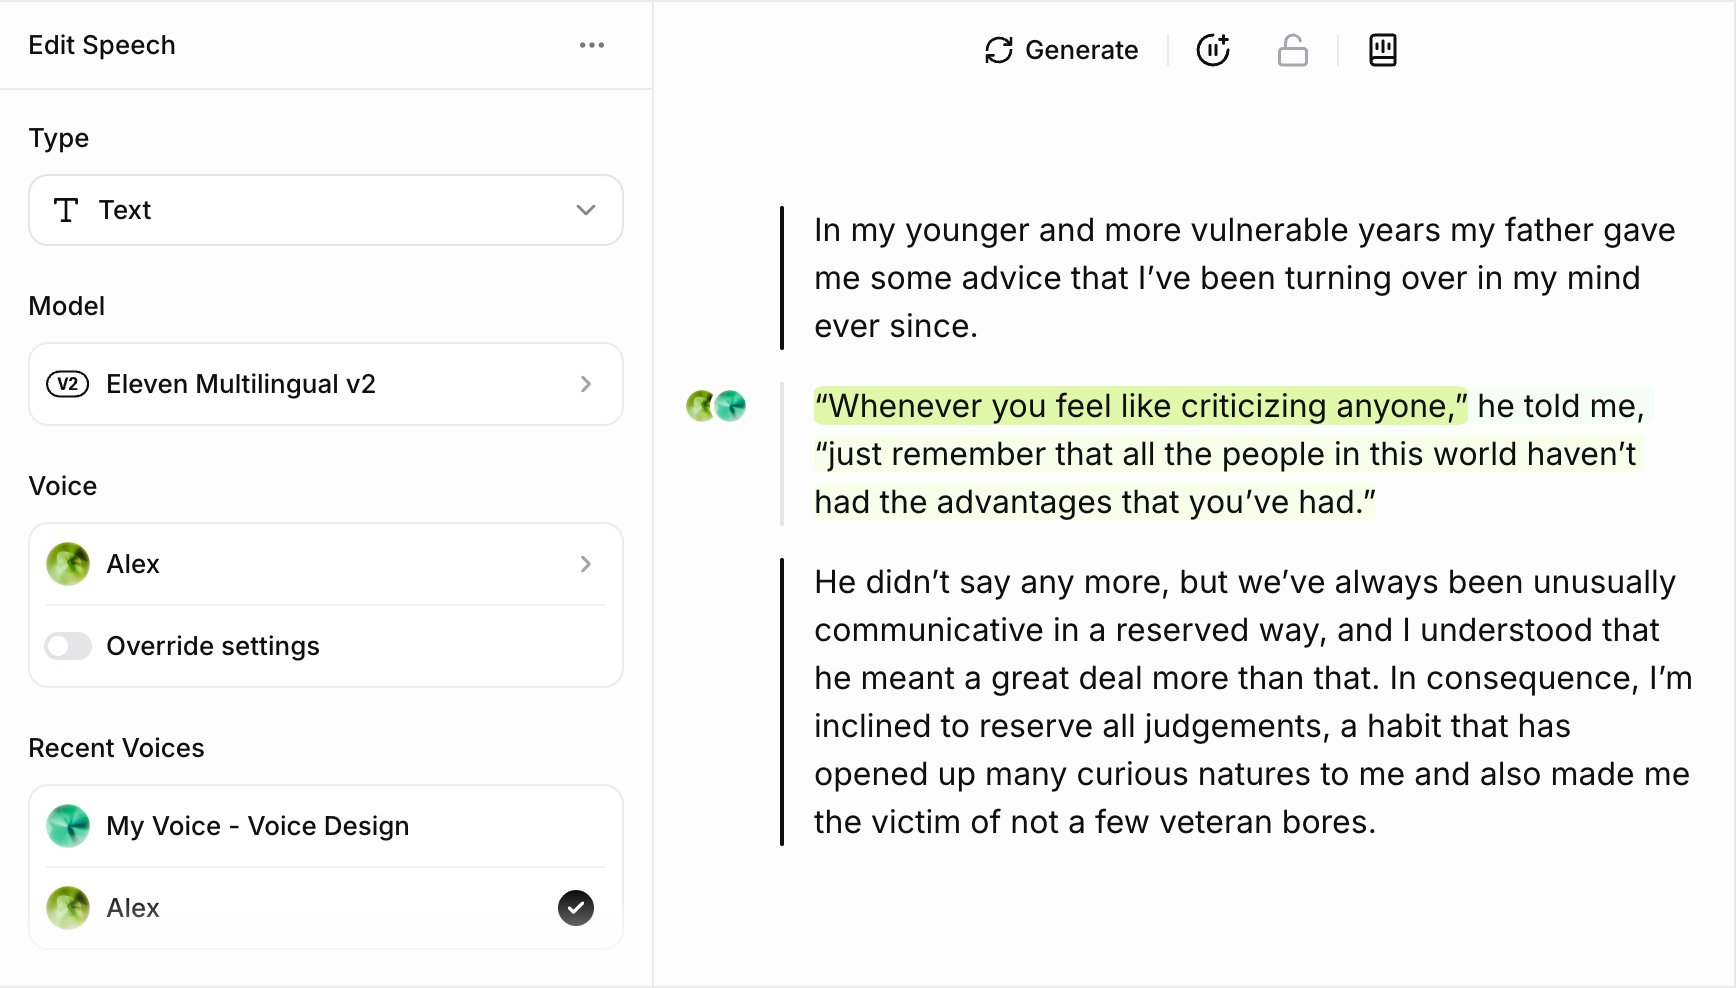
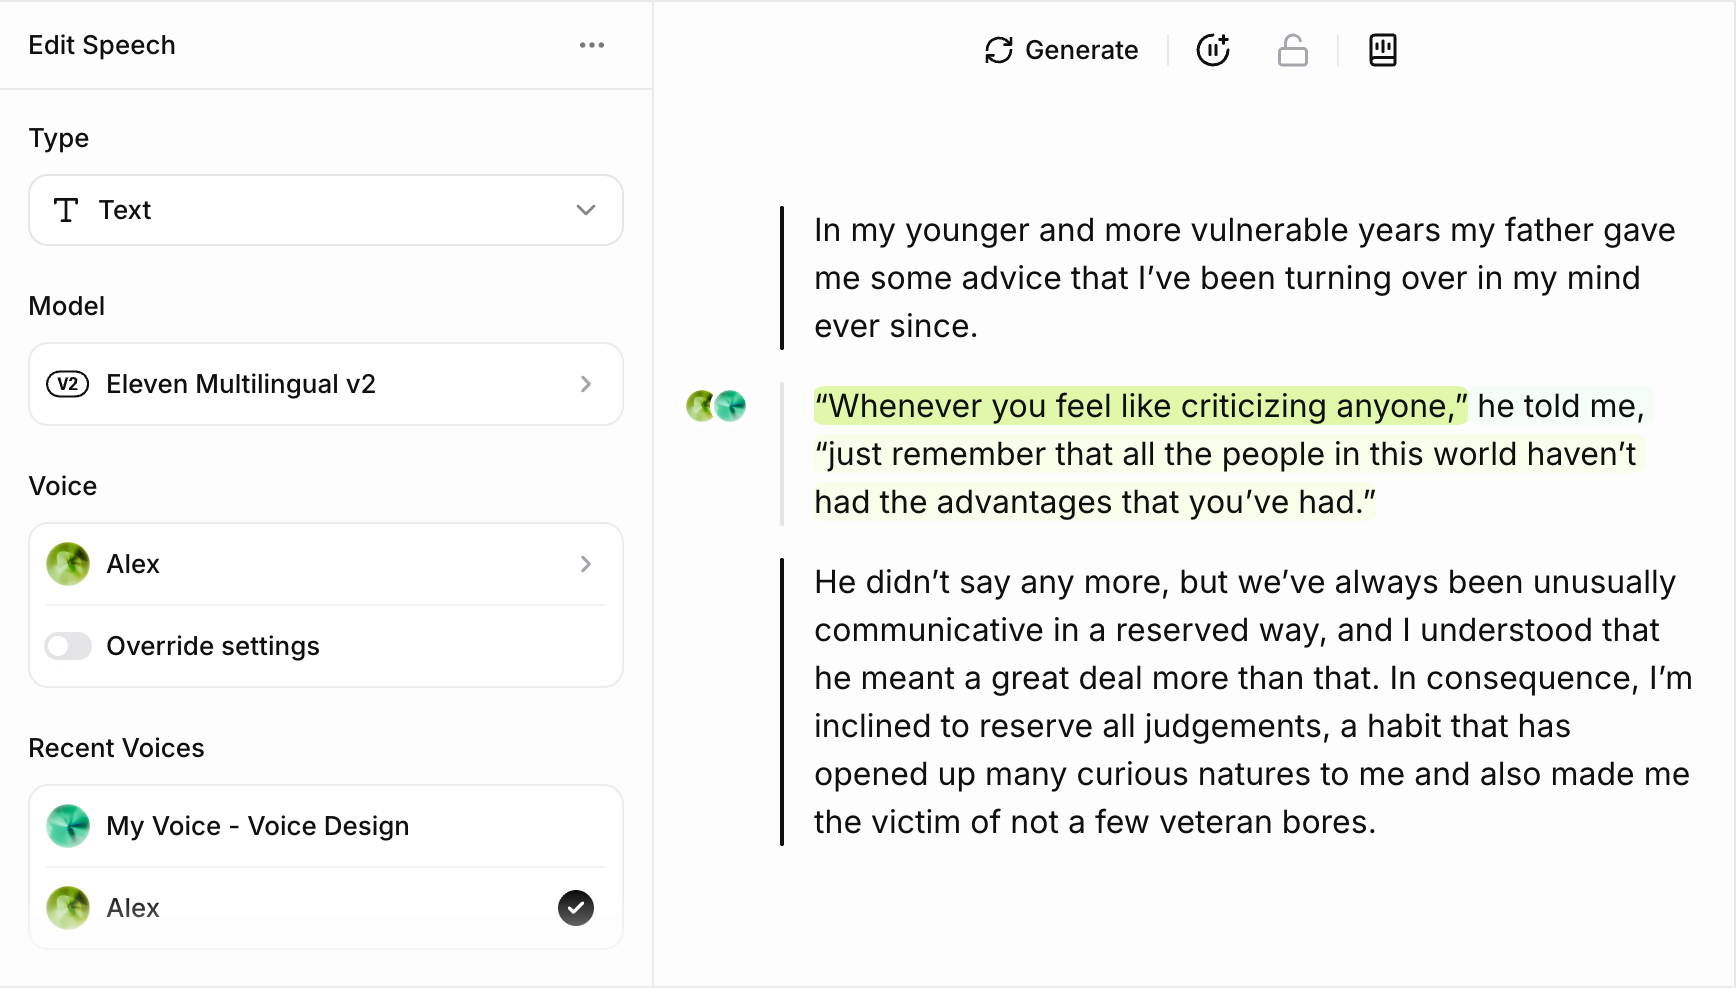
Select Generate to generate audio for the selected text. Generating audio consumes credits.
Changing the text or voice removes the paragraph’s generated status. Select Generate to generate it again.
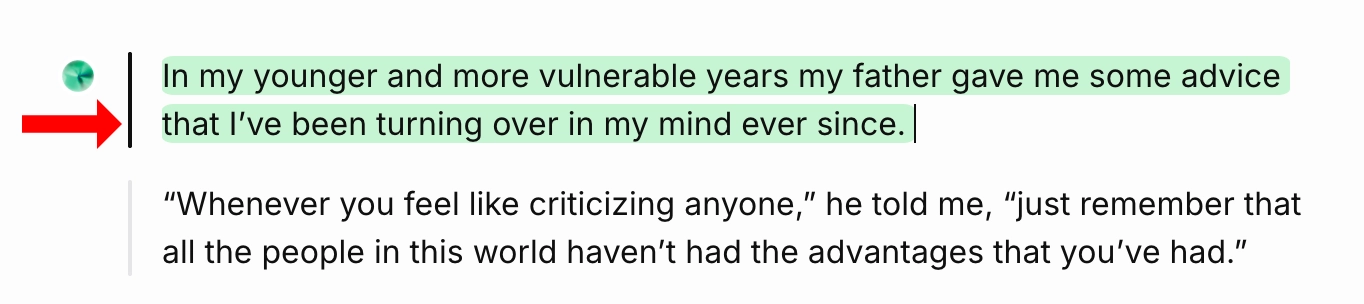
The status of a paragraph (converted or unconverted) is indicated by the bar to the left of the paragraph. Unconverted paragraphs have a pale grey bar while converted paragraphs have a dark grey bar.
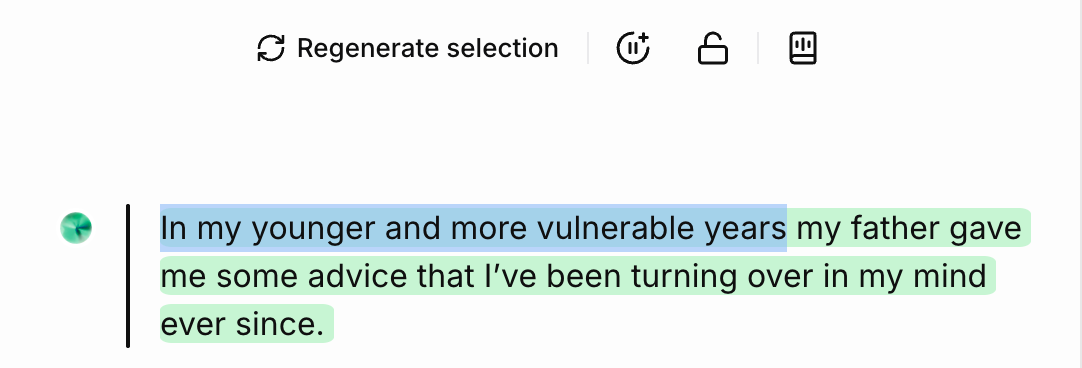
When the button displays Regenerate, the next generation does not consume credits. You can regenerate twice without using credits if you do not change the voice or text.
This action applies to narration and other generated speech. Timeline items like video, external audio, music, SFX, and captions are arranged on the timeline and rendered when you export.
Play
Play
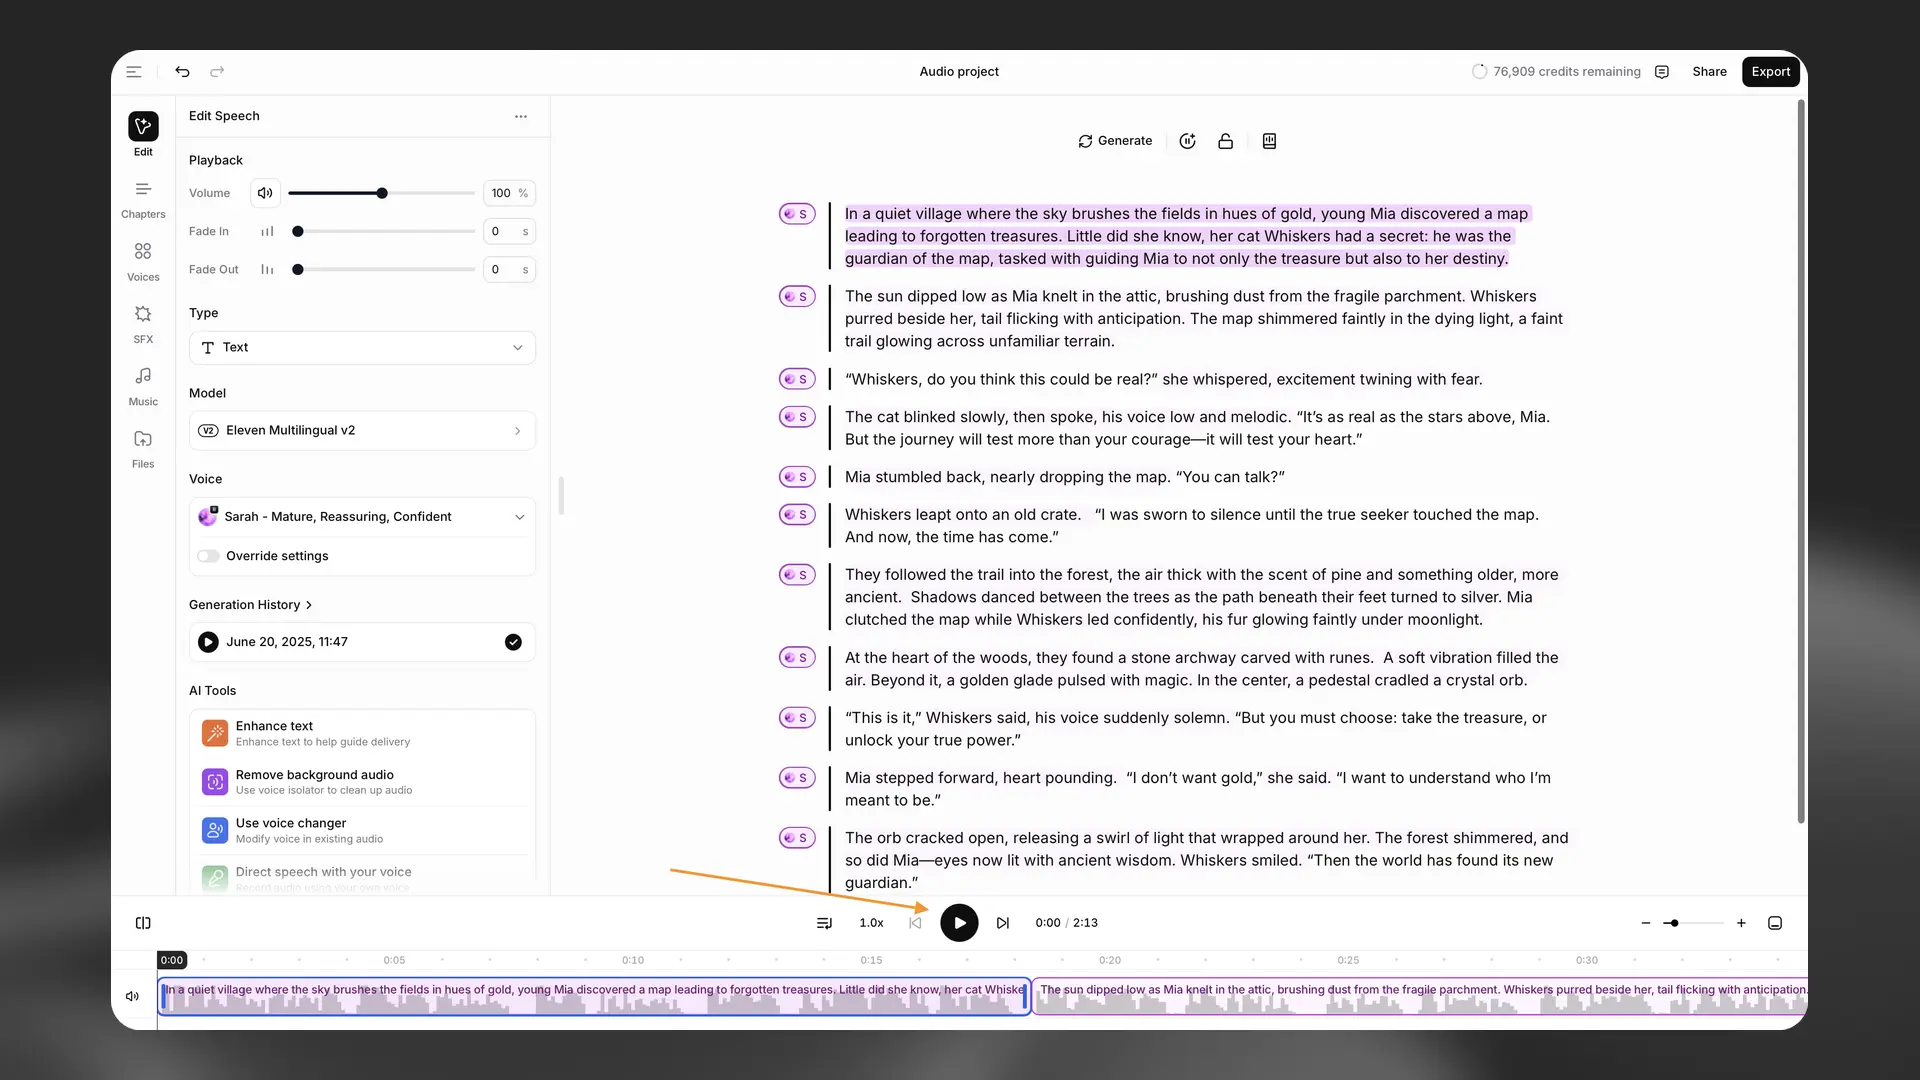
You can use the Play button in the player at the bottom of the ElevenCreative Studio interface to play audio that has already been generated, or generate audio if a paragraph has not yet been converted. Generating audio will cost credits. If you have already generated audio, then the Play button will play the audio that has already generated and you won’t be charged any credits. There are three modes when using the Play button. Until end (generate clips ahead) will play existing audio, or generate new audio for paragraphs that have not yet been generated, from the selected paragraph to the end of the current chapter, generating multiple clips ahead. Until end (generate one at a time) will play existing audio or generate new audio from the selected paragraph to the end of the current chapter, but generates only one clip at a time. Selection will play or generate audio only for the selected paragraph. When a video track is present, the player also previews video in sync with the playhead. Playing existing audio or video never consumes credits; only generating narration does.
Generation history
Generation history
The generation history for a paragraph appears in the contextual sidebar when the paragraph is selected. This shows all the previously generated audio for the selected paragraph, allowing you to listen to and download each individual generation.
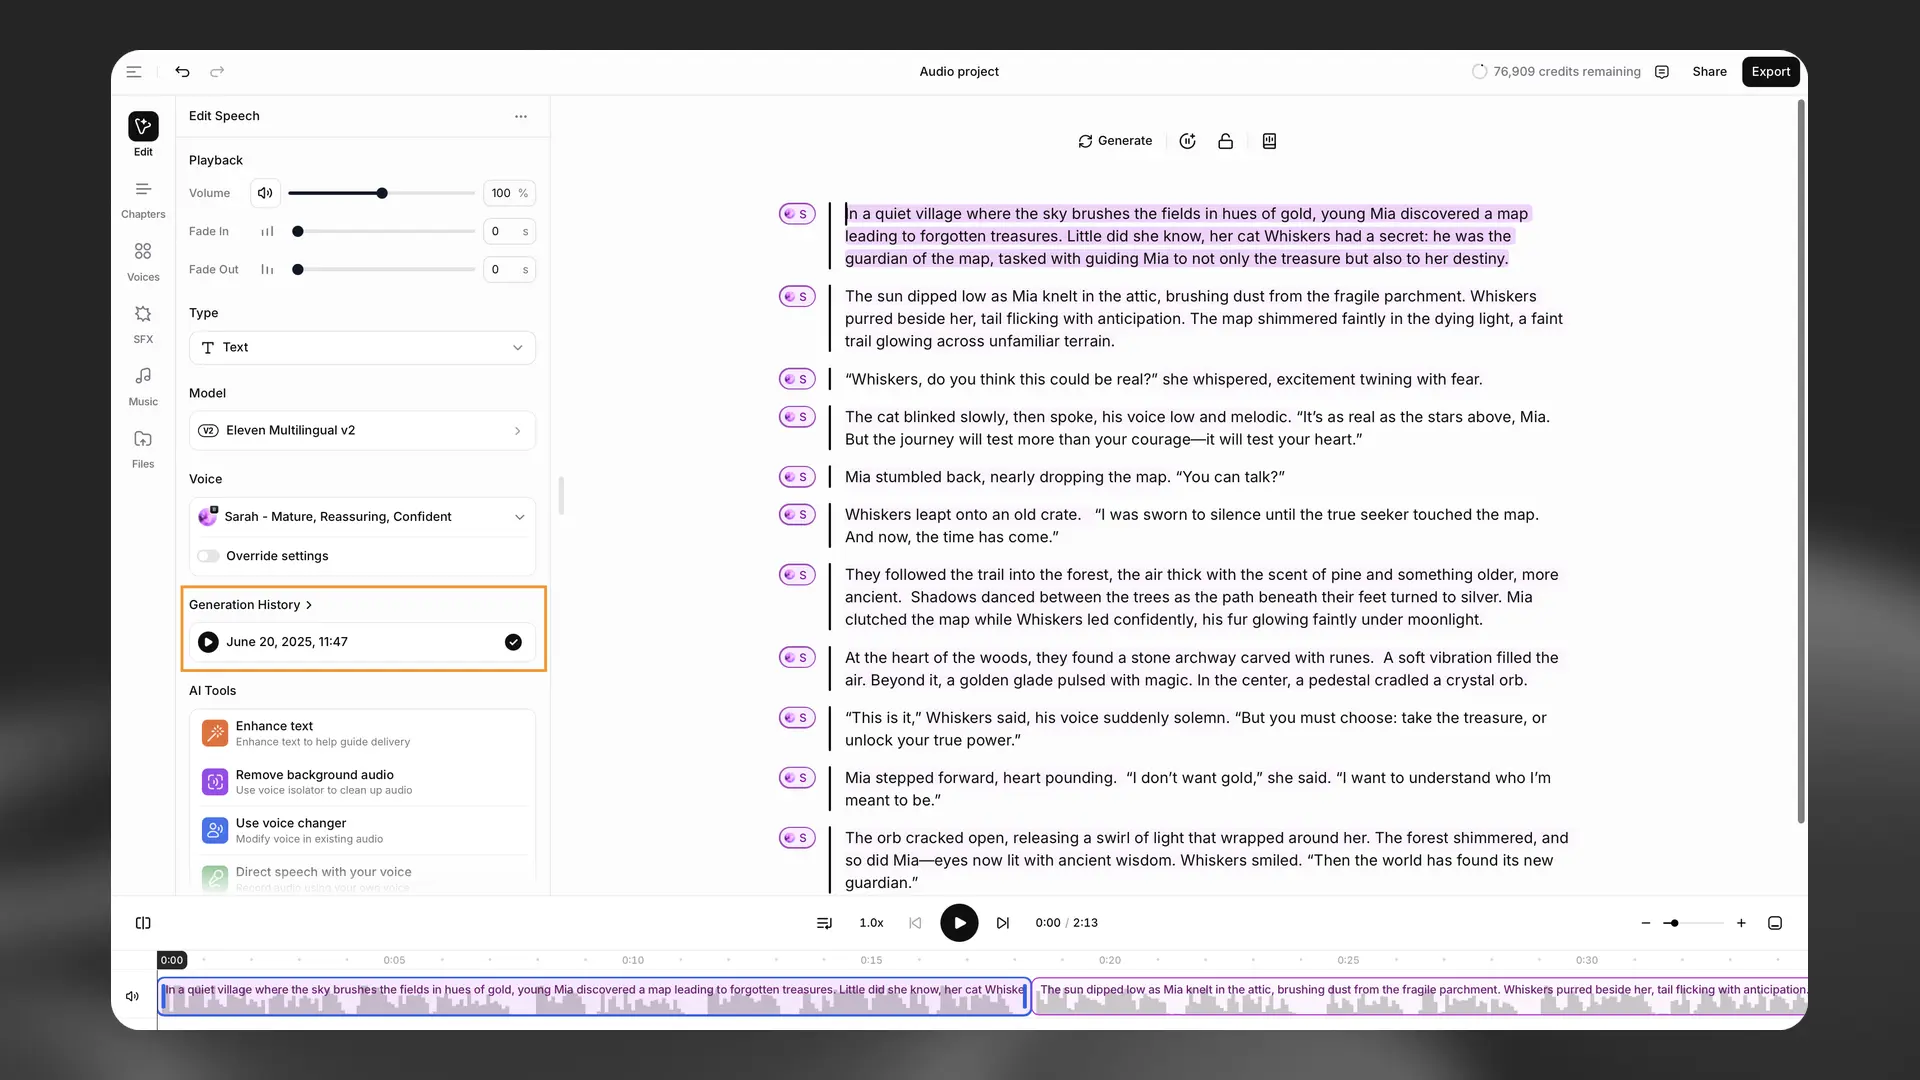
If you prefer an earlier version of a paragraph, you can use the Restore generation button to return to the selected version. You can also remove generations, but be aware that if you remove a version, this is permanent and you can’t restore it.
Generation history applies to narration generations. It doesn’t track imported media (external audio, music, SFX) or video clips.
Undo and Redo
Undo and Redo
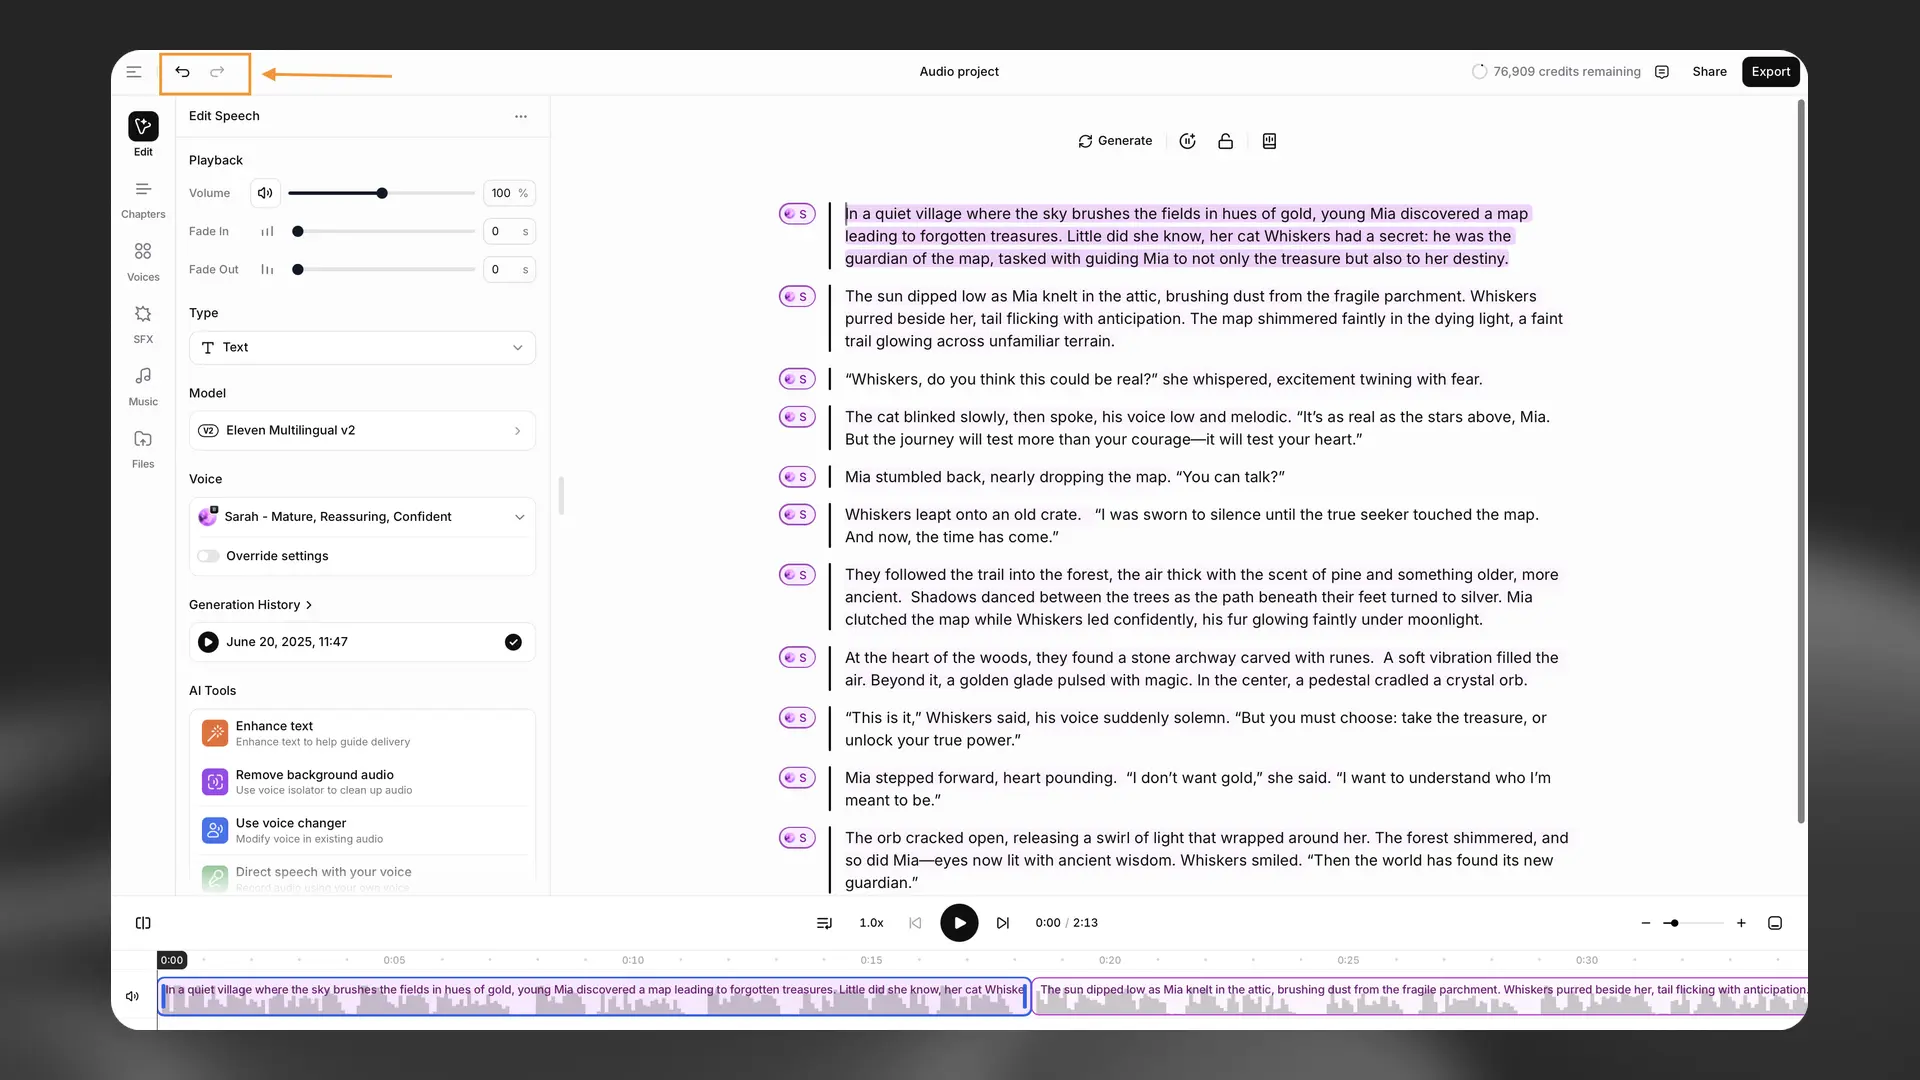
If you accidentally make a change, you can use the Undo button to restore the previous version, and the Redo button to restore the change.
Breaks
Breaks
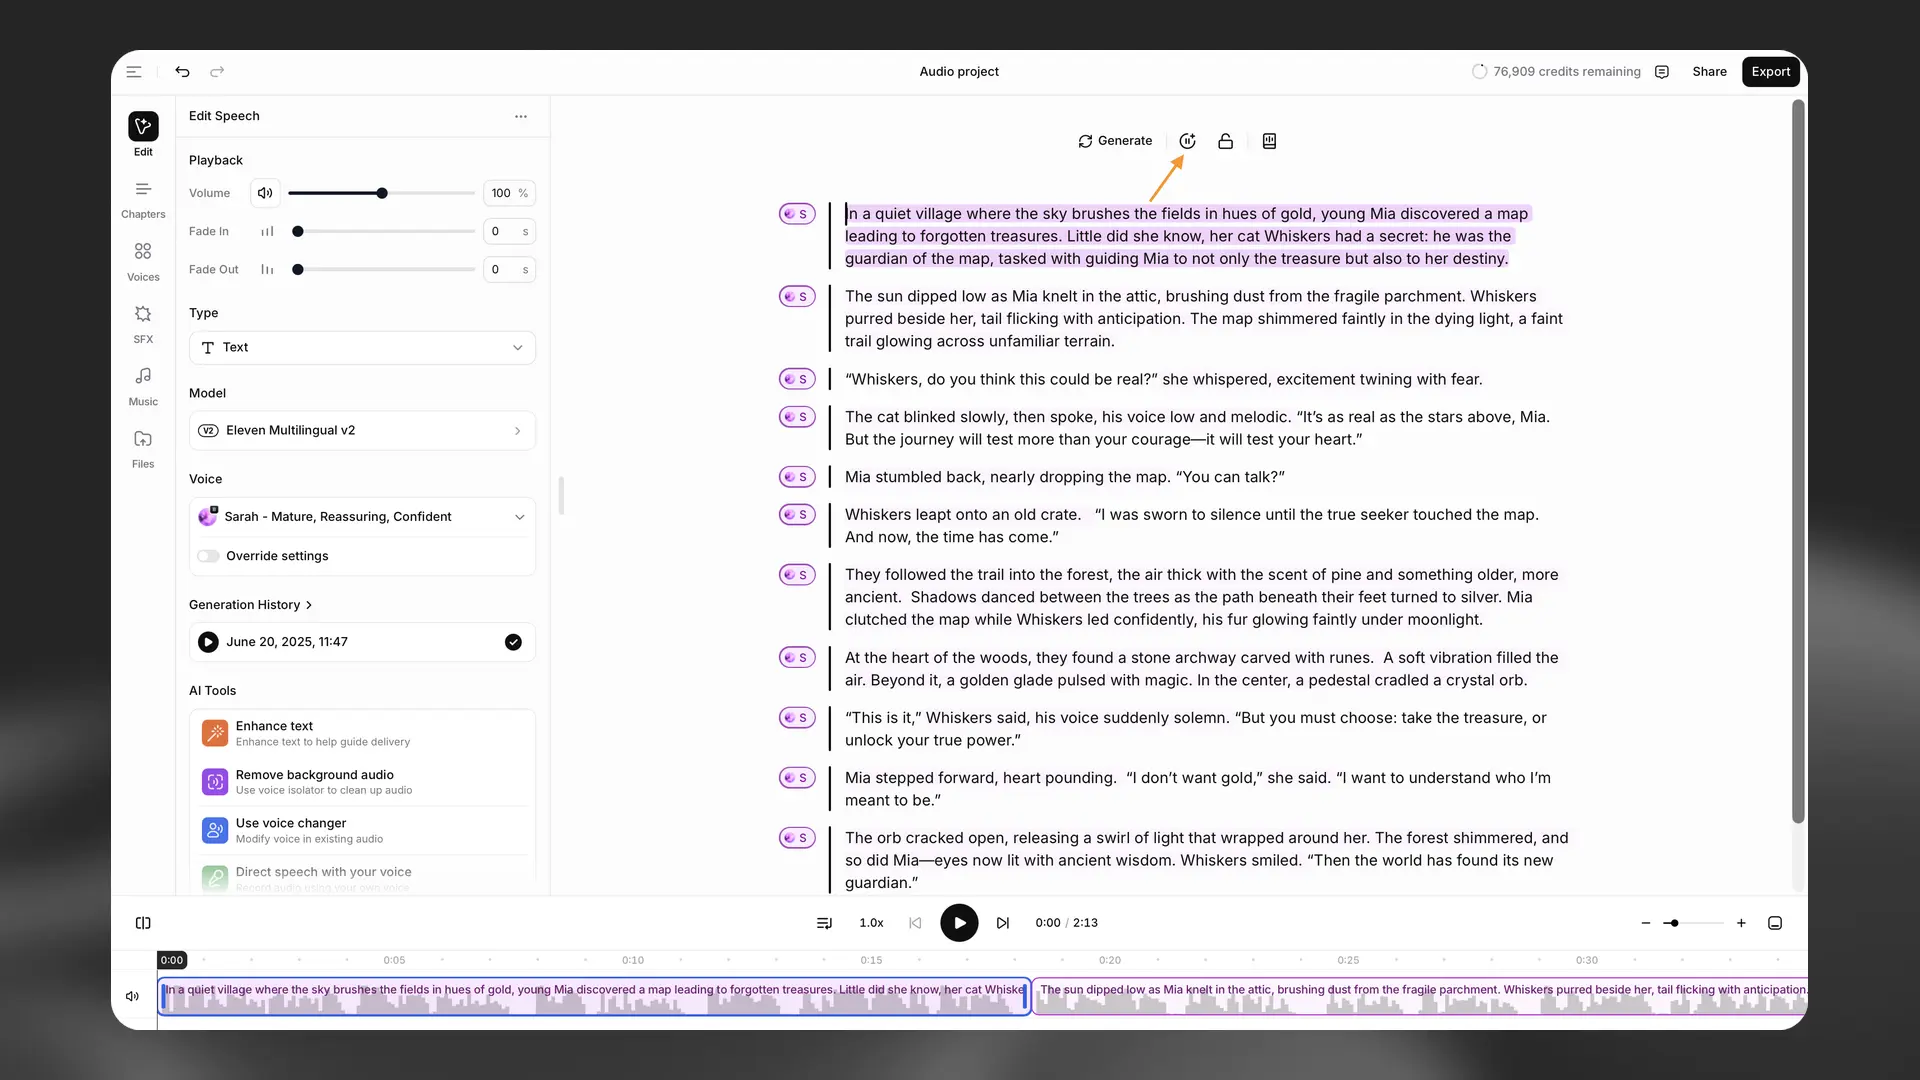
You can add a pause by using the Insert break button. This inserts a break tag. By default, this will be set to 1 second, but you can change the length of the break up to a maximum of 3 seconds.
For precise timing, prefer the timeline with trimming and sentence‑level control. Some newer models may reduce or ignore break tags in favor of natural flow.
Breaks affect generated speech delivery only; they don’t move or pause other timeline tracks. Use the timeline to create precise pauses across music, SFX, and video.
Actor Mode
Actor Mode
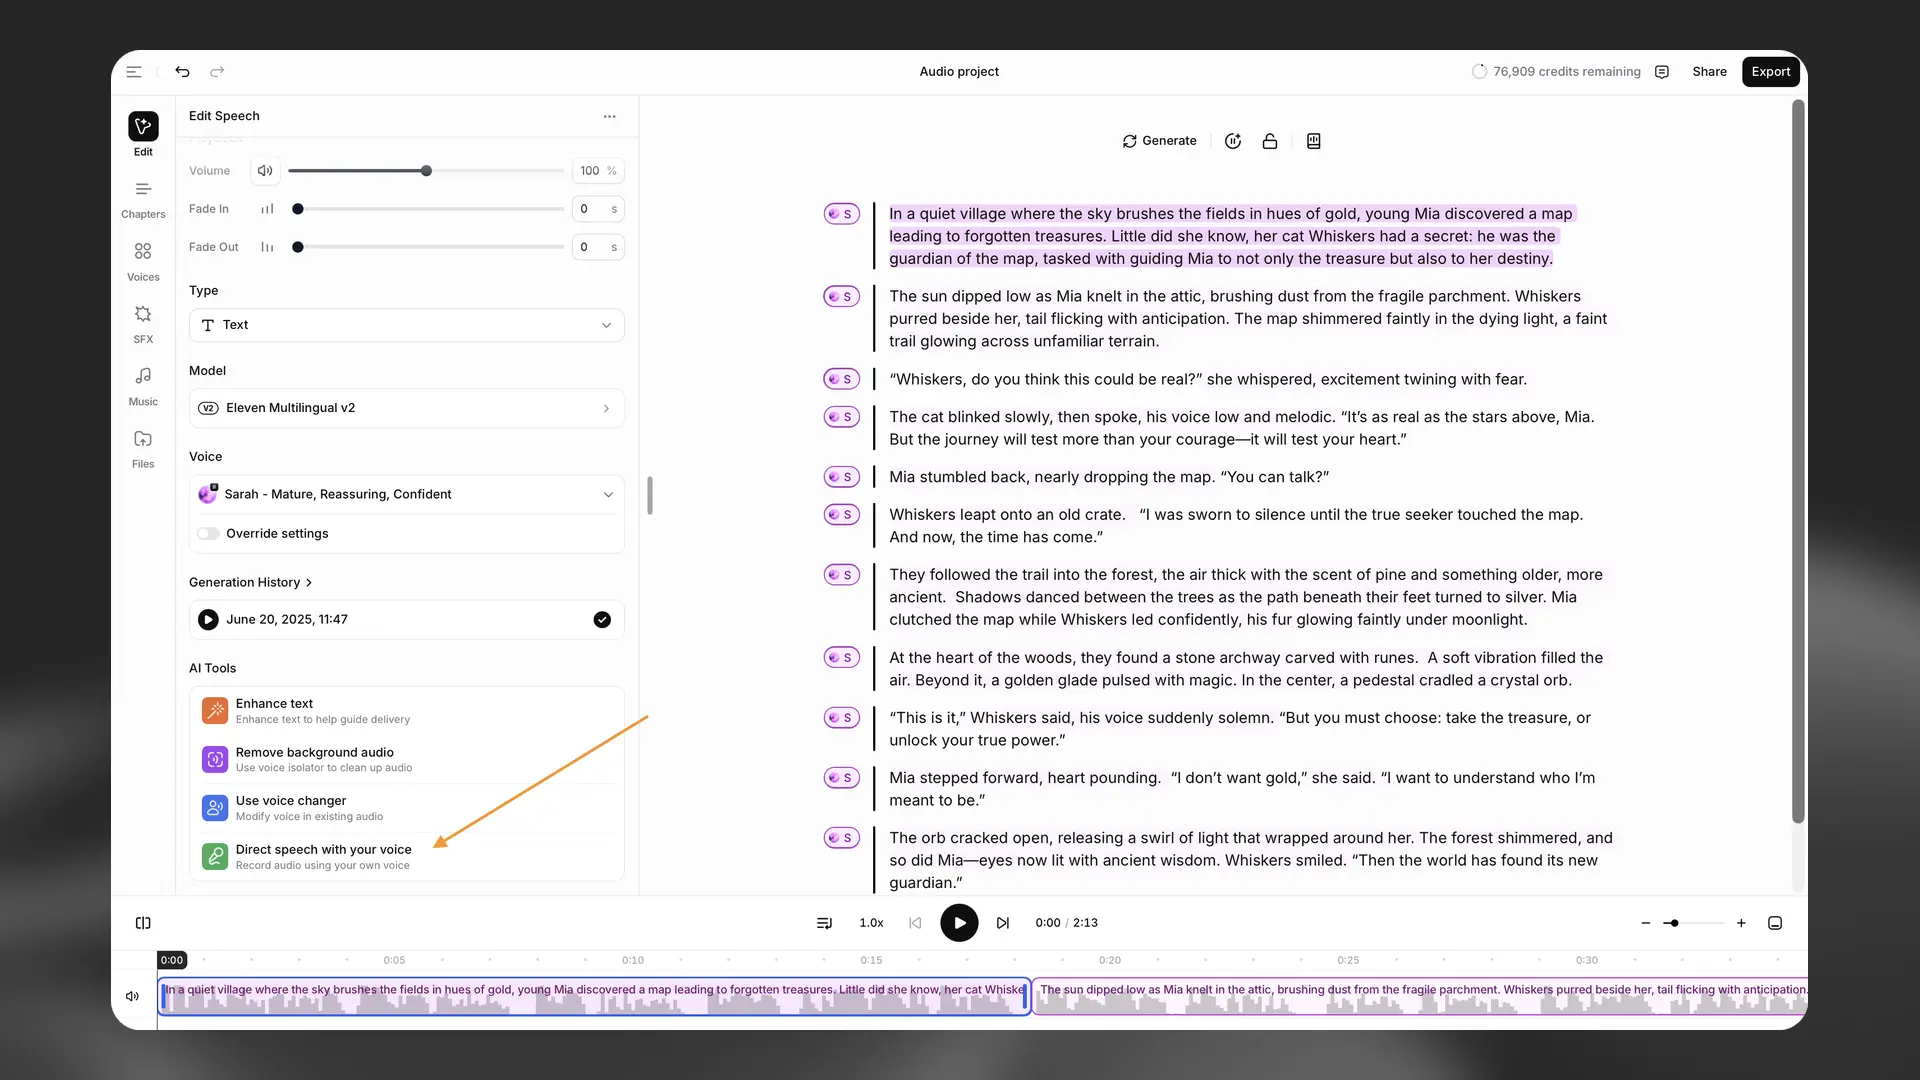
Actor Mode allows you to specify exactly how you would like a section of text to be delivered by uploading a recording, or by recording yourself directly. You can either highlight a selection of text that you want to work on, or select a whole paragraph. Once you have selected the text you want to use Actor Mode with, click Direct speech with your voice from the AI Tools section of the sidebar, and the Actor Mode pop-up will appear.
For an overview of Actor Mode, see this video.
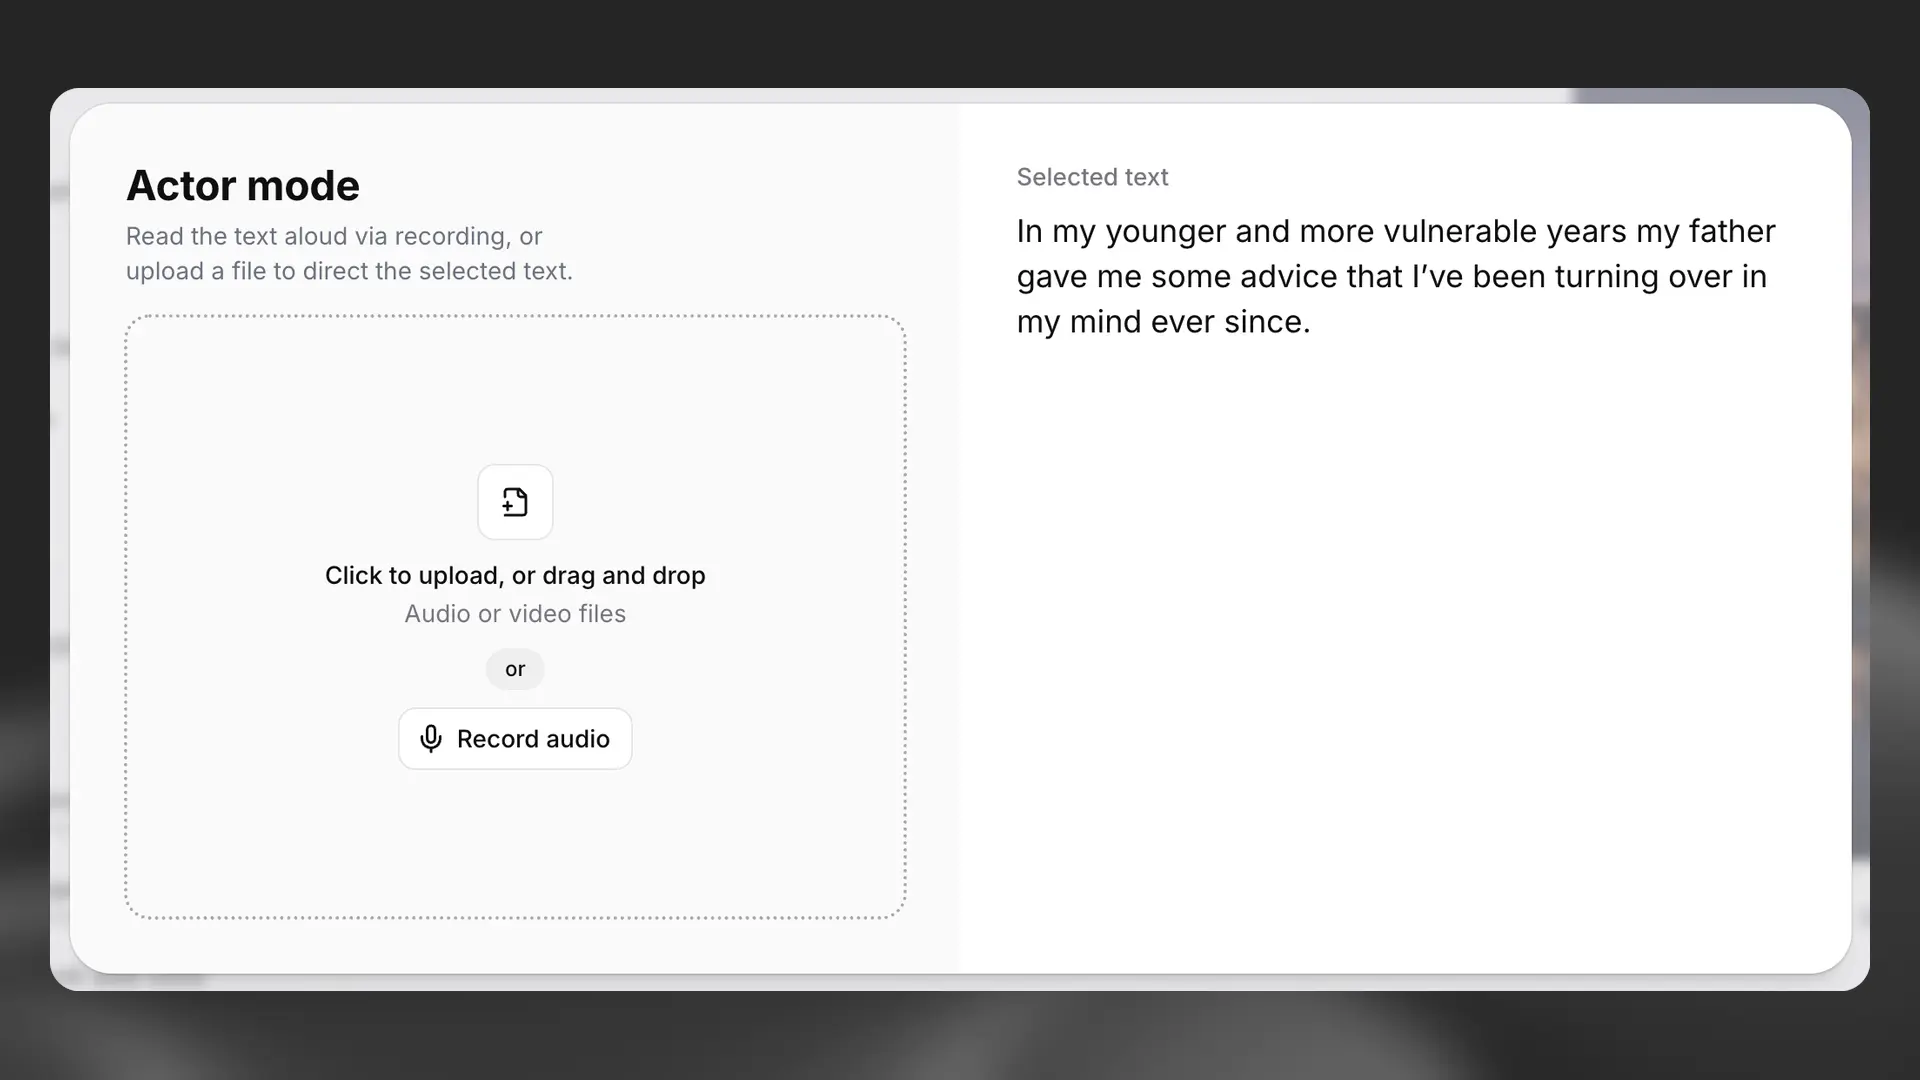
Either upload or record your audio, and you will then see the option to listen back to the audio or remove it. You will also see how many credits it will cost to generate the selected text using the audio you’ve provided.
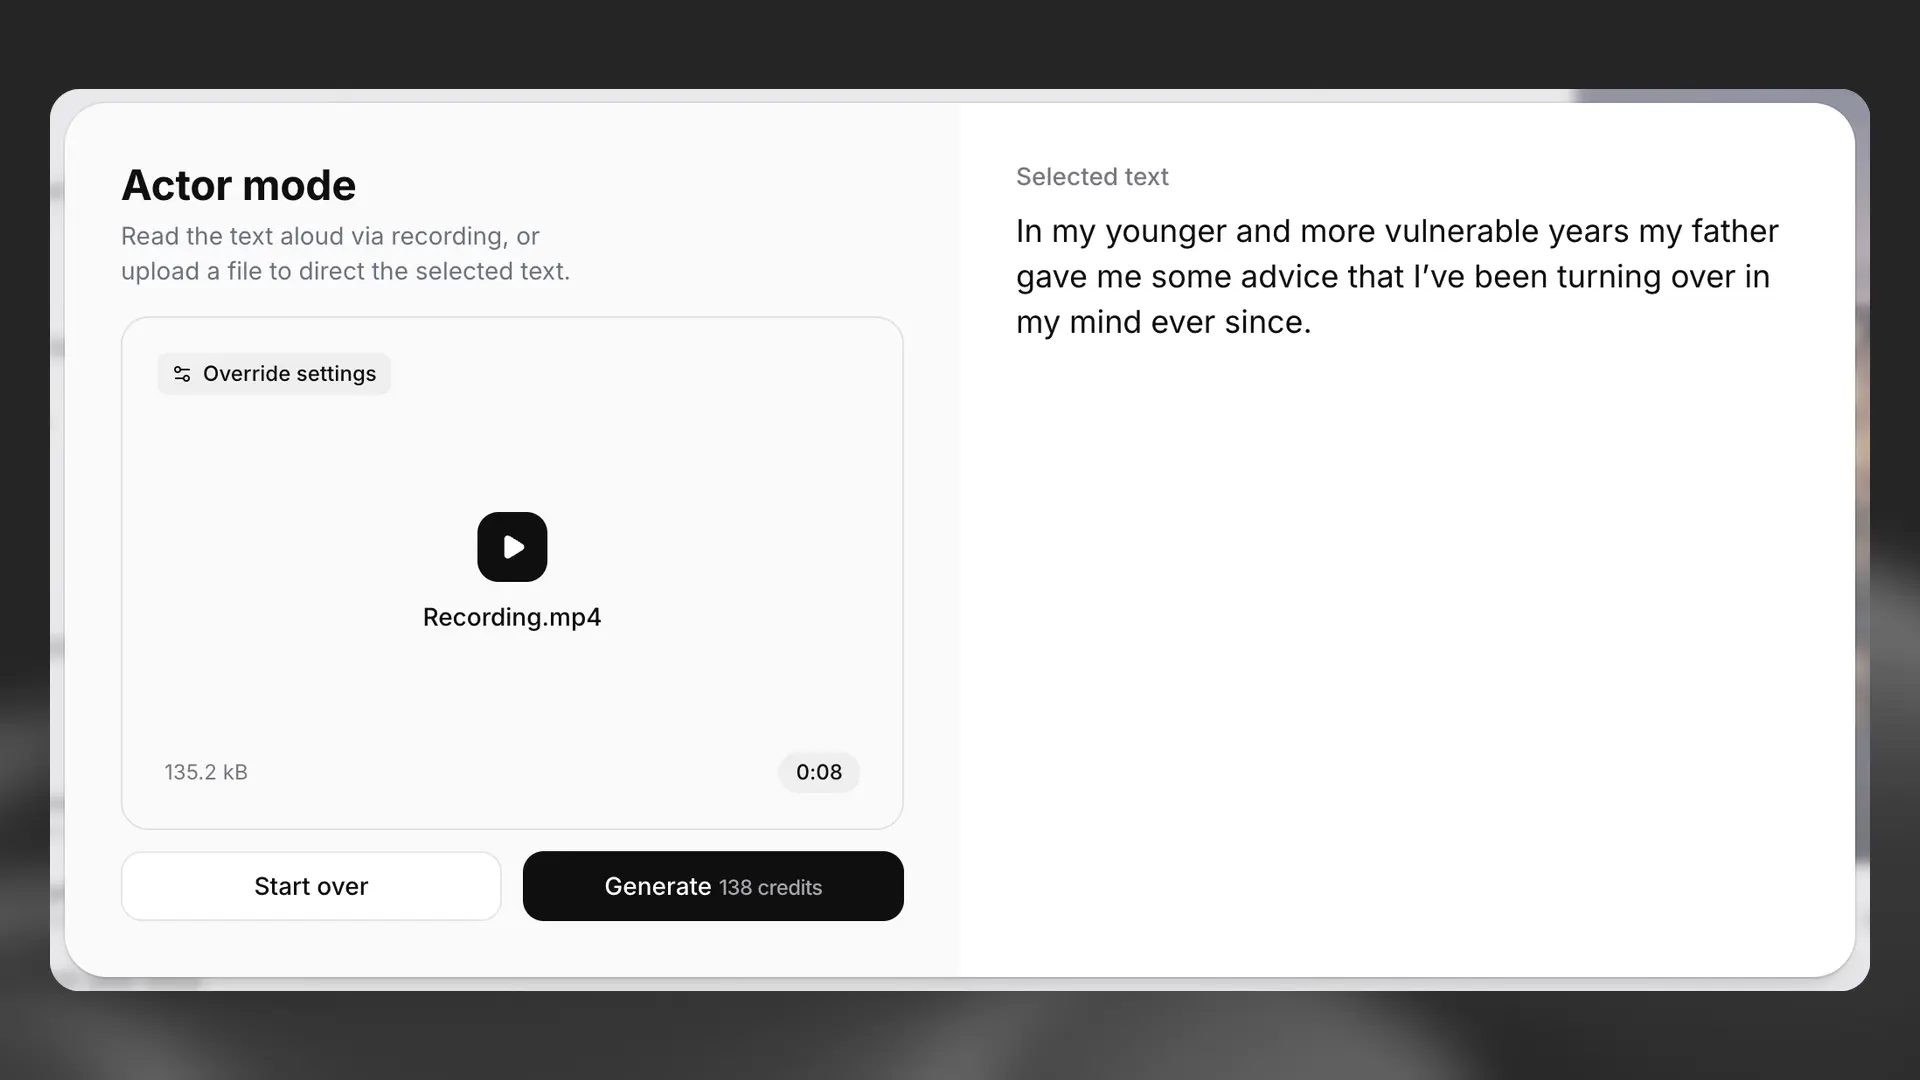
If you’re happy with the audio, click Generate, and your audio will be used to guide the delivery of the selected text.
Files
Files
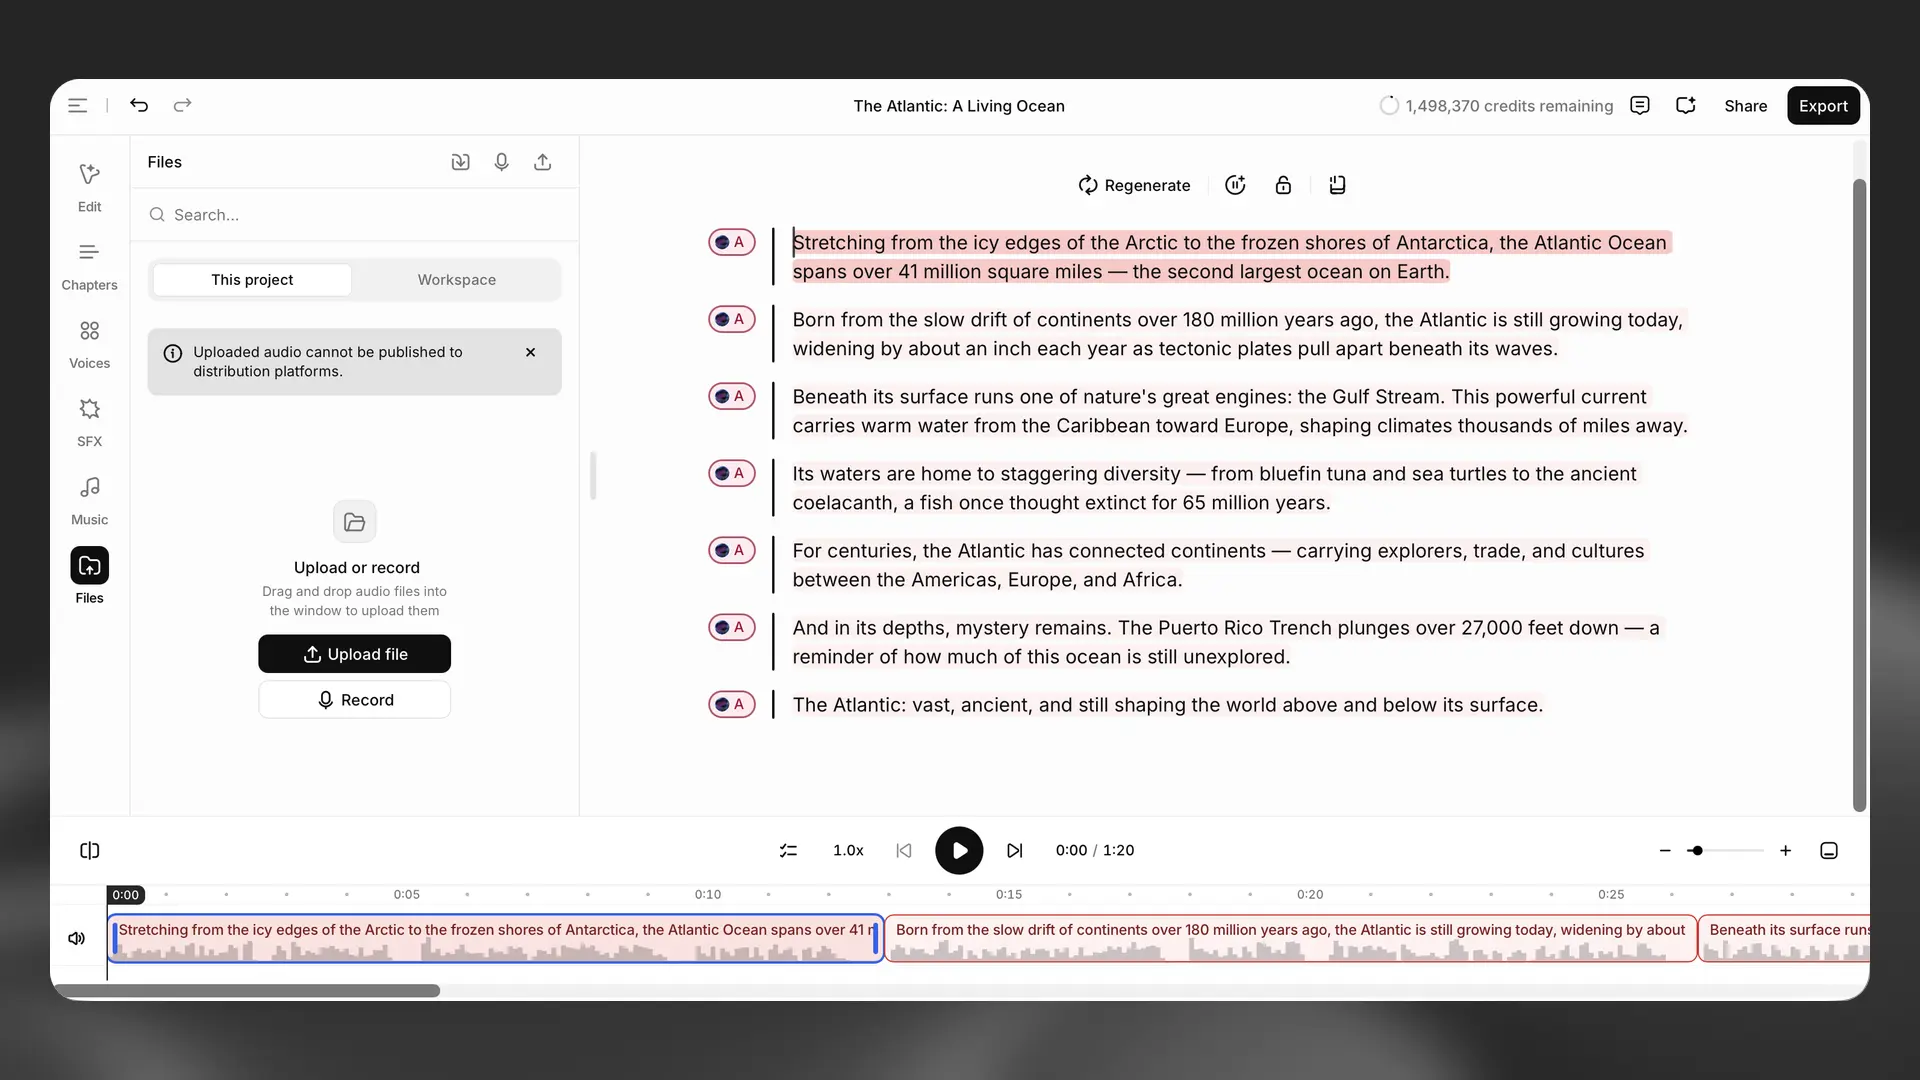
Upload or record audio files for your project. You can drag and drop files into the panel, click Upload file, or use the Record button to capture audio directly. Toggle between This project and Workspace to browse files. Uploaded audio cannot be published to distribution platforms.
Music
Music
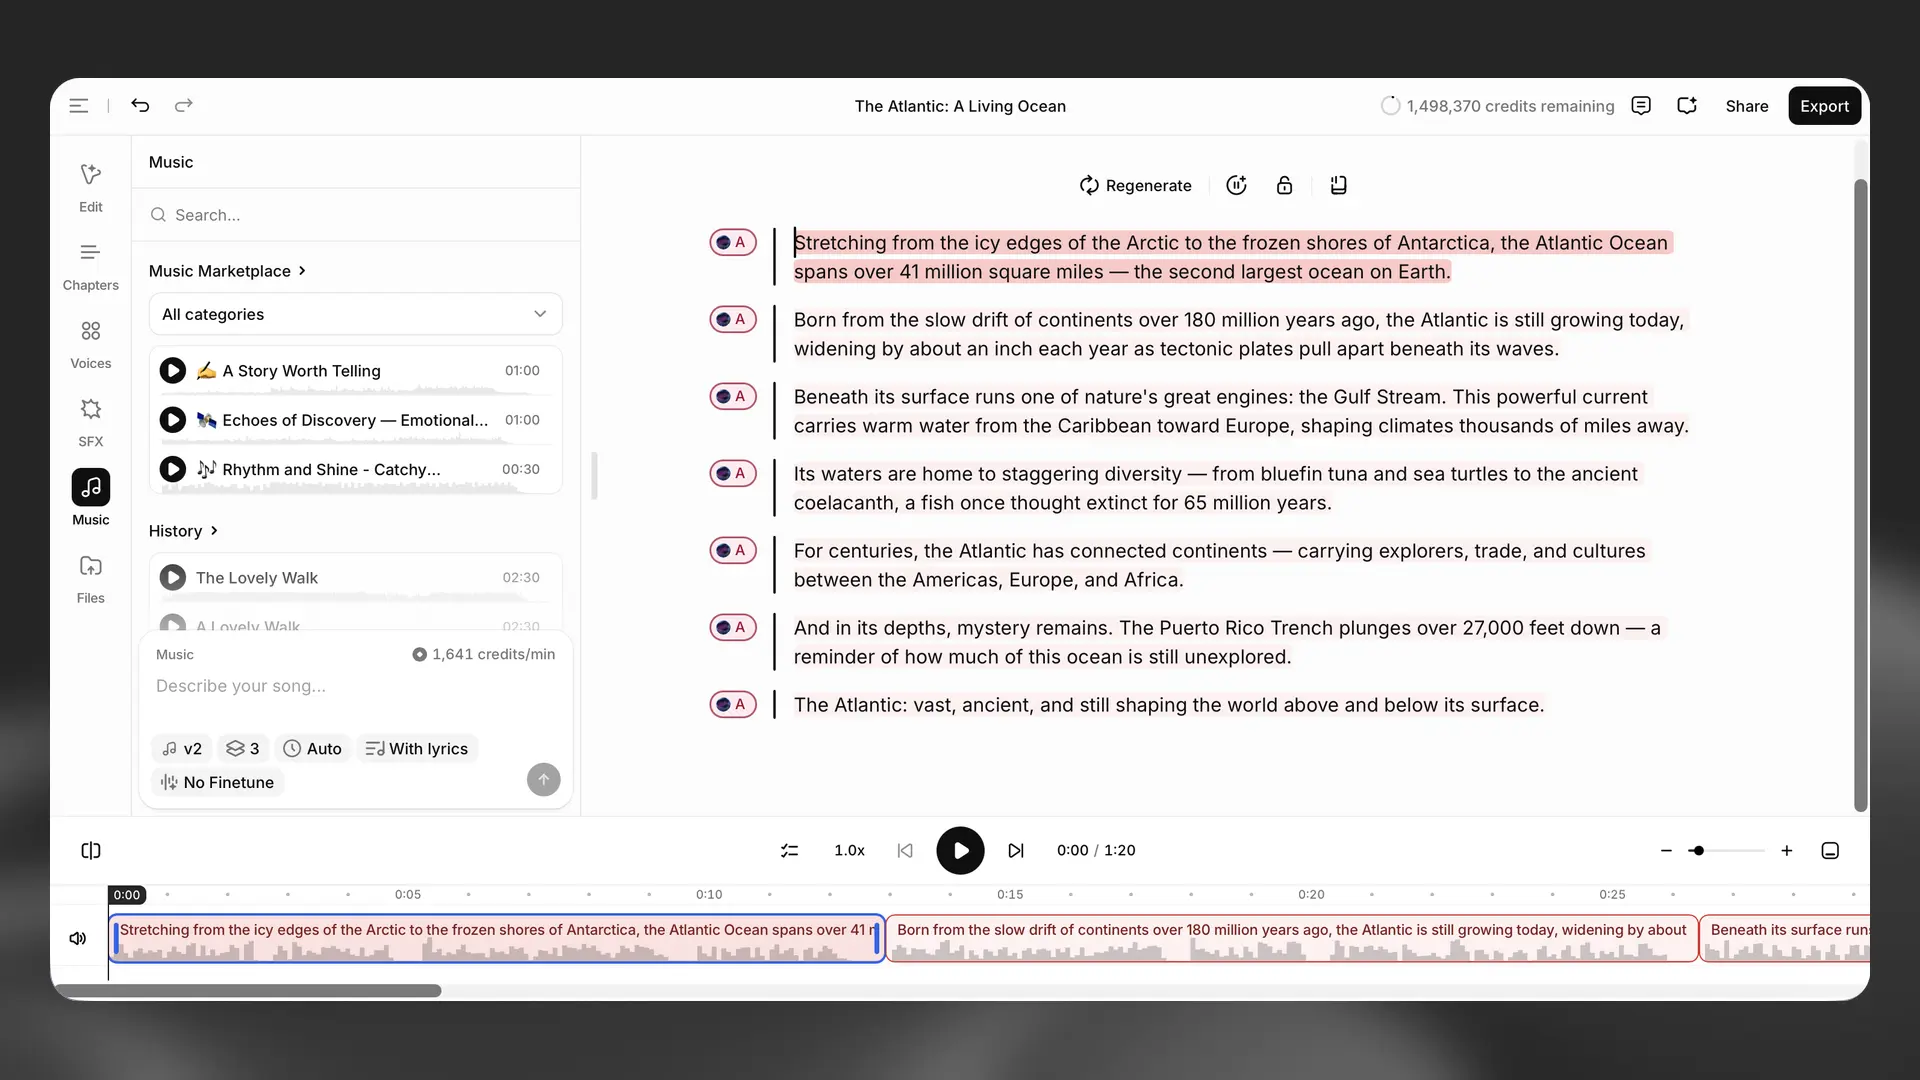
Generate music in ElevenCreative Studio and place it on a separate timeline track. Create music from a prompt or import an existing track. You can trim, duplicate, move, and adjust the volume of each clip. Stereo sources remain stereo.
Sound effects
Sound effects
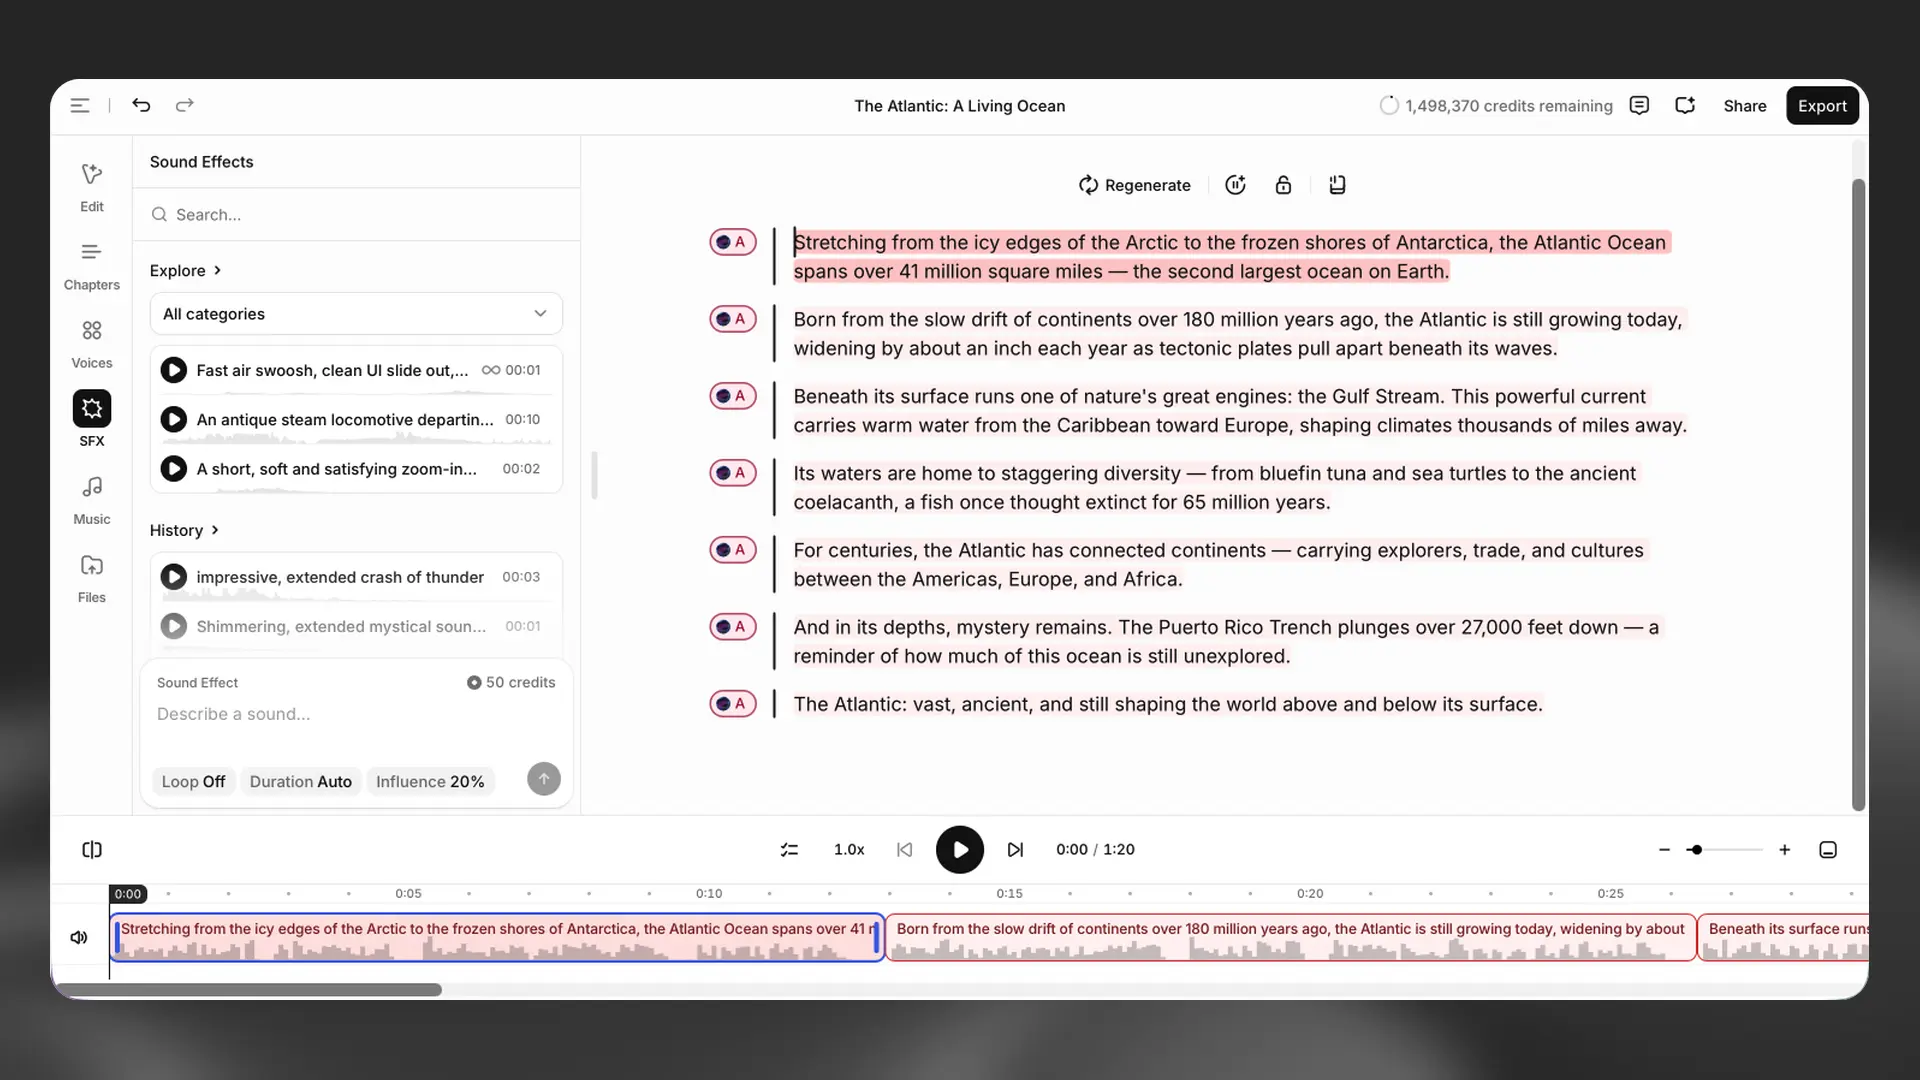
Add sound effects as separate clips on the timeline. You can position them anywhere, layer multiple effects, and adjust their timing precisely with trimming and duplication.
Create effects from a text prompt or select an existing effect from the SFX library.
You can regenerate previews to explore variants and then apply your chosen effect to the timeline. Deleting and duplicating SFX clips works the same as other timeline clips.
Sound effects are not supported in ElevenReader exports, or when streaming the project using the ElevenCreative Studio API.
Lock paragraph
Lock paragraph
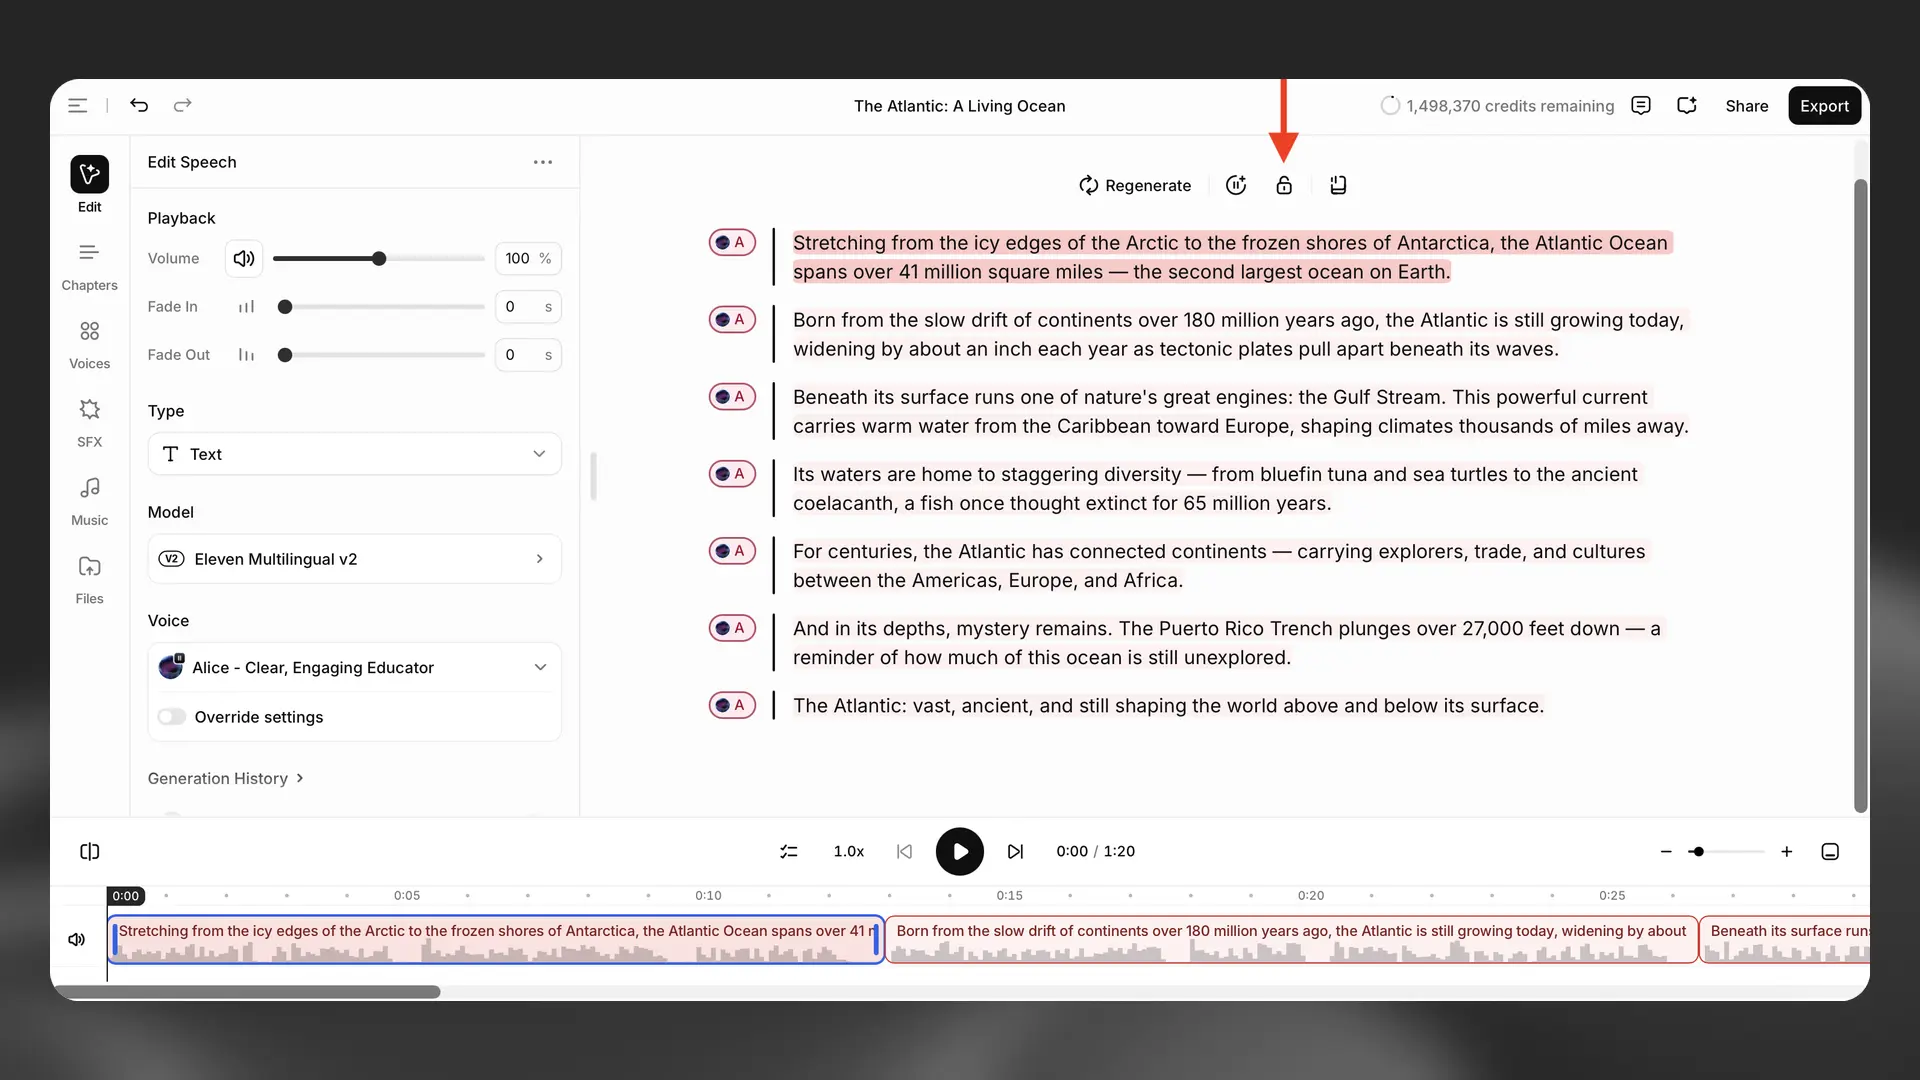
Select Lock paragraph to prevent changes to a paragraph.
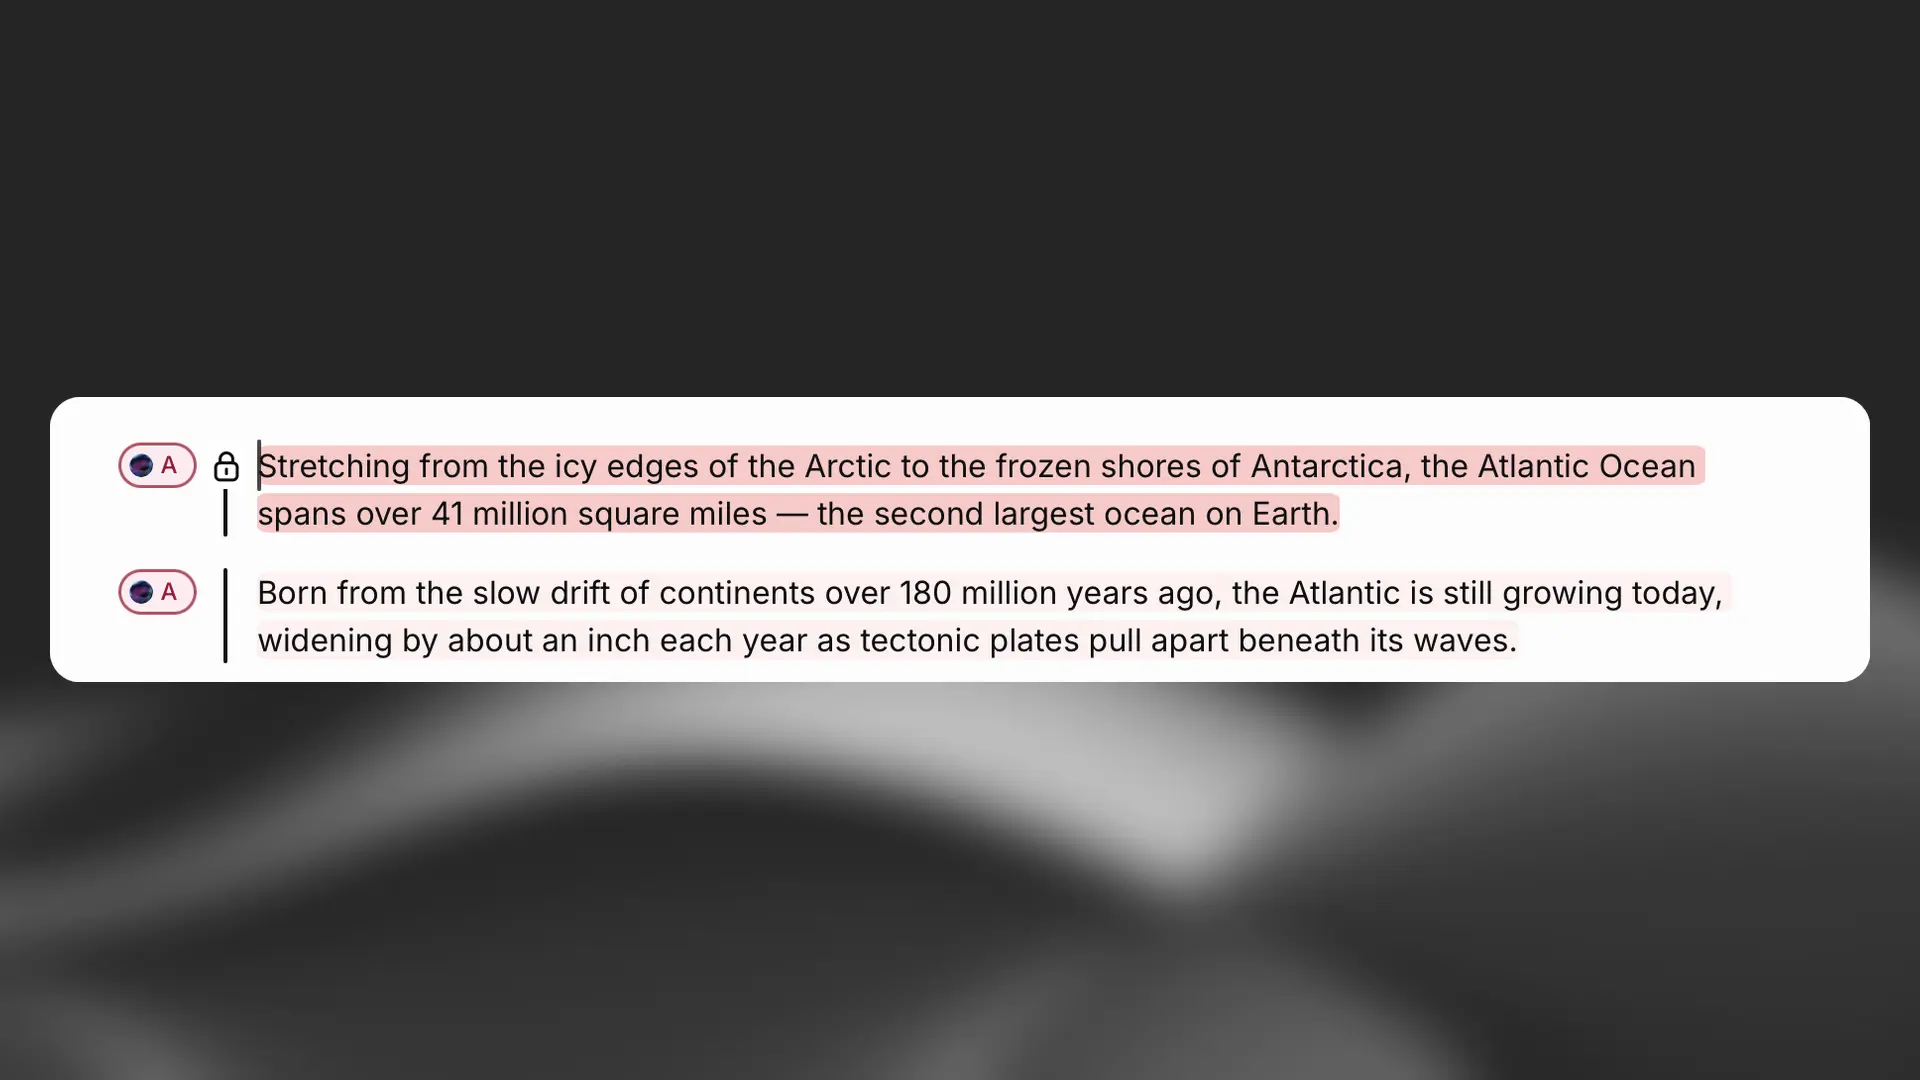
A lock icon appears to the left of locked paragraphs. Select Lock paragraph again to unlock a paragraph. Locking applies only to narration content; you can continue editing video, music, and sound effect clips.
Keyboard shortcuts
Keyboard shortcuts
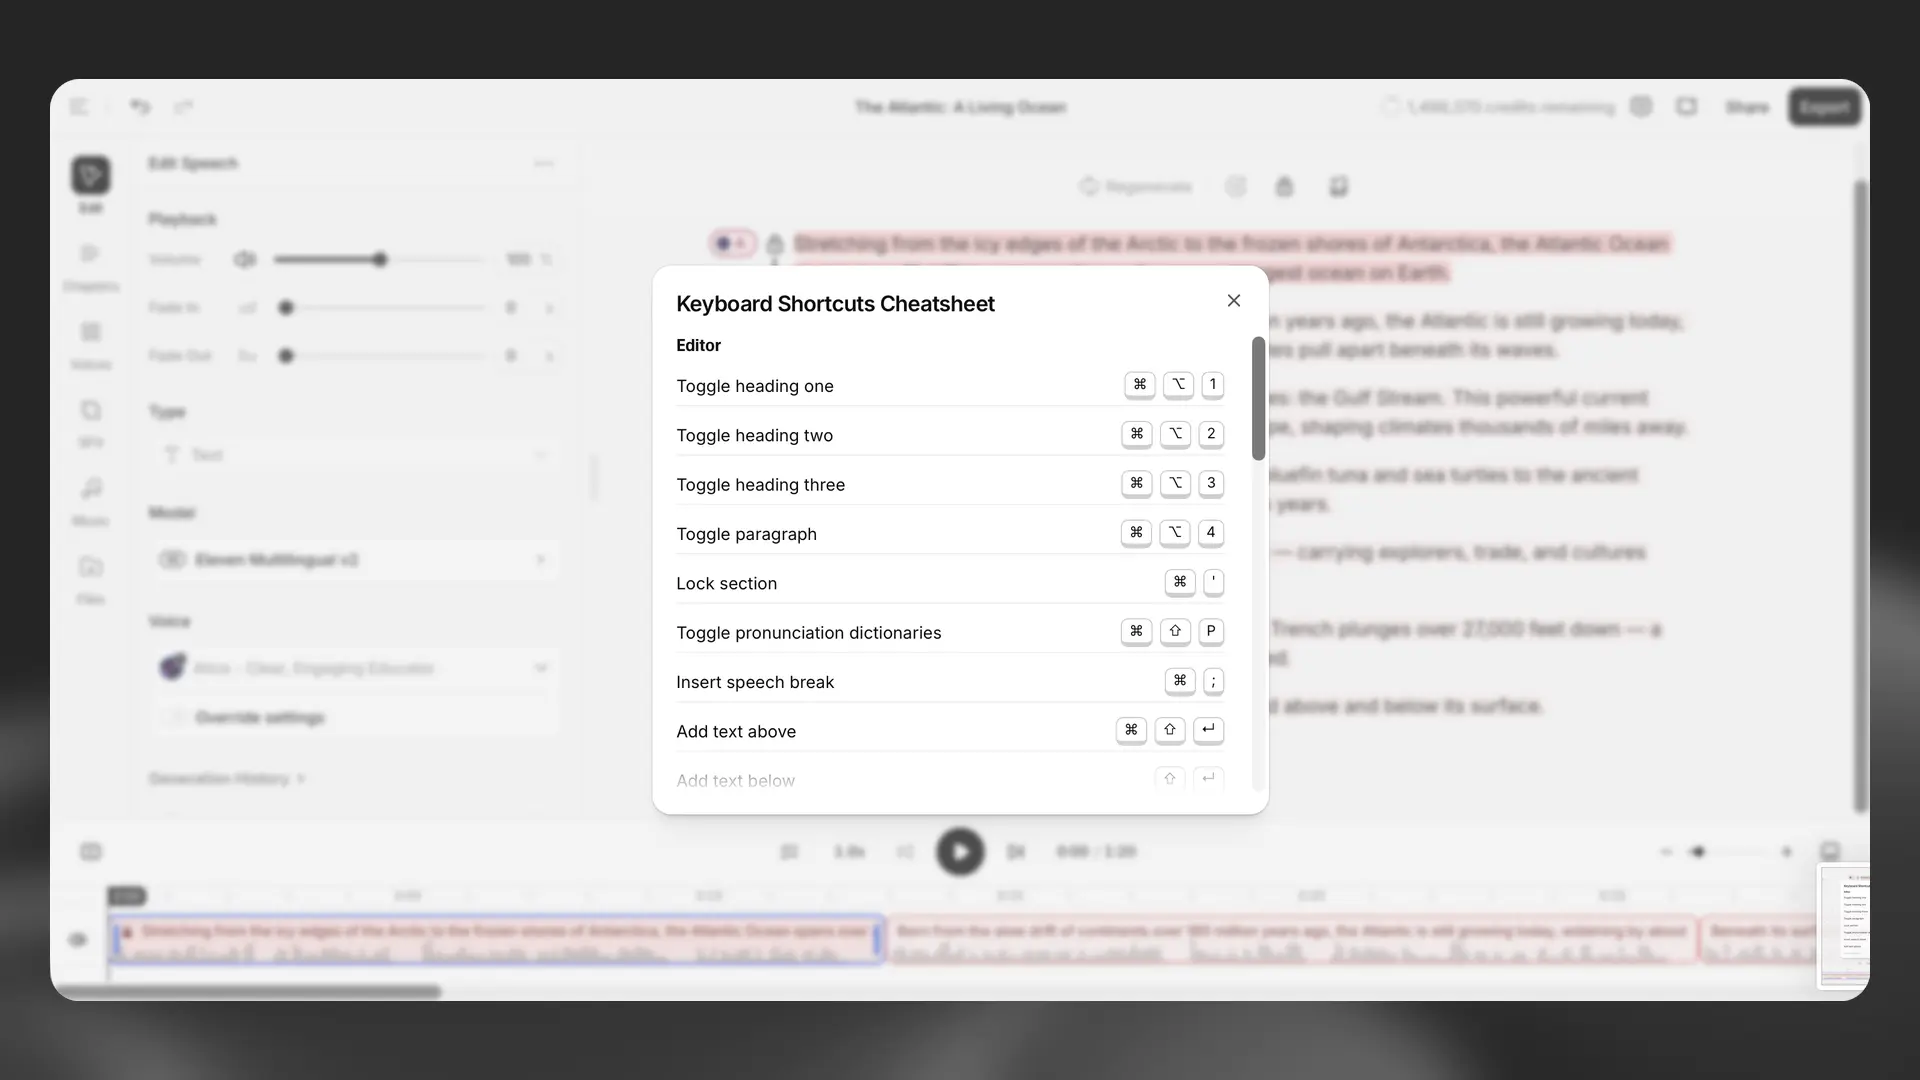
Select Project options > Keyboard shortcuts to view the available keyboard shortcuts.
Video projects
Contextual sidebar for Video projects
Contextual sidebar for Video projects
The new video project editor includes Library, Script, and Captions panels. For audio projects, see Contextual sidebar for Audio projects.
Library
Library
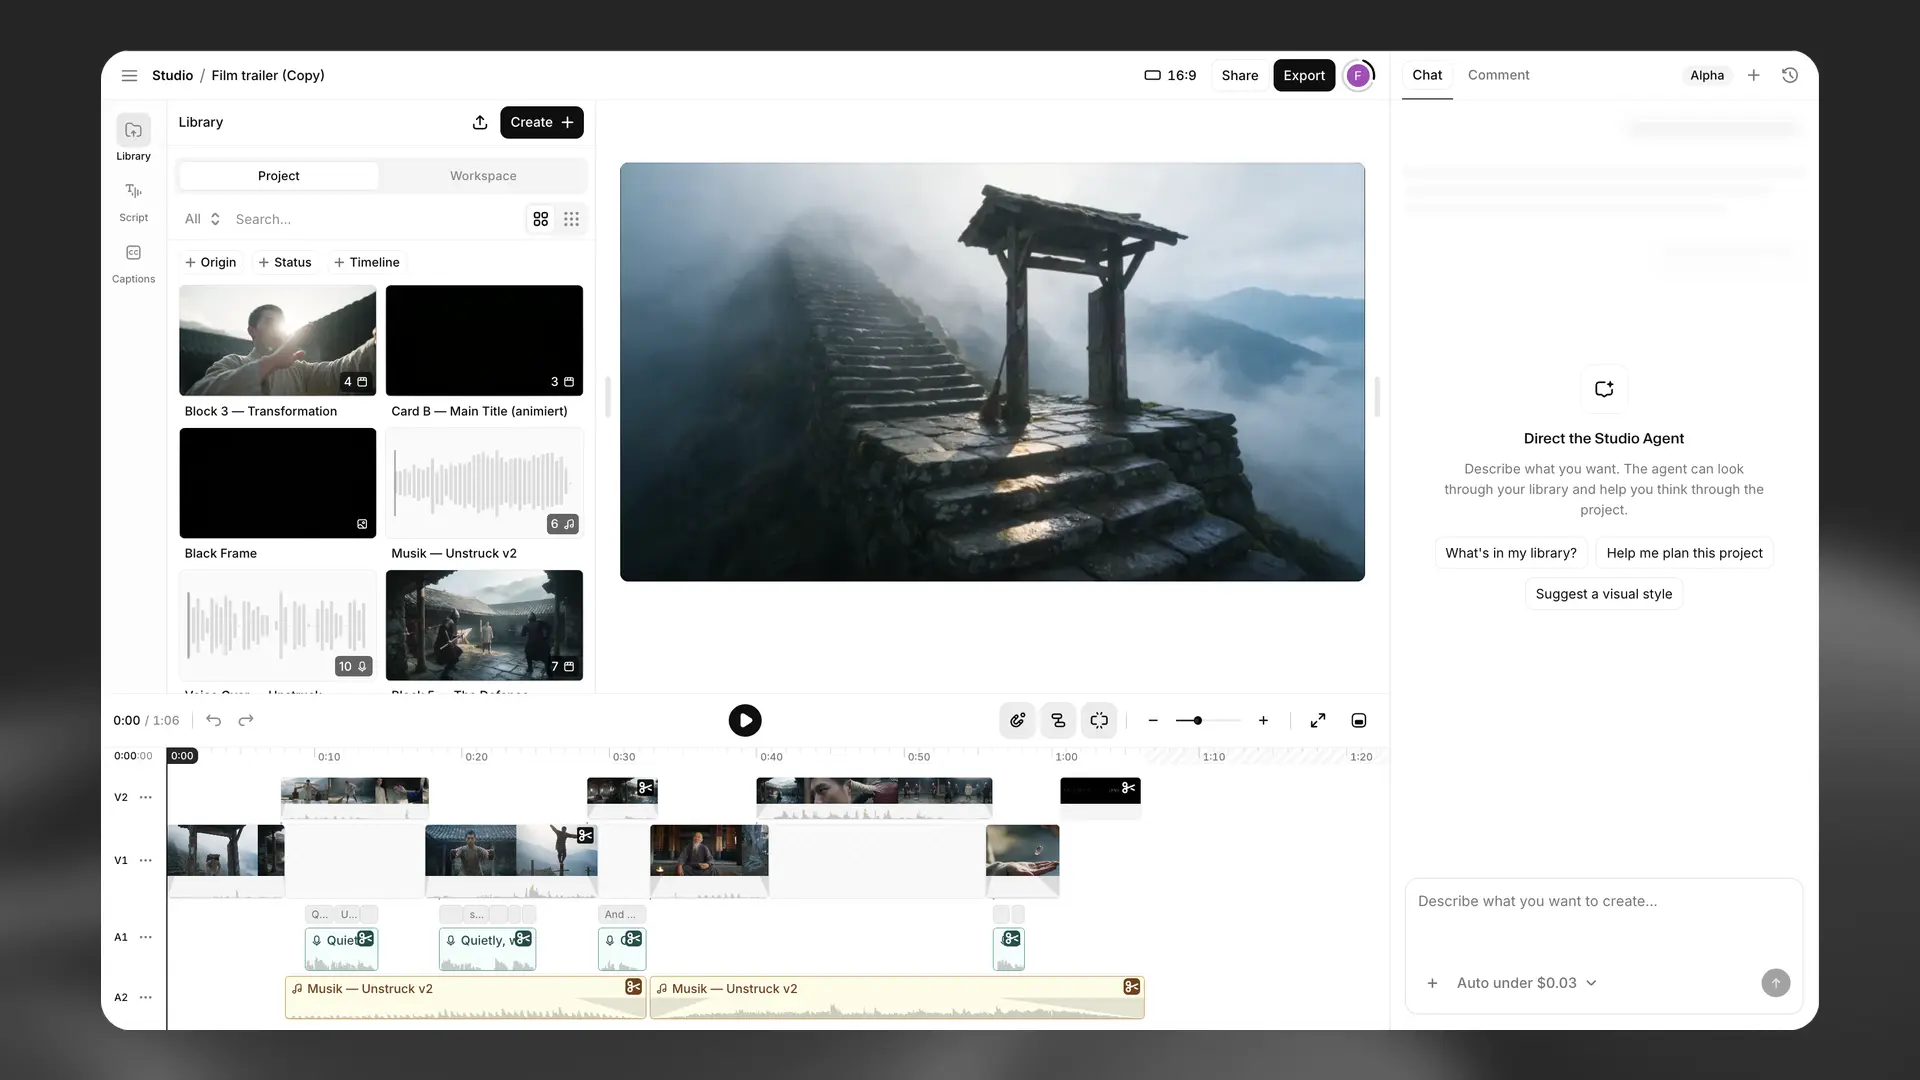
The Library panel stores video clips, images, and speech for reuse on the timeline. Use the Project and Workspace tabs to switch between project assets and assets shared across the workspace. Filter assets by Origin, Status, or Timeline presence.
Select Create + to add content.
Media
- Video generates a video clip.
- Lip sync synchronizes an avatar with a speech clip.
- Image generates a still image.
- Speech generates a voiceover clip.
- SFX generates a sound effect.
- Music generates a music track.
- Upload imports media files from your device.
Elements
- Text adds a text overlay.
Script
Script
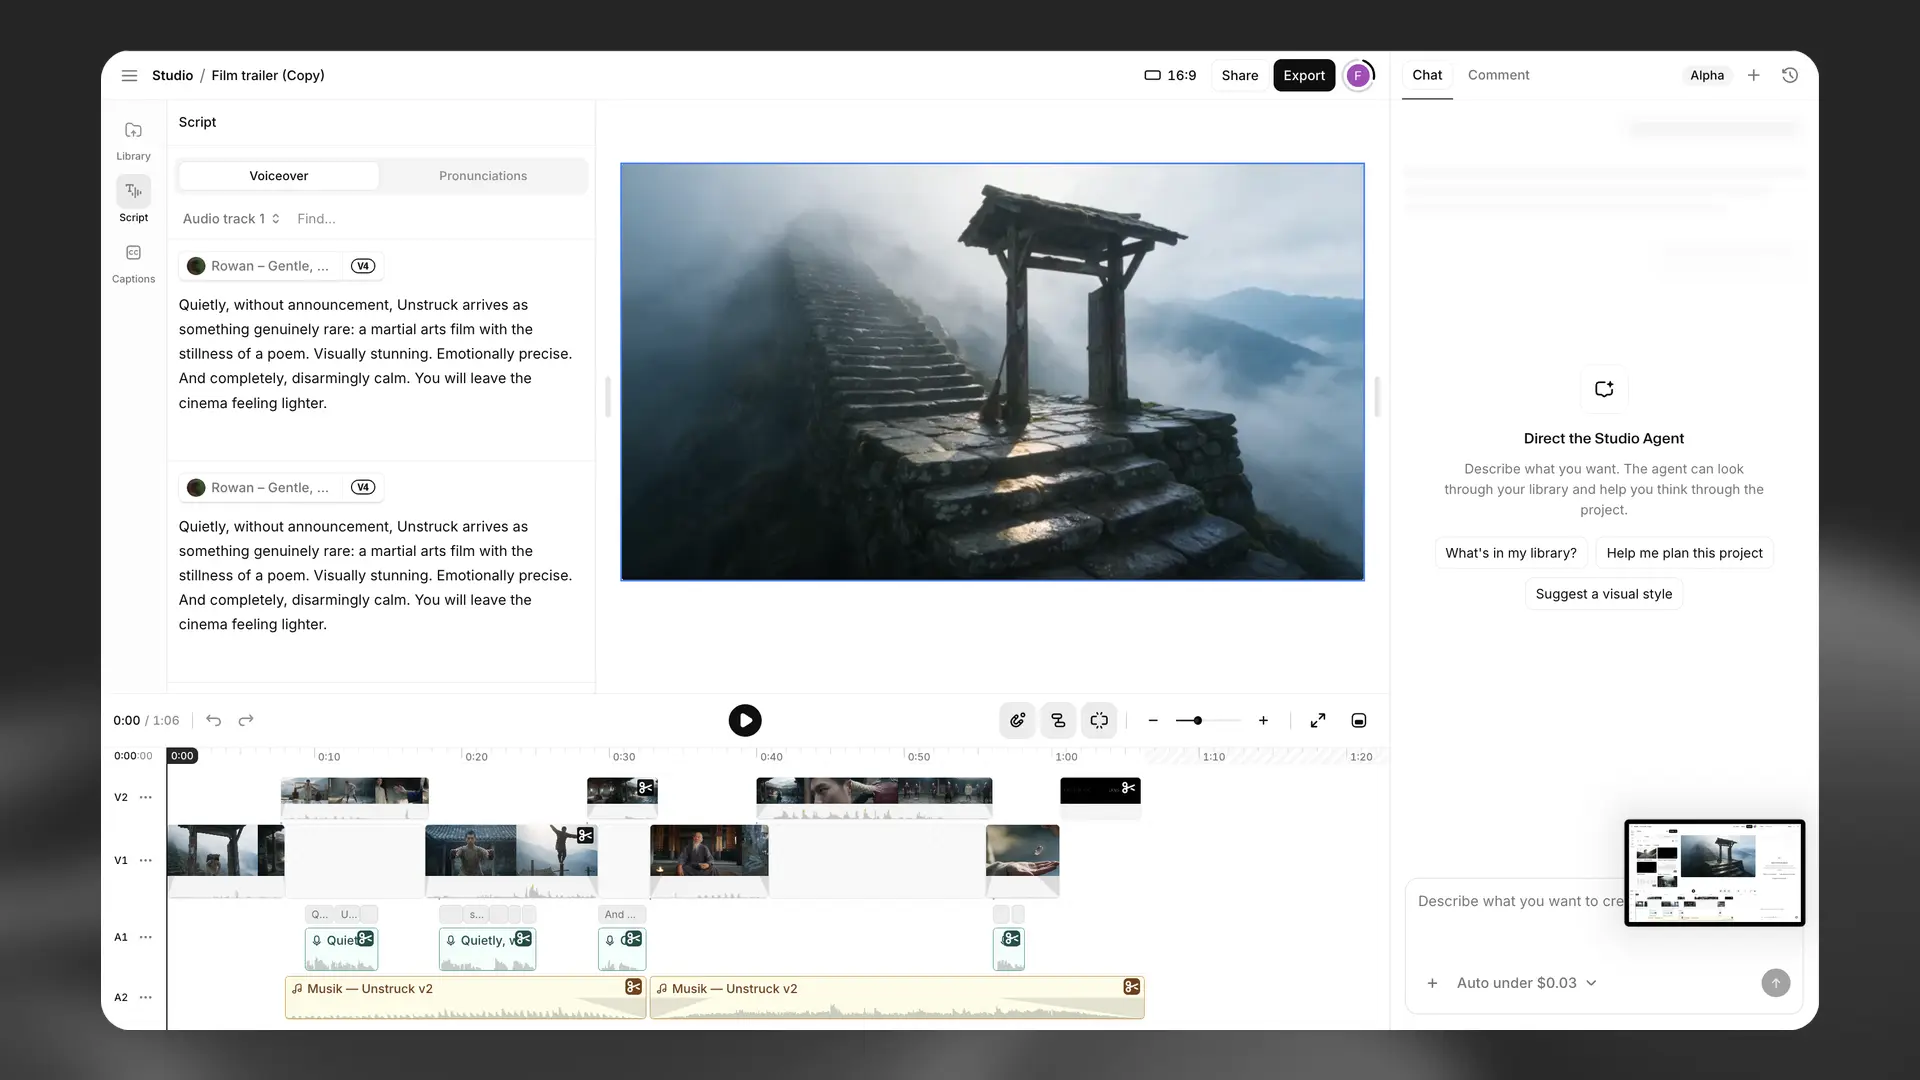
The Script panel organizes narration by audio track:
- Voiceover displays each paragraph with its assigned voice and model. Select a paragraph to edit the text or change the voice. Changes require regeneration.
- Pronunciations opens the Pronunciations Editor, where you can add alias or phoneme rules.
Captions
Captions
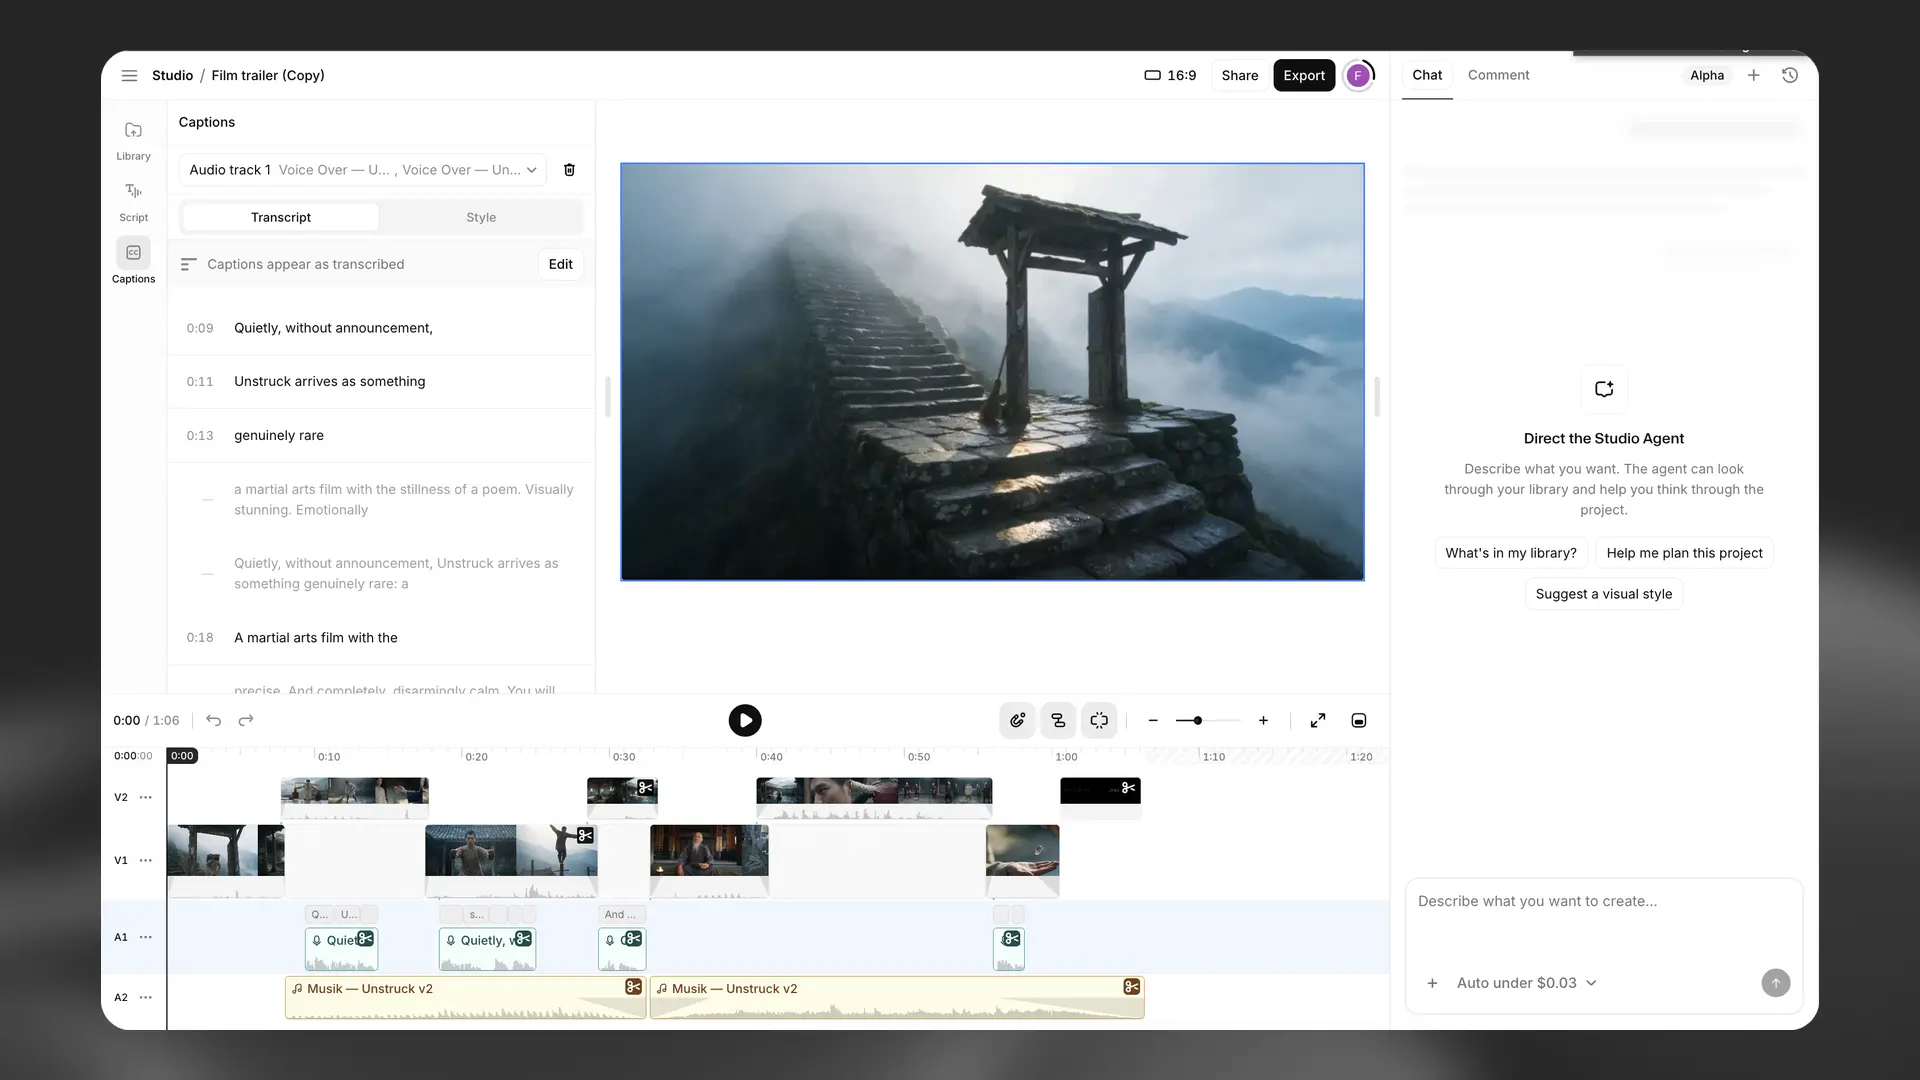
In the Captions panel, select an audio track as the caption source. Use the two tabs to edit the transcript and style:
- Transcript displays timestamped caption text. Select Edit to correct the text or timing.
- Style configures the font, color, size, and placement. Changes appear in the video preview and are burned into the exported video.
Video track and voiceovers
Video track and voiceovers
Create and manage video clips in the Library panel. Generate a clip from a prompt or select Upload to add existing footage. Drag a clip from the Library to place it on the timeline. Use Image refs, Reference videos, Start frame, and End frame to provide visual context for generation.
Add a video track to pair narration with existing footage or B-roll. Import a video file or add a blank track, then align the narration with the video on the timeline. Enable captions and select a template when required.
Aspect ratio for Video projects
Aspect ratio
Use the selector in the top bar to set the output aspect ratio:
- 16:9 for YouTube ads and standard widescreen.
- 9:16 for TikTok, Reels, and Shorts.
- 4:5 for LinkedIn and Facebook ads.
- 1:1 for Instagram posts.
The selected ratio applies to the canvas preview and exported video.
Settings
Voices
Voices
You can use Instant Voice Clones, Professional Voice Clones, voices shared through the Voice Library, and synthetic voices created with Voice Design.
Voice performance depends on the quality of the source audio, the model, and the language. Test several voices to determine which one fits the project.
If you’re unhappy with a voice, but you’re happy with the delivery of the narration, you can use our Voice Changer functionality to change the voice, but preserve the narration
Voice settings
Voice settings
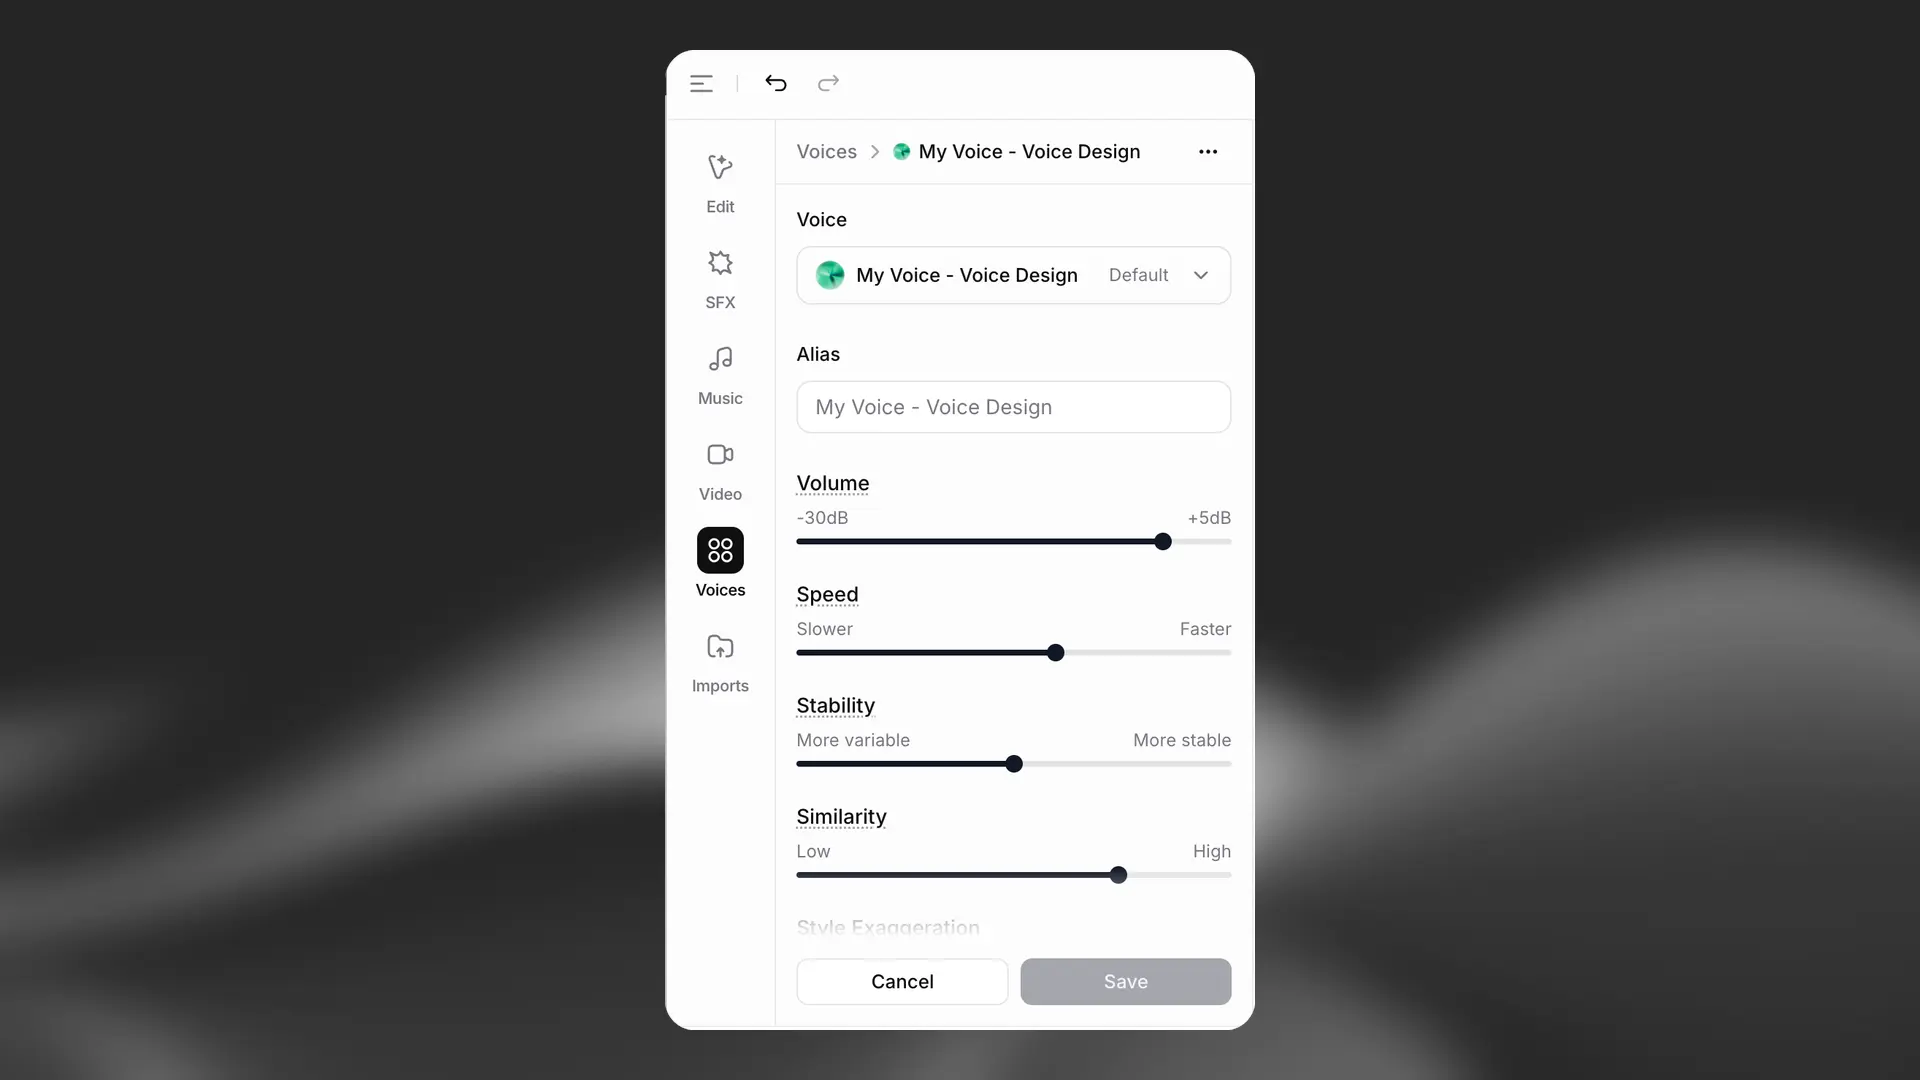
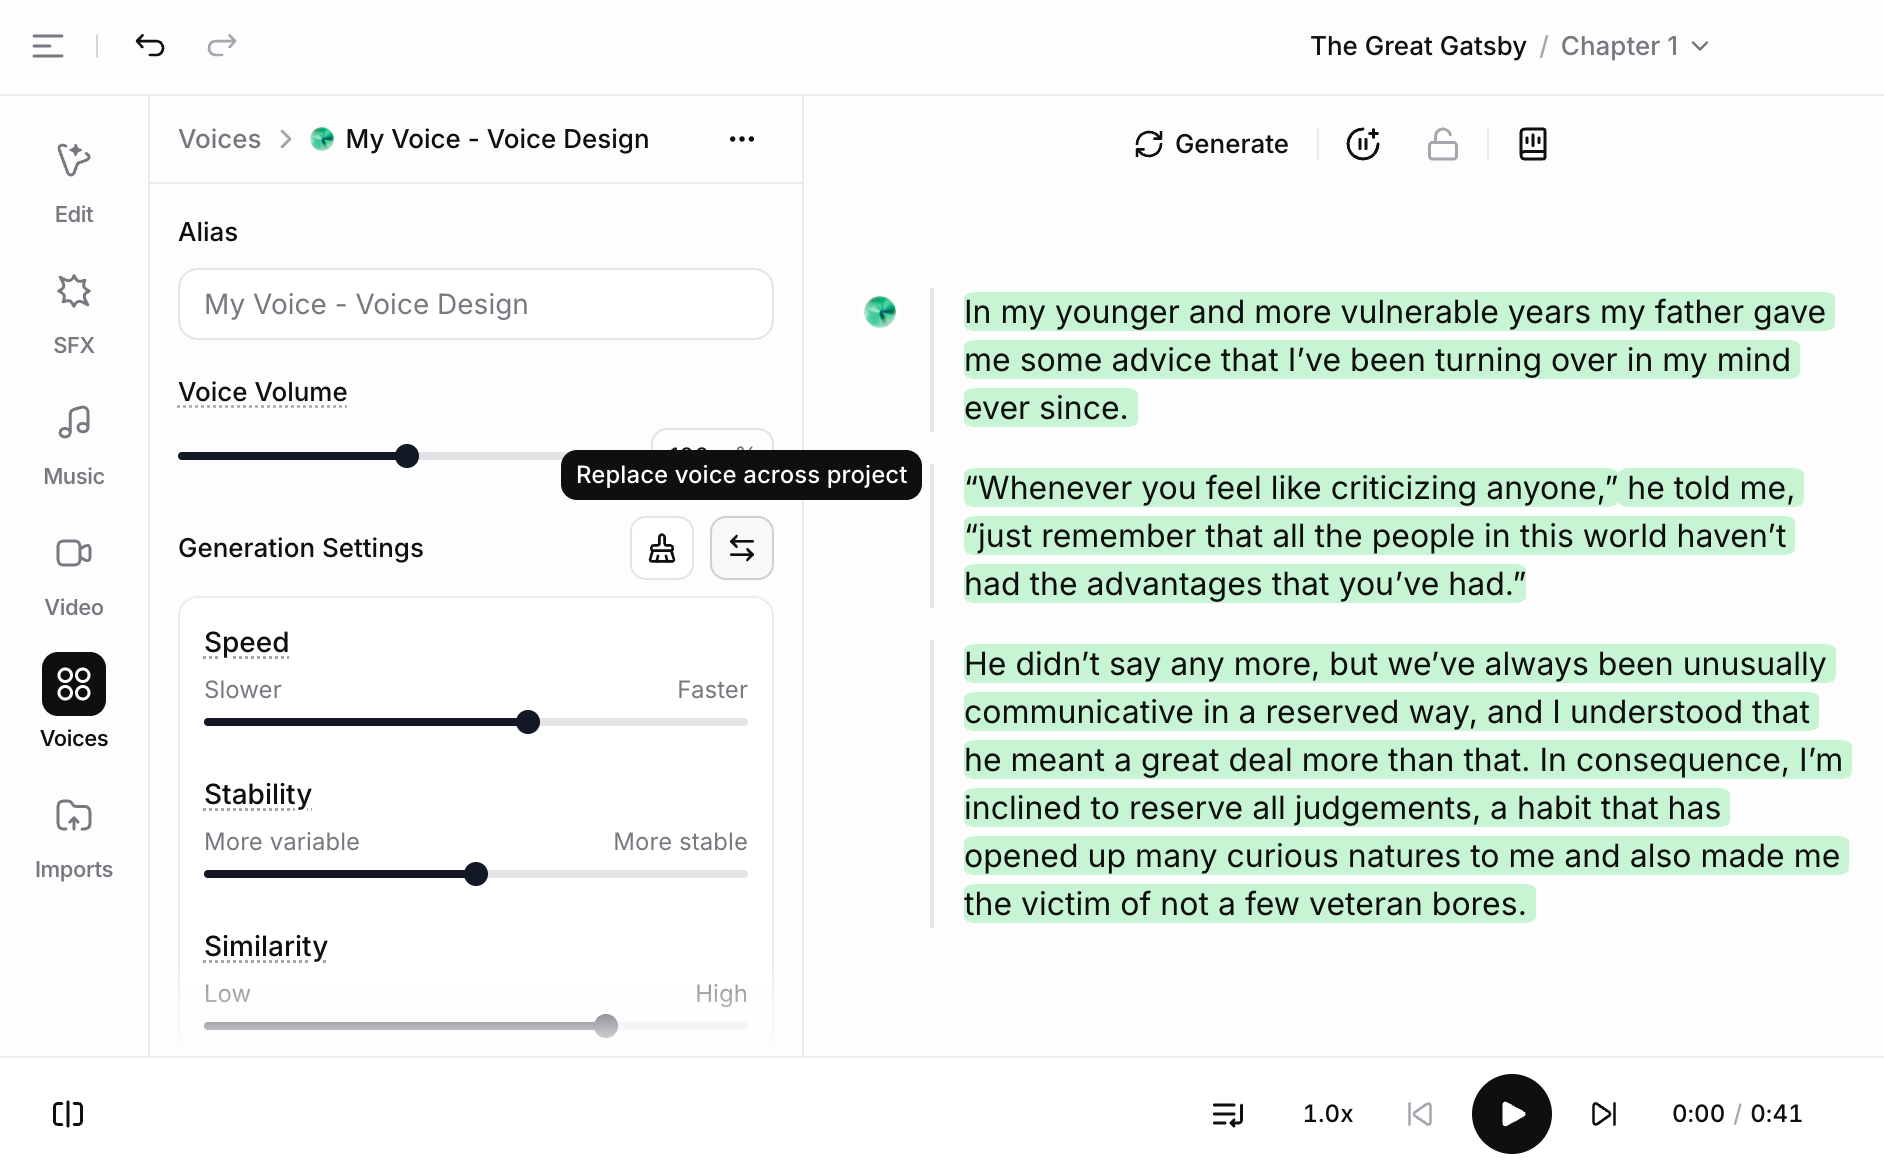
Our users have found different workflows that work for them. The most common setting is stability around 50 and similarity near 75, with minimal changes thereafter. Of course, this all depends on the original voice and the style of performance you’re aiming for.
It’s important to note that the AI is non-deterministic; setting the sliders to specific values won’t guarantee the same results every time. Instead, the sliders function more as a range, determining how wide the randomization can be between each generation.
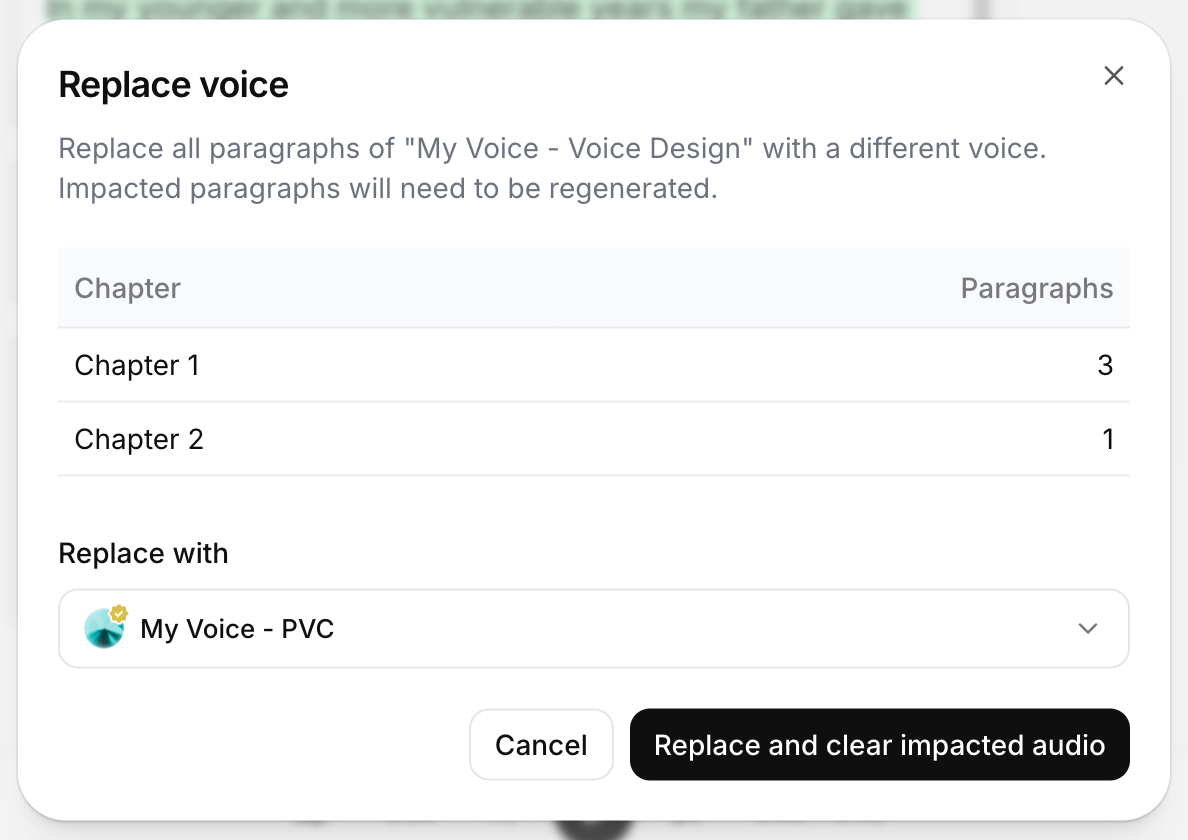
Enable Override settings to change voice settings for the selected text or paragraph. Without this override, changes apply to every use of the voice in the project and require regeneration. Unlock any affected locked paragraphs before changing the settings.
Alias
You can use this setting to give the voice an alias that applies only for this project. For example, if you’re using a different voice for each character in your audiobook, you could use the character’s name as the alias.
Volume
If you find the generated audio for the voice to be either too quiet or too loud, you can adjust the volume. The default value is 0.00, which means that the audio will be unchanged. The minimum value is -30 dB and the maximum is +5 dB.
Speed
The Speed setting allows you to either speed up or slow down the speed of the generated speech. The default value is 1.0, which means that the speed is not adjusted. Values below 1.0 will slow the voice down, to a minimum of 0.7. Values above 1.0 will speed up the voice, to a maximum of 1.2. Extreme values may affect the quality of the generated speech.
Stability
The Stability slider determines how stable the voice is and the randomness between each generation. Lowering this slider introduces a broader emotional range for the voice. This is influenced heavily by the original voice. Setting the slider too low may result in odd performances that are overly random and cause the character to speak too quickly. On the other hand, setting it too high can lead to a monotonous voice with limited emotion.
For a more lively and dramatic performance, it is recommended to set the stability slider lower and generate a few times until you find a performance you like.
On the other hand, if you want a more serious performance, even bordering on monotone at very high values, it is recommended to set the stability slider higher. Since it is more consistent and stable, you usually don’t need to generate as many samples to achieve the desired result. Experiment to find what works best for you!
Similarity
The Similarity slider dictates how closely the AI should adhere to the original voice when attempting to replicate it. If the original audio is of poor quality and the similarity slider is set too high, the AI may reproduce artifacts or background noise when trying to mimic the voice if those were present in the original recording.
Style exaggeration
Some models include a Style Exaggeration setting. This setting attempts to amplify the style of the original speaker. It does consume additional computational resources and might increase latency if set to anything other than 0. It’s important to note that using this setting has shown to make the model slightly less stable, as it strives to emphasize and imitate the style of the original voice.
In general, we recommend keeping this setting at 0 at all times.
Speaker boost
This setting boosts the similarity to the original speaker. However, using this setting requires a slightly higher computational load, which in turn increases latency. The differences introduced by this setting are generally rather subtle.
Pronunciation dictionaries
Pronunciation dictionaries
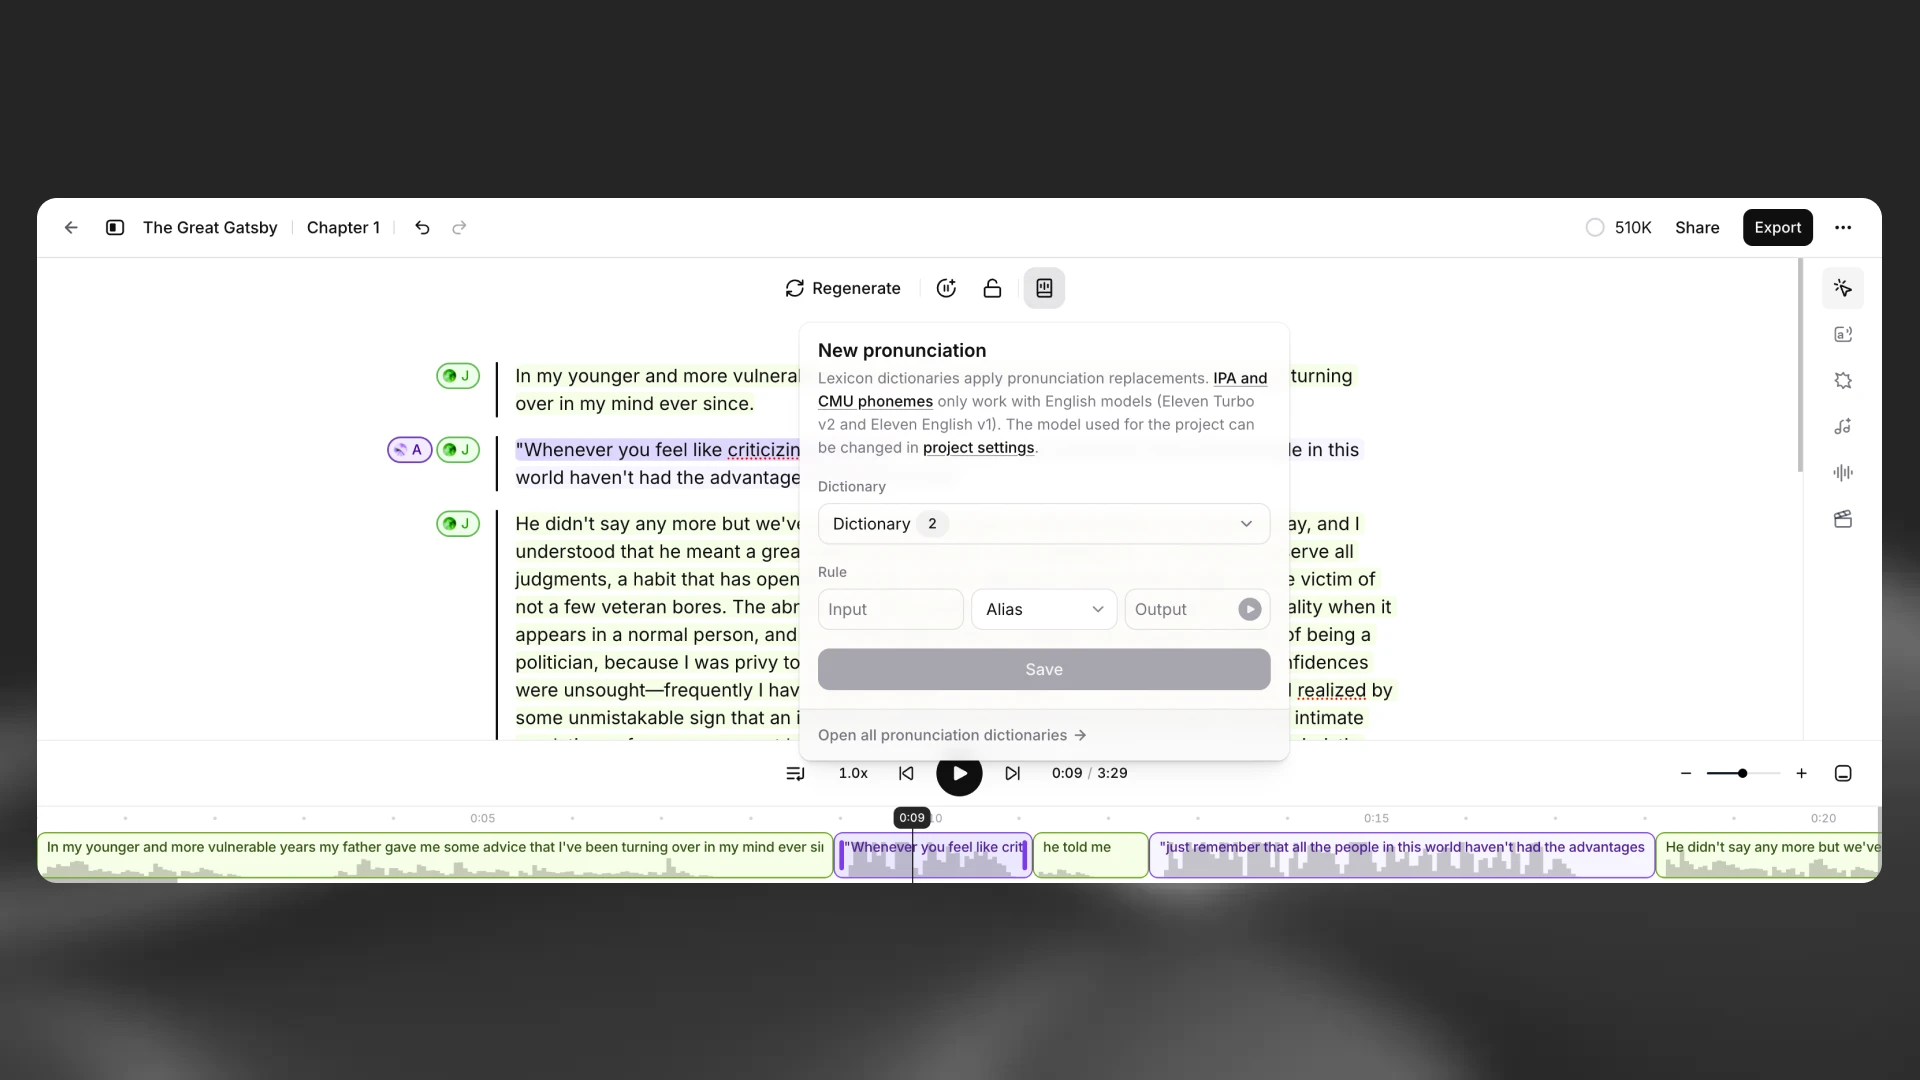
Sometimes you may want to specify the pronunciation of certain words, such as character or brand names, or specify how acronyms should be read. Pronunciation dictionaries allow this functionality by enabling you to upload a lexicon or dictionary file that includes rules about how specified words should be pronounced, either using a phonetic alphabet (phoneme tags) or word substitutions (alias tags).
Phoneme tags are only compatible with “Eleven Flash v2” model.
Whenever one of these words is encountered in a project, the AI will pronounce the word using the specified replacement. When checking for a replacement word in a pronunciation dictionary, the dictionary is checked from start to end and only the first replacement is used.
Existing pronunciation dictionaries can be connected to your project from the Pronunciations Editor. You can open this from the toolbar. Find the dictionary you want to connect in the drop down menu and select Connect.
You can create a new pronunciation dictionary from your project by creating an entry in the Pronunciations Editor, or you can upload or create a pronunciation dictionary from Open all pronunciation dictionaries in the Pronunciations Editor. You can then select Connect to connect the pronunciation dictionary to the current project.
For more information on pronunciation dictionaries, please see our prompting best practices guide.
Export settings
Export settings
Within the Export tab under Project settings you can add additional metadata such as Title, Author, ISBN and a Description to your project. This information will automatically be added to the downloaded audio files. You can also access previous versions of your project, and enable volume normalization. These settings apply to audio exports; video appearance is controlled by your timeline and caption templates.
Exporting and sharing
When you’re happy with your chapter or project, use the Export button to generate a downloadable version. If you’ve already generated audio for every paragraph in either your chapter or project, you won’t be charged any additional credits to export. If there are any paragraphs that do need converting as part of the export process, you will see a notification of how many credits it will cost to export.
Video exports on the Free plan include a watermark. Paid plans export videos without a watermark.
Export options
Export options
For a single-chapter project, export the project as MP3 or WAV. If the project contains a video track or captions, you can also export it as video.
If your project has multiple chapters, you will have the option to export each chapter individually, or export the full project. If you’re exporting the full project, you can either export as a single file, or as a ZIP file containing individual files for each chapter. You can also choose whether to download as MP3 or WAV for audio‑only exports.
For video exports, enable captions and add a video track (or shareable TTS video) before exporting. Video is rendered with your selected caption template.
Quality setting
Quality setting
The quality of the export depends on your subscription plan. For newly created projects, the quality will be:
- Free, Starter and Creator: 128 kbps MP3, or WAV converted from 128 kbps source.
- Pro, Scale, Business and Enterprise plans: 16-bit, 44.1 kHz WAV, or 192 kbps MP3 (Ultra Lossless).
If you have an older project, you may have set the quality setting when you created the project, and this can’t be changed. You can check the quality setting for your project in the Export menu by hovering over Format
Downloading
Downloading
Once your export is ready, it will be automatically downloaded. For shareable TTS videos, you can also copy a link for quick sharing.
You can access and download all previous exports, of both chapters and projects, by clicking the Project options button and selecting Exports.
Sharing
Sharing
From the editor, create a read‑only link so others can play your timeline and review your mix without downloading files. You can revoke access at any time. Commenting is also available, including anonymous comments.
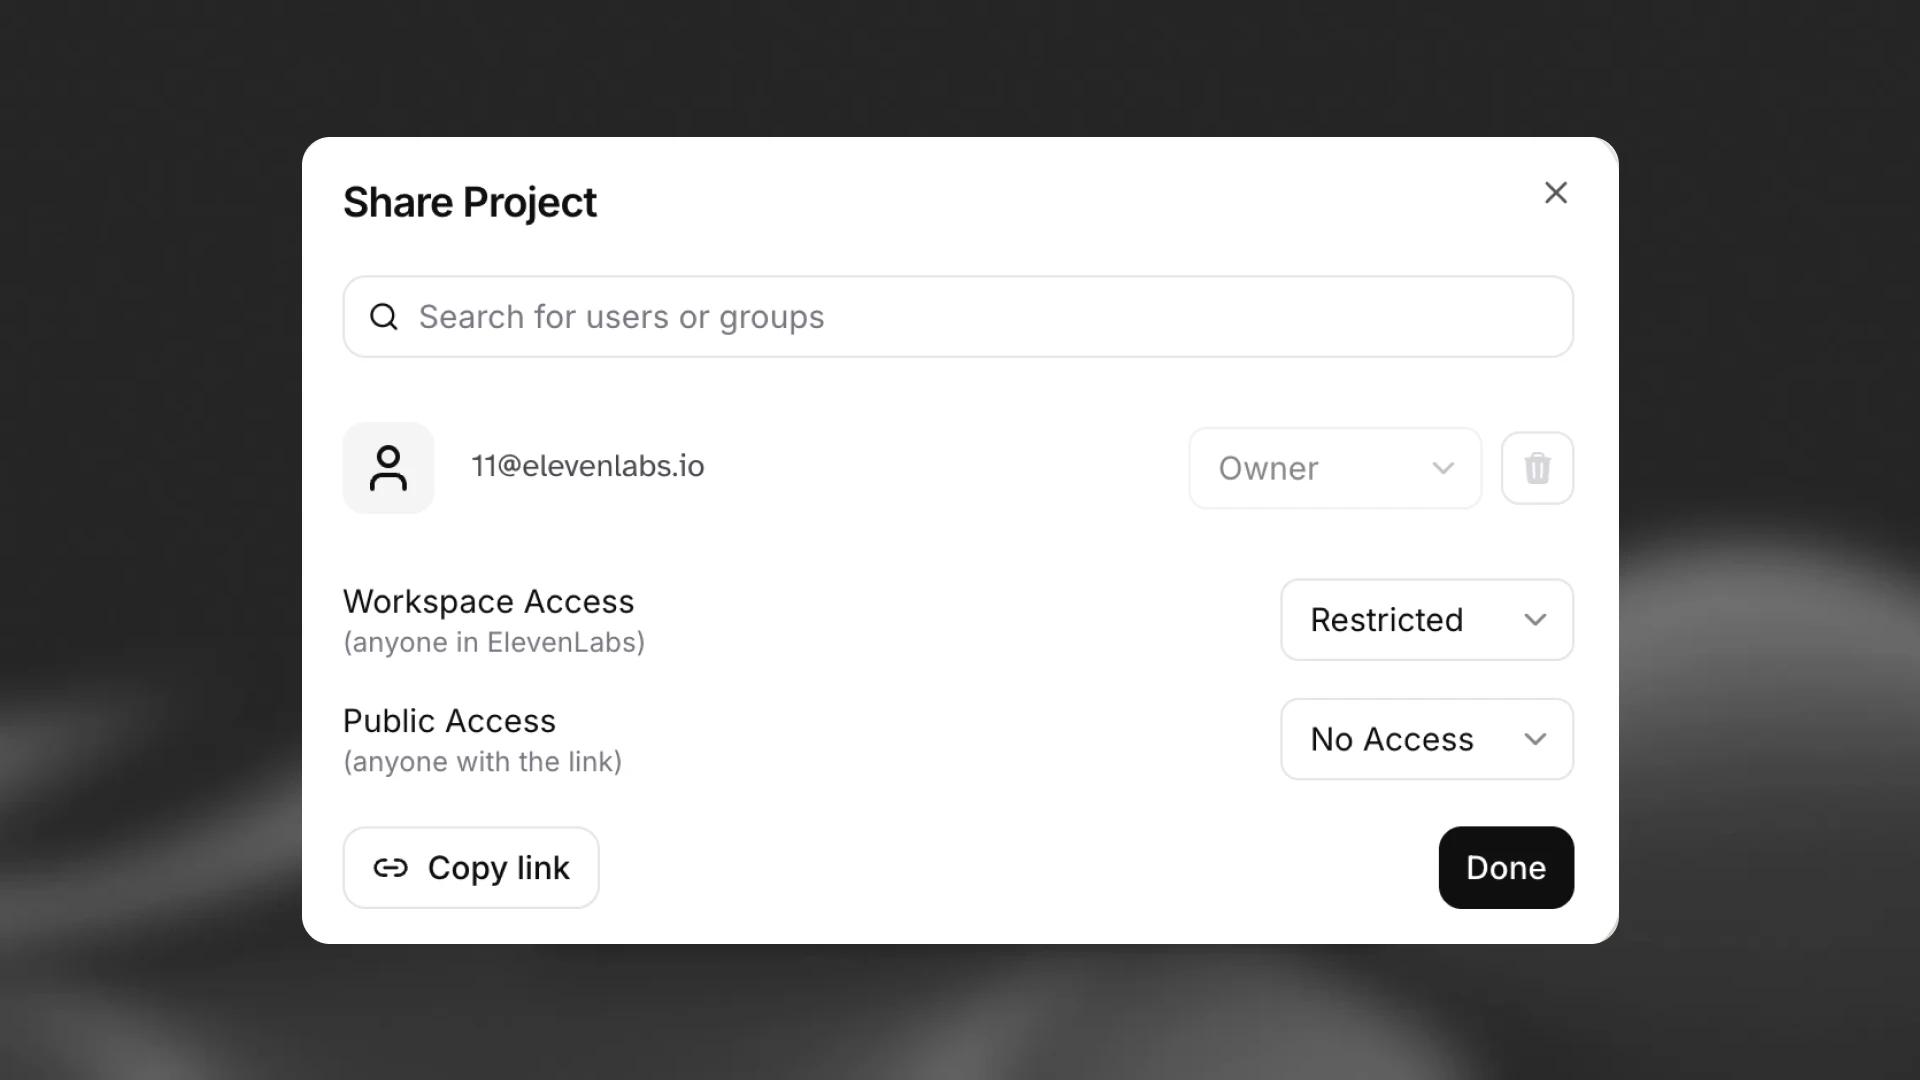
Commenting
Commenting
Invite collaborators or your audience to leave feedback directly on the timeline. Comments are timestamped to the playhead so feedback appears exactly where it’s relevant. Commenters don’t need an ElevenLabs account and can leave a name or post anonymously. Discussions stay organized with threaded replies and optional mentions of collaborators.
To add a comment, open a shared project link (or the editor with sharing enabled), move the playhead to the right moment, and click Add comment. Type your message and post; use Reply to continue the thread. You’ll receive email notifications when there’s a new comment or reply in a thread you started or participated in.
When feedback is addressed, mark the thread as Resolved; it will collapse in the list and can be reopened later. Resolving a thread pauses further notifications until it is reopened.