Audio Native with WordPress
Integrate Audio Native into your WordPress sites.
Follow the steps in the Audio Native overview to get started with Audio Native before continuing with this guide.
Create a new code snippet
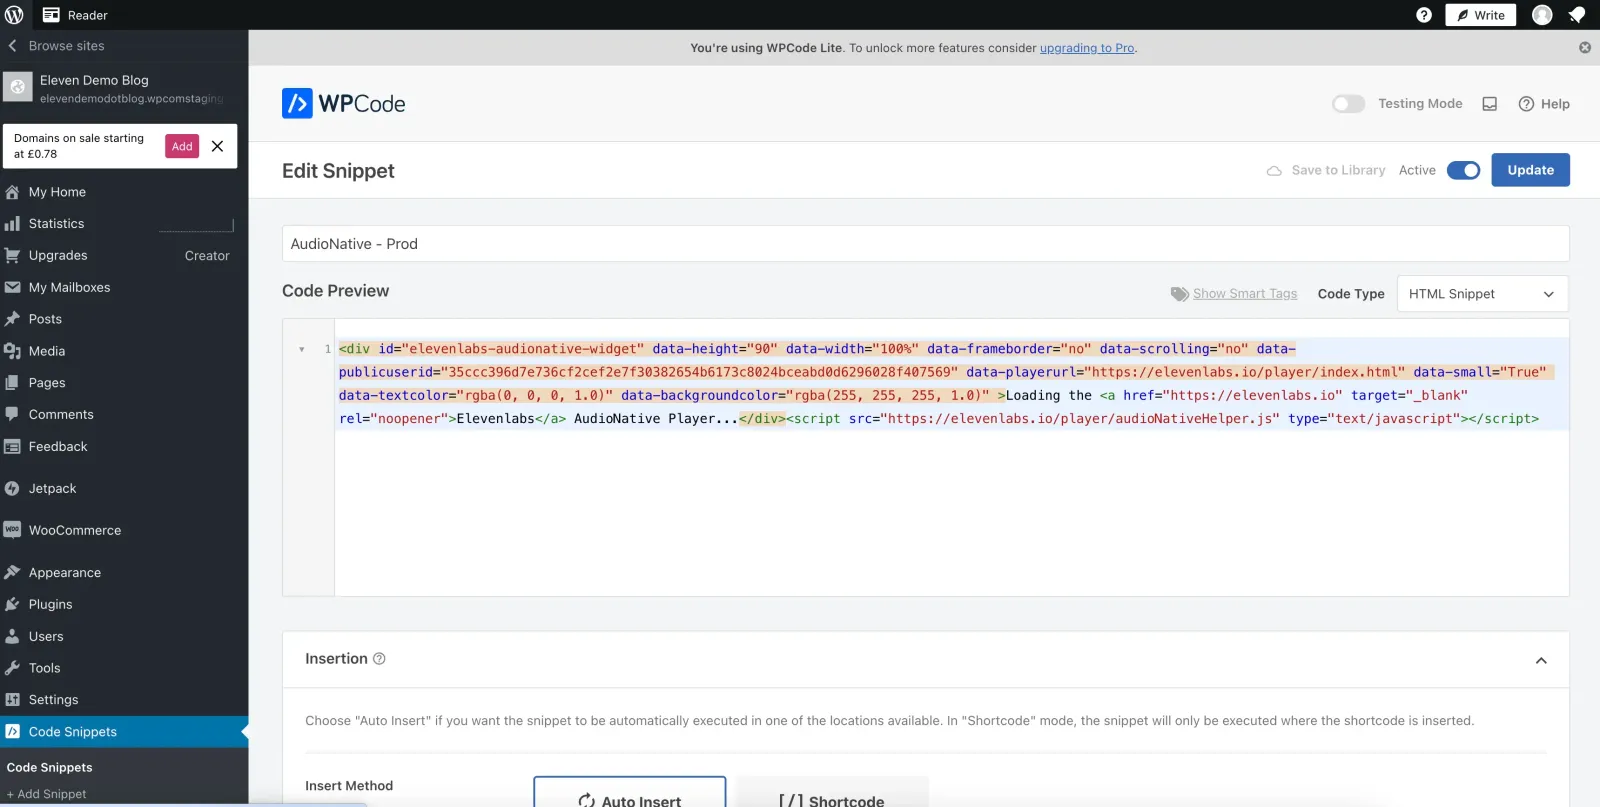
In the WordPress admin console, click on “Code Snippets”. Add the Audio Native embed code to the new code snippet.
Embed code snippet
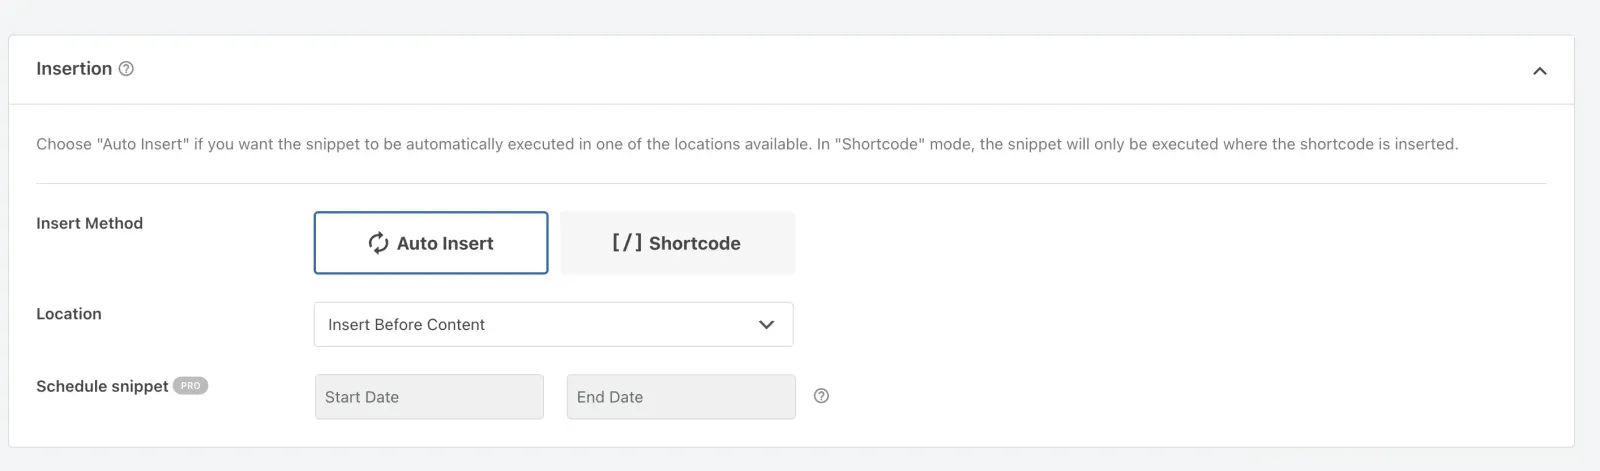
Pick “Auto Insert” for the insert method and set the location to be “Insert Before Content”.
Publish your changes
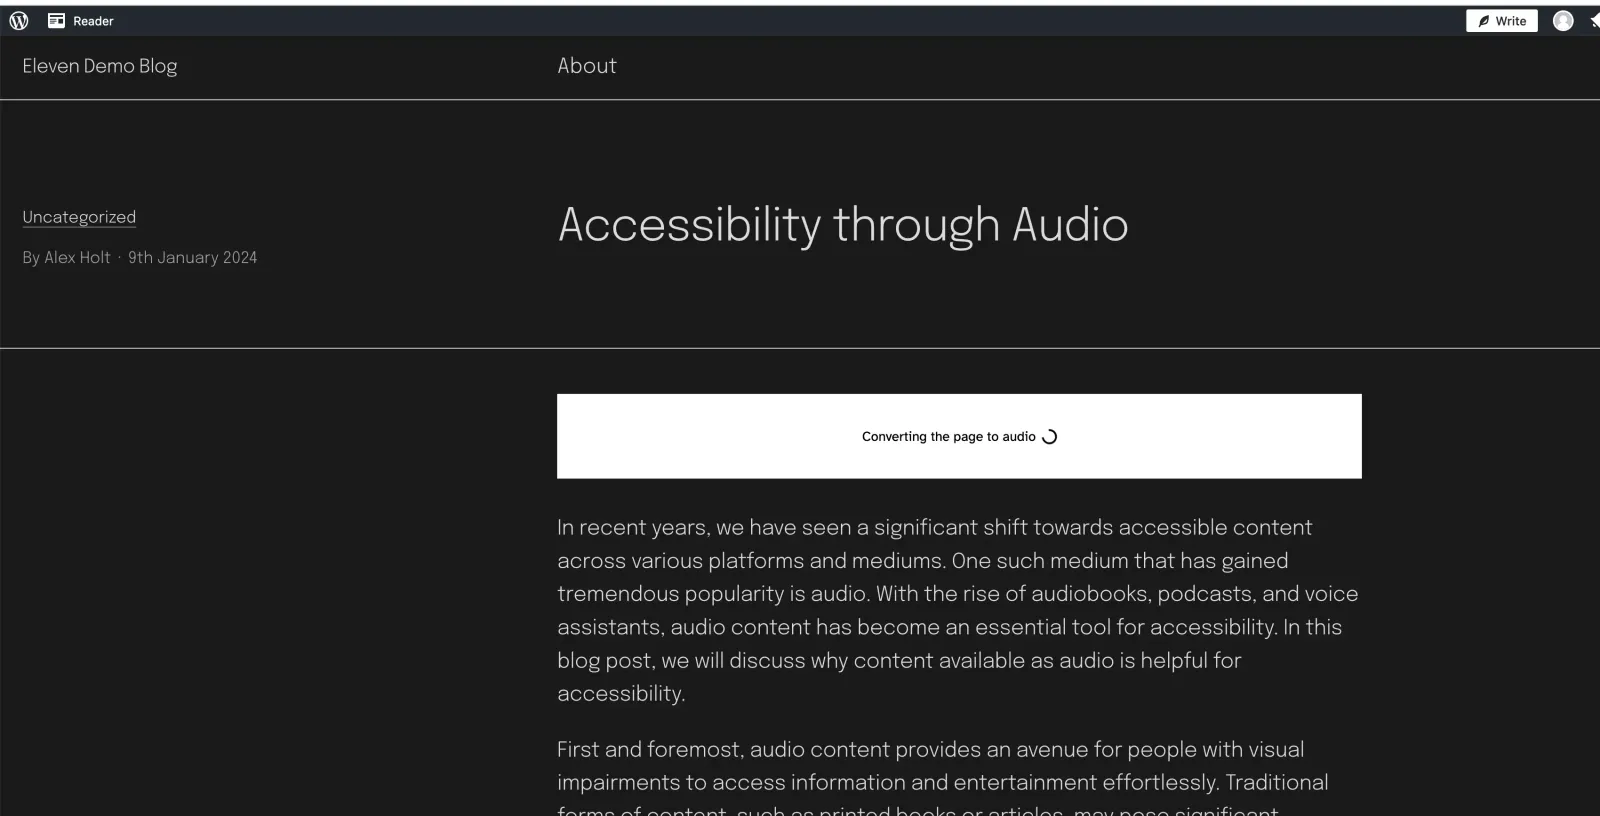
Finally, publish your changes and navigate to the live version of the blog post. You should see a message to let you know that the Audio Native project is being created. After a few minutes the text in your blog will be converted to an audio article and the embedded audio player will appear.