Learn how to create a web application that enables voice conversations with ElevenLabs AI agents

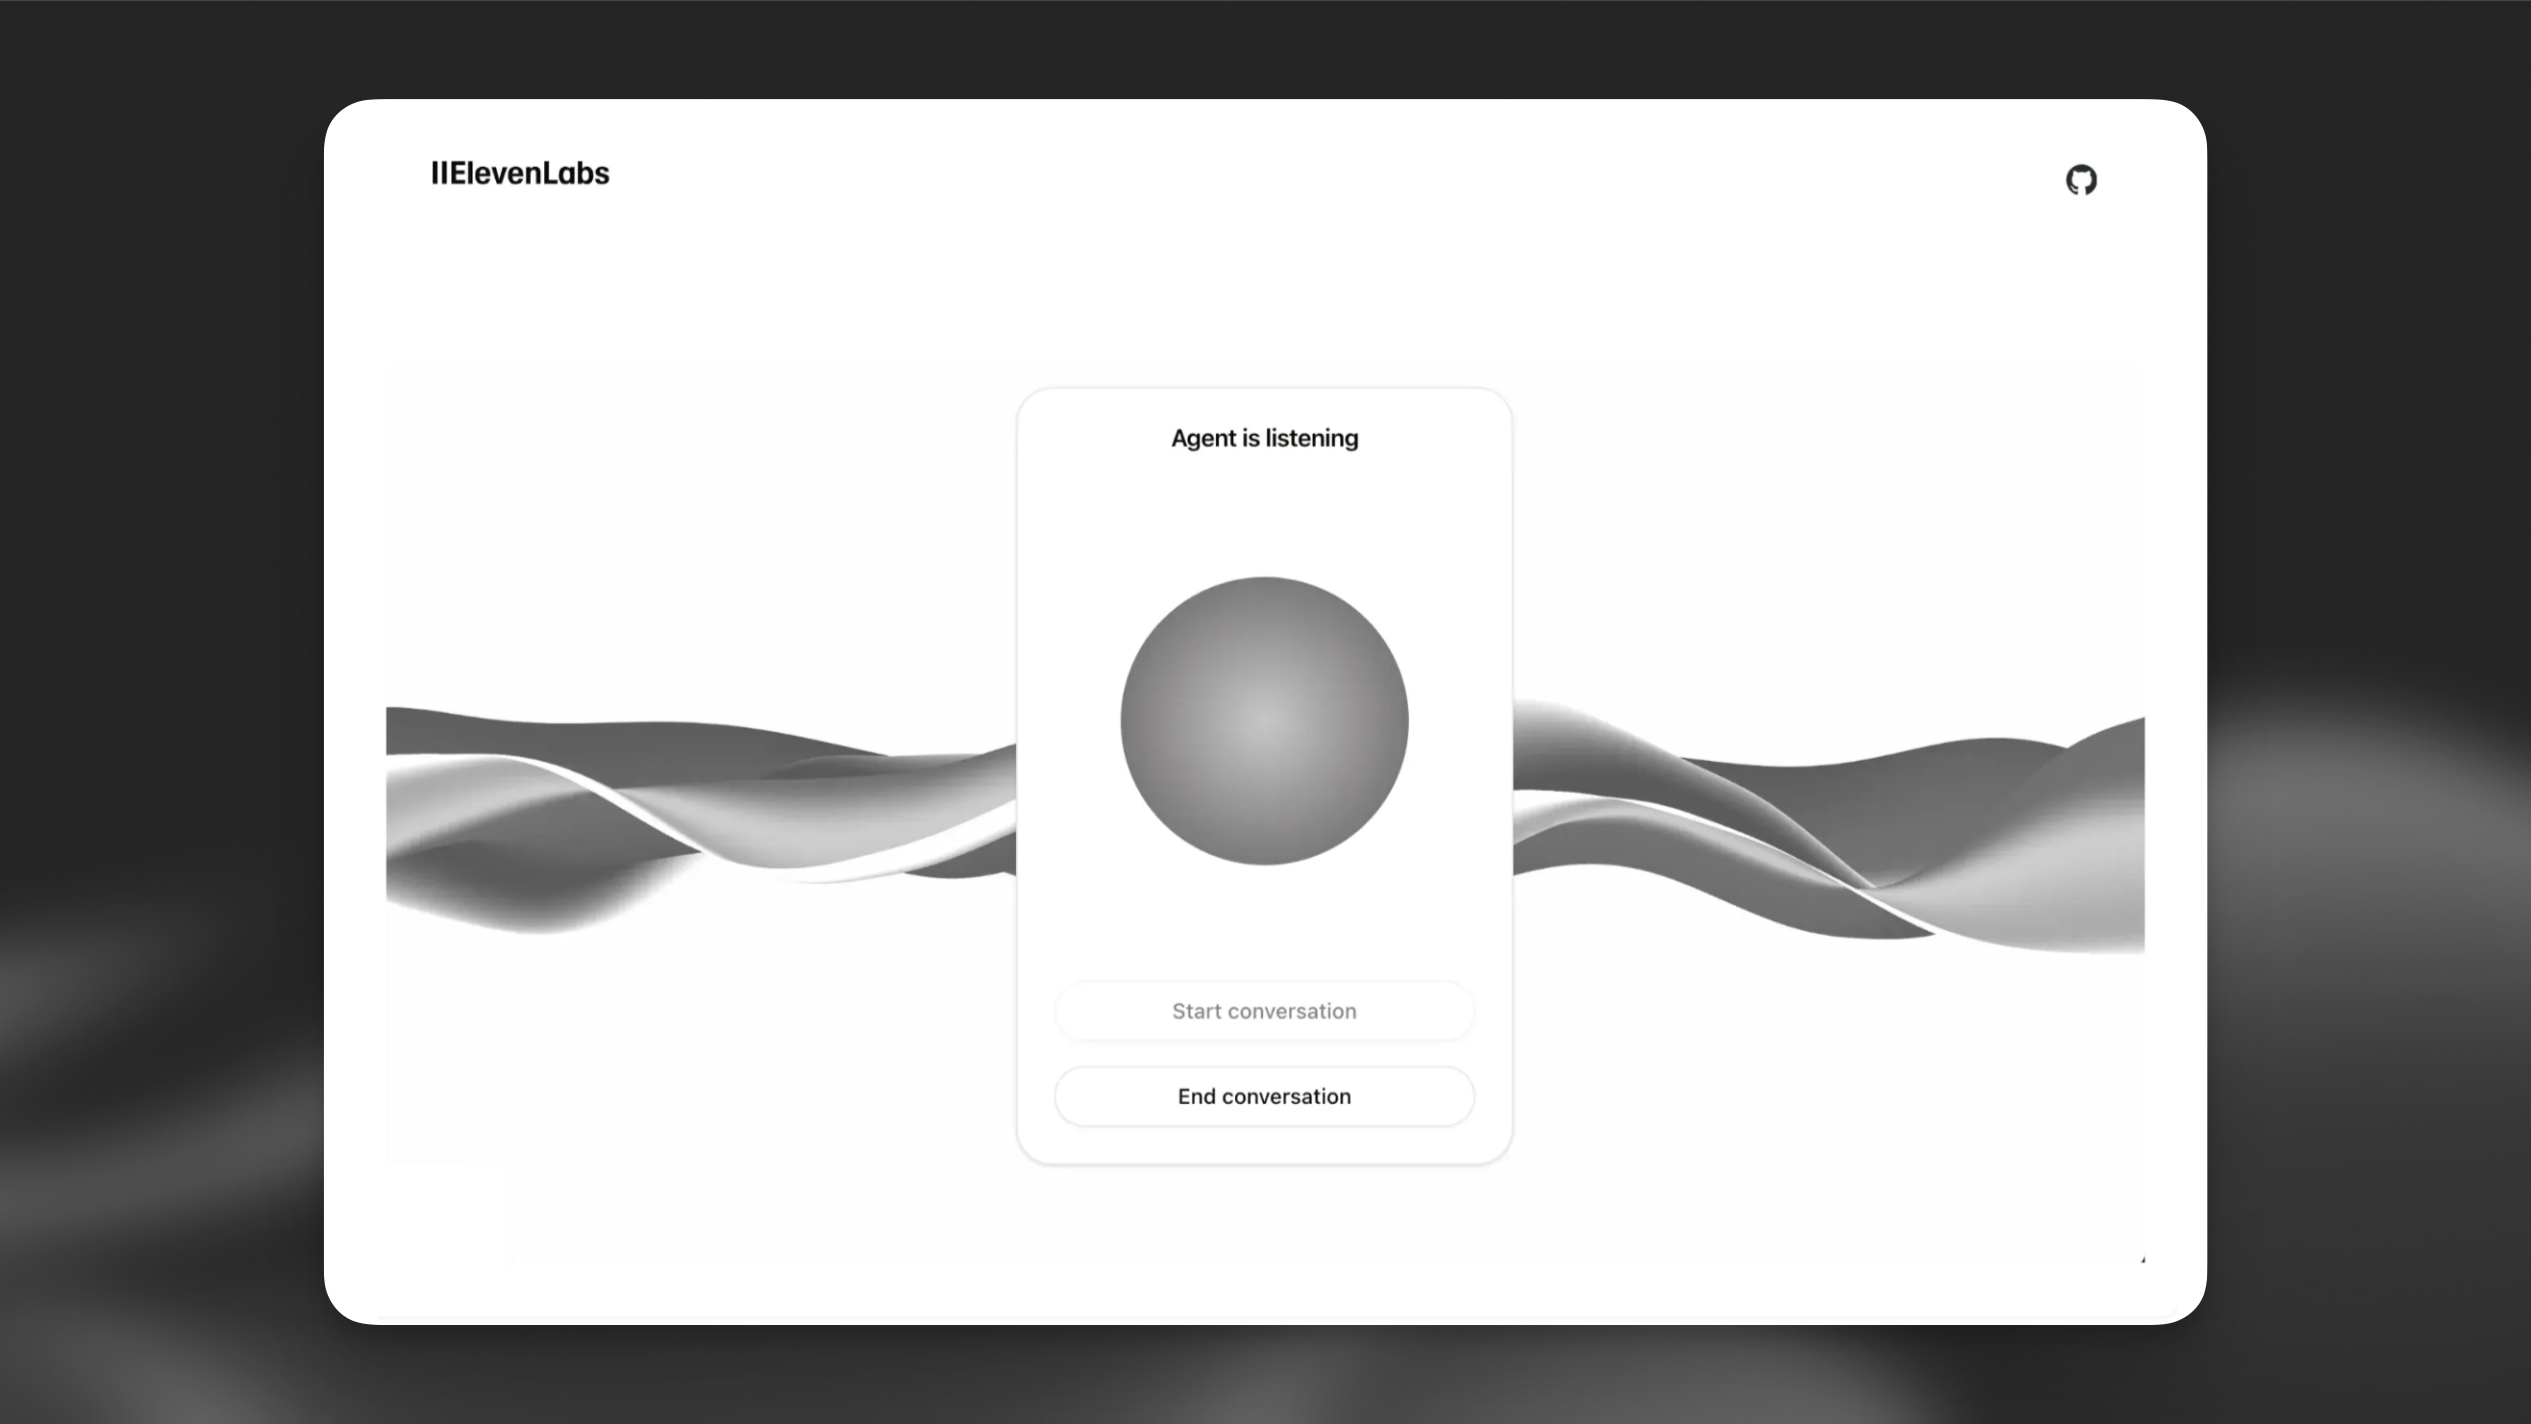
This tutorial will guide you through creating a web client that can interact with a Conversational AI agent. You’ll learn how to implement real-time voice conversations, allowing users to speak with an AI agent that can listen, understand, and respond naturally using voice synthesis.

What You’ll Need

  1. An ElevenLabs agent created following this guide
  2. npm installed on your local system.
  3. We’ll use Typescript for this tutorial, but you can use Javascript if you prefer.

Looking for a complete example? Check out our Next.js demo on GitHub.

Setup

1

Create a new Next.js project

Open a terminal window and run the following command:

$npm create next-app my-conversational-agent

It will ask you some questions about how to build your project. We’ll follow the default suggestions for this tutorial.

3

Install the ElevenLabs dependency

$npm install @11labs/react
4

Test the setup

Run the following command to start the development server and open the provided URL in your browser:

$npm run dev

Implement Conversational AI

1

Create the conversation component

Create a new file app/components/conversation.tsx:

app/components/conversation.tsx
1'use client';
2
3import { useConversation } from '@11labs/react';
4import { useCallback } from 'react';
5
6export function Conversation() {
7 const conversation = useConversation({
8 onConnect: () => console.log('Connected'),
9 onDisconnect: () => console.log('Disconnected'),
10 onMessage: (message) => console.log('Message:', message),
11 onError: (error) => console.error('Error:', error),
12 });
13
14
15 const startConversation = useCallback(async () => {
16 try {
17 // Request microphone permission
18 await navigator.mediaDevices.getUserMedia({ audio: true });
19
20 // Start the conversation with your agent
21 await conversation.startSession({
22 agentId: 'YOUR_AGENT_ID', // Replace with your agent ID
23 });
24
25 } catch (error) {
26 console.error('Failed to start conversation:', error);
27 }
28 }, [conversation]);
29
30 const stopConversation = useCallback(async () => {
31 await conversation.endSession();
32 }, [conversation]);
33
34 return (
35 <div className="flex flex-col items-center gap-4">
36 <div className="flex gap-2">
37 <button
38 onClick={startConversation}
39 disabled={conversation.status === 'connected'}
40 className="px-4 py-2 bg-blue-500 text-white rounded disabled:bg-gray-300"
41 >
42 Start Conversation
43 </button>
44 <button
45 onClick={stopConversation}
46 disabled={conversation.status !== 'connected'}
47 className="px-4 py-2 bg-red-500 text-white rounded disabled:bg-gray-300"
48 >
49 Stop Conversation
50 </button>
51 </div>
52
53 <div className="flex flex-col items-center">
54 <p>Status: {conversation.status}</p>
55 <p>Agent is {conversation.isSpeaking ? 'speaking' : 'listening'}</p>
56 </div>
57 </div>
58 );
59}
2

Update the main page

Replace the contents of app/page.tsx with:

app/page.tsx
1import { Conversation } from './components/conversation';
2
3export default function Home() {
4 return (
5 <main className="flex min-h-screen flex-col items-center justify-between p-24">
6 <div className="z-10 max-w-5xl w-full items-center justify-between font-mono text-sm">
7 <h1 className="text-4xl font-bold mb-8 text-center">
8 ElevenLabs Conversational AI
9 </h1>
10 <Conversation />
11 </div>
12 </main>
13 );
14}

This authentication step is only required for private agents. If you’re using a public agent, you can skip this section and directly use the agentId in the startSession call.

If you’re using a private agent that requires authentication, you’ll need to generate a signed URL from your server. This section explains how to set this up.

What You’ll Need

  1. An ElevenLabs account and API key. Sign up here.
1

Create environment variables

Create a .env.local file in your project root:

.env.local
1ELEVENLABS_API_KEY=your-api-key-here
2NEXT_PUBLIC_AGENT_ID=your-agent-id-here
  1. Make sure to add .env.local to your .gitignore file to prevent accidentally committing sensitive credentials to version control.
  2. Never expose your API key in the client-side code. Always keep it secure on the server.
2

Create an API route

Create a new file app/api/get-signed-url/route.ts:

app/api/get-signed-url/route.ts
1import { NextResponse } from 'next/server';
2
3export async function GET() {
4 try {
5 const response = await fetch(
6 `https://api.elevenlabs.io/v1/convai/conversation/get_signed_url?agent_id=${process.env.NEXT_PUBLIC_AGENT_ID}`,
7 {
8 headers: {
9 'xi-api-key': process.env.ELEVENLABS_API_KEY!,
10 },
11 }
12 );
13
14 if (!response.ok) {
15 throw new Error('Failed to get signed URL');
16 }
17
18 const data = await response.json();
19 return NextResponse.json({ signedUrl: data.signed_url });
20 } catch (error) {
21 return NextResponse.json(
22 { error: 'Failed to generate signed URL' },
23 { status: 500 }
24 );
25 }
26}
3

Update the Conversation component

Modify your conversation.tsx to fetch and use the signed URL:

1// ... existing imports ...
2
3export function Conversation() {
4 // ... existing conversation setup ...
5 const getSignedUrl = async (): Promise<string> => {
6 const response = await fetch("/api/get-signed-url");
7 if (!response.ok) {
8 throw new Error(`Failed to get signed url: ${response.statusText}`);
9 }
10 const { signedUrl } = await response.json();
11 return signedUrl;
12 };
13
14 const startConversation = useCallback(async () => {
15 try {
16 // Request microphone permission
17 await navigator.mediaDevices.getUserMedia({ audio: true });
18
19 const signedUrl = await getSignedUrl();
20
21 // Start the conversation with your signed url
22 await conversation.startSession({
23 signedUrl,
24 });
25
26 } catch (error) {
27 console.error('Failed to start conversation:', error);
28 }
29 }, [conversation]);
30
31 // ... rest of the component ...
32}

Signed URLs expire after a short period. However, any conversations initiated before expiration will continue uninterrupted. In a production environment, implement proper error handling and URL refresh logic for starting new conversations.

Next Steps

Now that you have a basic implementation, you can:

  1. Add visual feedback for voice activity
  2. Implement error handling and retry logic
  3. Add a chat history display
  4. Customize the UI to match your brand

For more advanced features and customization options, check out the @11labs/react package.

Built with