> This is a page from the ElevenLabs documentation. For a complete page index, fetch https://elevenlabs.io/docs/llms.txt. For the full documentation in a single file, fetch https://elevenlabs.io/docs/llms-full.txt.
# Vite (JavaScript)
यह ट्यूटोरियल आपको ऐसा वेब क्लाइंट बनाने में मार्गदर्शन देगा जो ElevenLabs एजेंट के साथ इंटरैक्ट कर सके। आप रियल-टाइम वॉइस बातचीत लागू करना सीखेंगे, जिससे यूज़र AI एजेंट से बात कर सकेंगे। एजेंट सुन सकता है, समझ सकता है और वॉइस सिंथेसिस के ज़रिए स्वाभाविक रूप से जवाब दे सकता है।
> **Note**
>
> React/Next.js के साथ बनाना चाहते हैं? हमारी [Next.js गाइड](/docs/hi/eleven-agents/guides/quickstarts/next-js) देखें
## आपको क्या चाहिए
1. [इस गाइड](/docs/hi/eleven-agents/quickstart) के अनुसार बनाया गया ElevenLabs एजेंट
2. आपके लोकल सिस्टम पर `npm` इंस्टॉल होना चाहिए
3. JavaScript का बुनियादी ज्ञान
## प्रोजेक्ट सेटअप
#### प्रोजेक्ट डायरेक्टरी बनाएं
टर्मिनल खोलें और अपने प्रोजेक्ट के लिए नई डायरेक्टरी बनाएं:
```bash
mkdir elevenlabs-conversational-ai
cd elevenlabs-conversational-ai
```
#### npm इनिशियलाइज़ करें और डिपेंडेंसी इंस्टॉल करें
नया npm प्रोजेक्ट इनिशियलाइज़ करें और ज़रूरी पैकेज इंस्टॉल करें:
```bash
npm init -y
npm install vite @elevenlabs/client
```
#### बुनियादी प्रोजेक्ट स्ट्रक्चर सेट अप करें
इसे अपने `package.json` में जोड़ें:
**`package.json`**
```json package.json {4}
{
"scripts": {
...
"dev:frontend": "vite"
}
}
```
निम्न फ़ाइल स्ट्रक्चर बनाएं:
```shell {2,3}
elevenlabs-conversational-ai/
├── index.html
├── script.js
├── package-lock.json
├── package.json
└── node_modules
```
## वॉइस चैट इंटरफ़ेस लागू करना
#### HTML इंटरफ़ेस बनाएं
`index.html` में एक सरल यूज़र इंटरफ़ेस सेट अप करें:
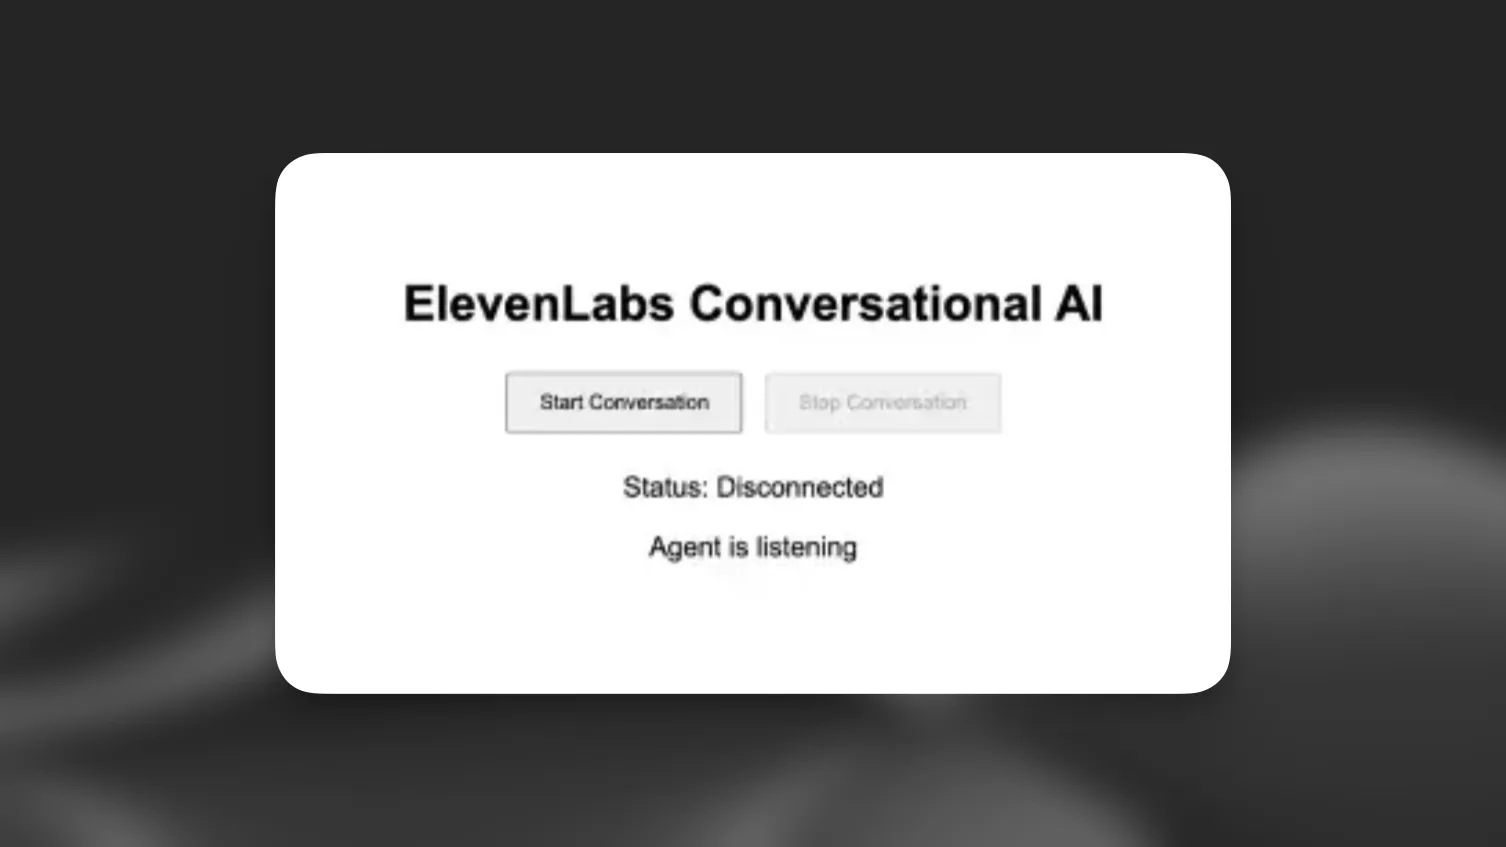
**`index.html`**
```html index.html
ElevenLabs Agents
ElevenLabs Agents
Status: Disconnected
Agent is listening
```
#### बातचीत की लॉजिक लागू करें
`script.js` में फ़ंक्शनैलिटी लागू करें:
**`script.js`**
```javascript script.js
import { Conversation } from '@elevenlabs/client';
const startButton = document.getElementById('startButton');
const stopButton = document.getElementById('stopButton');
const connectionStatus = document.getElementById('connectionStatus');
const agentStatus = document.getElementById('agentStatus');
let conversation;
async function startConversation() {
try {
// Request microphone permission
await navigator.mediaDevices.getUserMedia({ audio: true });
// Start the conversation
conversation = await Conversation.startSession({
agentId: 'YOUR_AGENT_ID', // Replace with your agent ID
onConnect: () => {
connectionStatus.textContent = 'Connected';
startButton.disabled = true;
stopButton.disabled = false;
},
onDisconnect: () => {
connectionStatus.textContent = 'Disconnected';
startButton.disabled = false;
stopButton.disabled = true;
},
onError: (error) => {
console.error('Error:', error);
},
onModeChange: (mode) => {
agentStatus.textContent = mode.mode === 'speaking' ? 'speaking' : 'listening';
},
});
} catch (error) {
console.error('Failed to start conversation:', error);
}
}
async function stopConversation() {
if (conversation) {
await conversation.endSession();
conversation = null;
}
}
startButton.addEventListener('click', startConversation);
stopButton.addEventListener('click', stopConversation);
```
#### फ़्रंटएंड सर्वर शुरू करें
```shell
npm run dev:frontend
```
> **Note**
>
> अपना वास्तविक एजेंट ID पाने के लिए `'YOUR_AGENT_ID'` को ElevenLabs के अपने एजेंट ID से बदलना न भूलें।
#### (वैकल्पिक) Signed URL से प्रमाणित करें
> **Note**
>
> यह प्रमाणीकरण चरण सिर्फ़ प्राइवेट एजेंट्स के लिए ज़रूरी है। अगर आप पब्लिक एजेंट इस्तेमाल कर रहे हैं, तो इस सेक्शन को छोड़कर सीधे `startSession` कॉल में `agentId` इस्तेमाल कर सकते हैं।
#### एनवायरनमेंट वेरिएबल्स बनाएं
अपने प्रोजेक्ट रूट में `.env` फ़ाइल बनाएं:
**`.env`**
```env .env
ELEVENLABS_API_KEY=your-api-key-here
AGENT_ID=your-agent-id-here
```
> **Warning**
>
> संवेदनशील क्रेडेंशियल्स को गलती से कमिट होने से बचाने के लिए `.env` को अपनी `.gitignore` फ़ाइल में ज़रूर जोड़ें।
#### बैकएंड सेट अप करें
1. अतिरिक्त डिपेंडेंसी इंस्टॉल करें:
```bash
npm install express cors dotenv
```
2. `backend` नाम का नया फ़ोल्डर बनाएं:
```shell {2}
elevenlabs-conversational-ai/
├── backend
...
```
#### सर्वर बनाएं
**`backend/server.js`**
```javascript backend/server.js
require("dotenv").config();
const express = require("express");
const cors = require("cors");
const app = express();
app.use(cors());
app.use(express.json());
const PORT = process.env.PORT || 3001;
app.get("/api/get-signed-url", async (req, res) => {
try {
const response = await fetch(
`https://api.elevenlabs.io/v1/convai/conversation/get-signed-url?agent_id=${process.env.AGENT_ID}`,
{
headers: {
"xi-api-key": process.env.ELEVENLABS_API_KEY,
},
}
);
if (!response.ok) {
throw new Error("Failed to get signed URL");
}
const data = await response.json();
res.json({ signedUrl: data.signed_url });
} catch (error) {
console.error("Error:", error);
res.status(500).json({ error: "Failed to generate signed URL" });
}
});
app.listen(PORT, () => {
console.log(`Server running on http://localhost:${PORT}`);
});
```
#### क्लाइंट कोड अपडेट करें
Signed URL फ़ेच करने और इस्तेमाल करने के लिए अपना `script.js` बदलें:
**`script.js`**
```javascript script.js {2-10,16,19,20}
// ... existing imports and variables ...
async function getSignedUrl() {
const response = await fetch('http://localhost:3001/api/get-signed-url');
if (!response.ok) {
throw new Error(`Failed to get signed url: ${response.statusText}`);
}
const { signedUrl } = await response.json();
return signedUrl;
}
async function startConversation() {
try {
await navigator.mediaDevices.getUserMedia({ audio: true });
const signedUrl = await getSignedUrl();
conversation = await Conversation.startSession({
signedUrl,
// agentId has been removed...
onConnect: () => {
connectionStatus.textContent = 'Connected';
startButton.disabled = true;
stopButton.disabled = false;
},
onDisconnect: () => {
connectionStatus.textContent = 'Disconnected';
startButton.disabled = false;
stopButton.disabled = true;
},
onError: (error) => {
console.error('Error:', error);
},
onModeChange: (mode) => {
agentStatus.textContent = mode.mode === 'speaking' ? 'speaking' : 'listening';
},
});
} catch (error) {
console.error('Failed to start conversation:', error);
}
}
// ... rest of the code ...
```
> **Warning**
>
> Signed URL कुछ समय बाद एक्सपायर हो जाते हैं। हालांकि, एक्सपायर होने से पहले शुरू की गई बातचीत बिना रुकावट जारी रहेगी। प्रोडक्शन एनवायरनमेंट में, नई बातचीत शुरू करने के लिए सही एरर हैंडलिंग और URL रीफ़्रेश लॉजिक लागू करें।
#### package.json अपडेट करें
**`package.json`**
```json package.json {4,5}
{
"scripts": {
...
"dev:backend": "node backend/server.js",
"dev": "npm run dev:frontend & npm run dev:backend"
}
}
```
#### ऐप्लिकेशन चलाएं
ऐप्लिकेशन शुरू करें:
```bash
npm run dev
```
## अगले चरण
अब आपके पास एक बुनियादी इम्प्लीमेंटेशन है, आप ये कर सकते हैं:
1. वॉइस गतिविधि के लिए विज़ुअल फ़ीडबैक जोड़ें
2. एरर हैंडलिंग और रीट्राई लॉजिक लागू करें
3. चैट हिस्ट्री डिस्प्ले जोड़ें
4. अपने ब्रांड के अनुसार UI कस्टमाइज़ करें
> **Info**
>
> ज़्यादा उन्नत सुविधाओं और कस्टमाइज़ेशन विकल्पों के लिए
> [@elevenlabs/client](https://www.npmjs.com/package/@elevenlabs/client) पैकेज देखें।